With Anaconda Desktop, you can create and manage conda environments to isolate your projects and dependencies using a graphical interface. Anaconda Desktop also includes several pre-configured quick start environments that come with curated packages for fields that rely on data analytics.Documentation Index
Fetch the complete documentation index at: https://anaconda.com/docs/llms.txt
Use this file to discover all available pages before exploring further.
Viewing environments
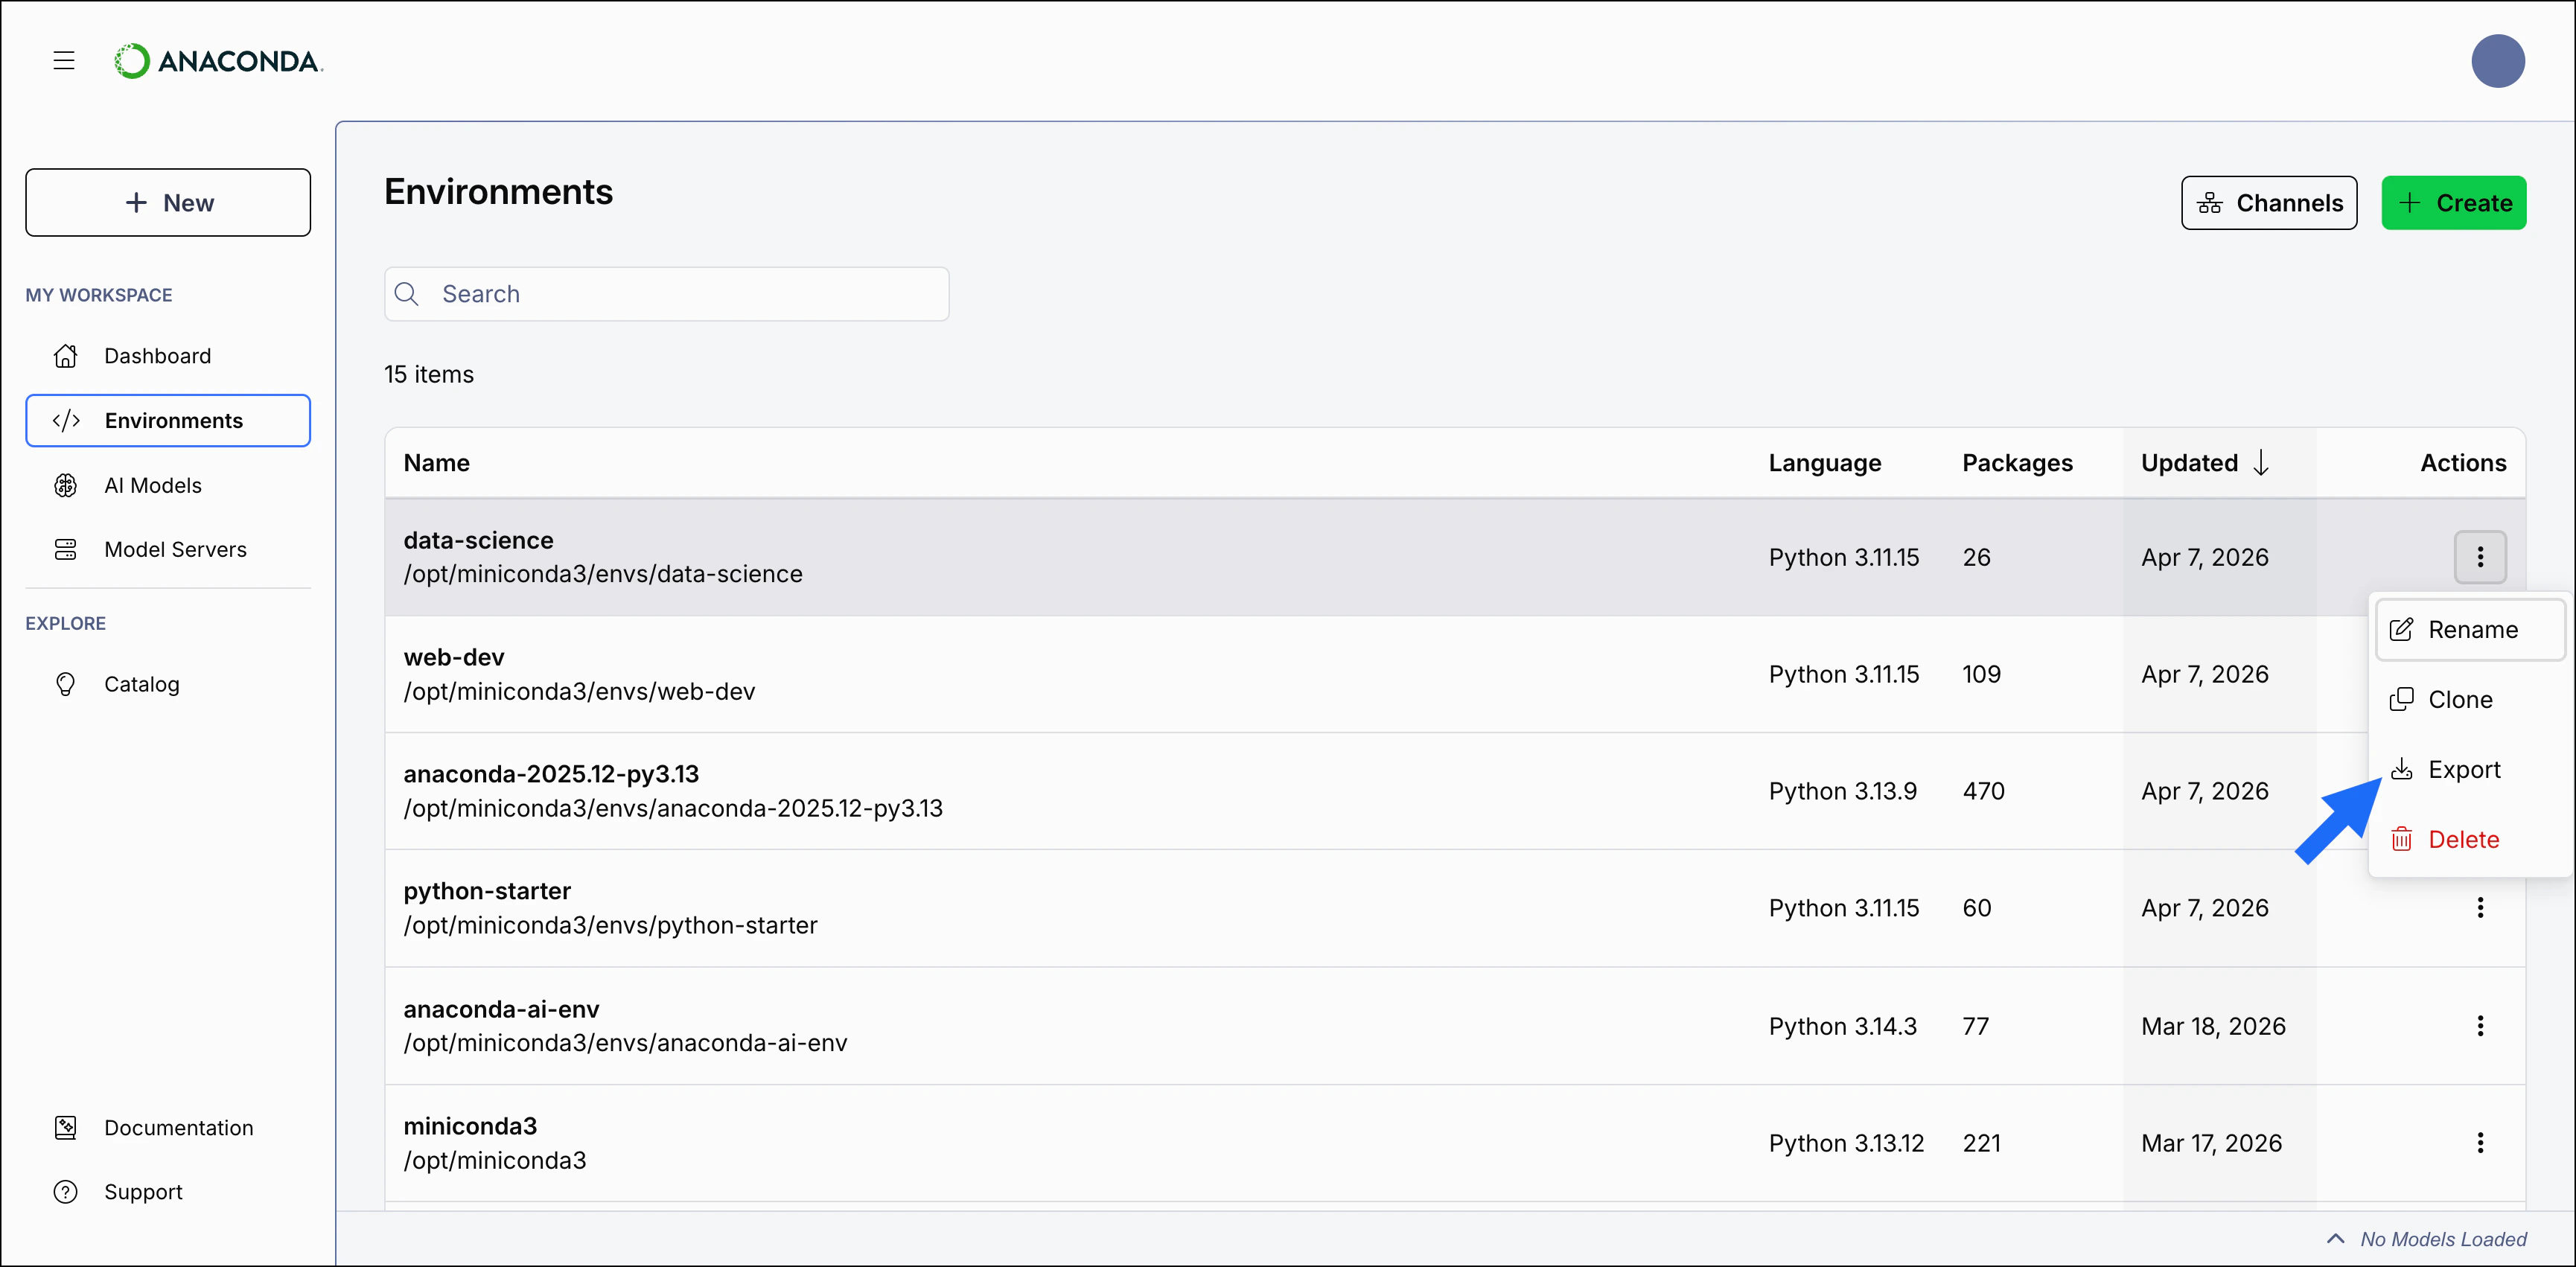
To view your environments, select Environments from the left navigation. The Environments page displays your environments in a table. Select a column header to sort environments by name, number of packages, or when it was last updated. Select an environment’s name to open the environment’s details page. From the details page, you can view the environment’s packages, dependencies, and channels. For more information on managing packages, see Packages, and for more information on managing channels, see Channels.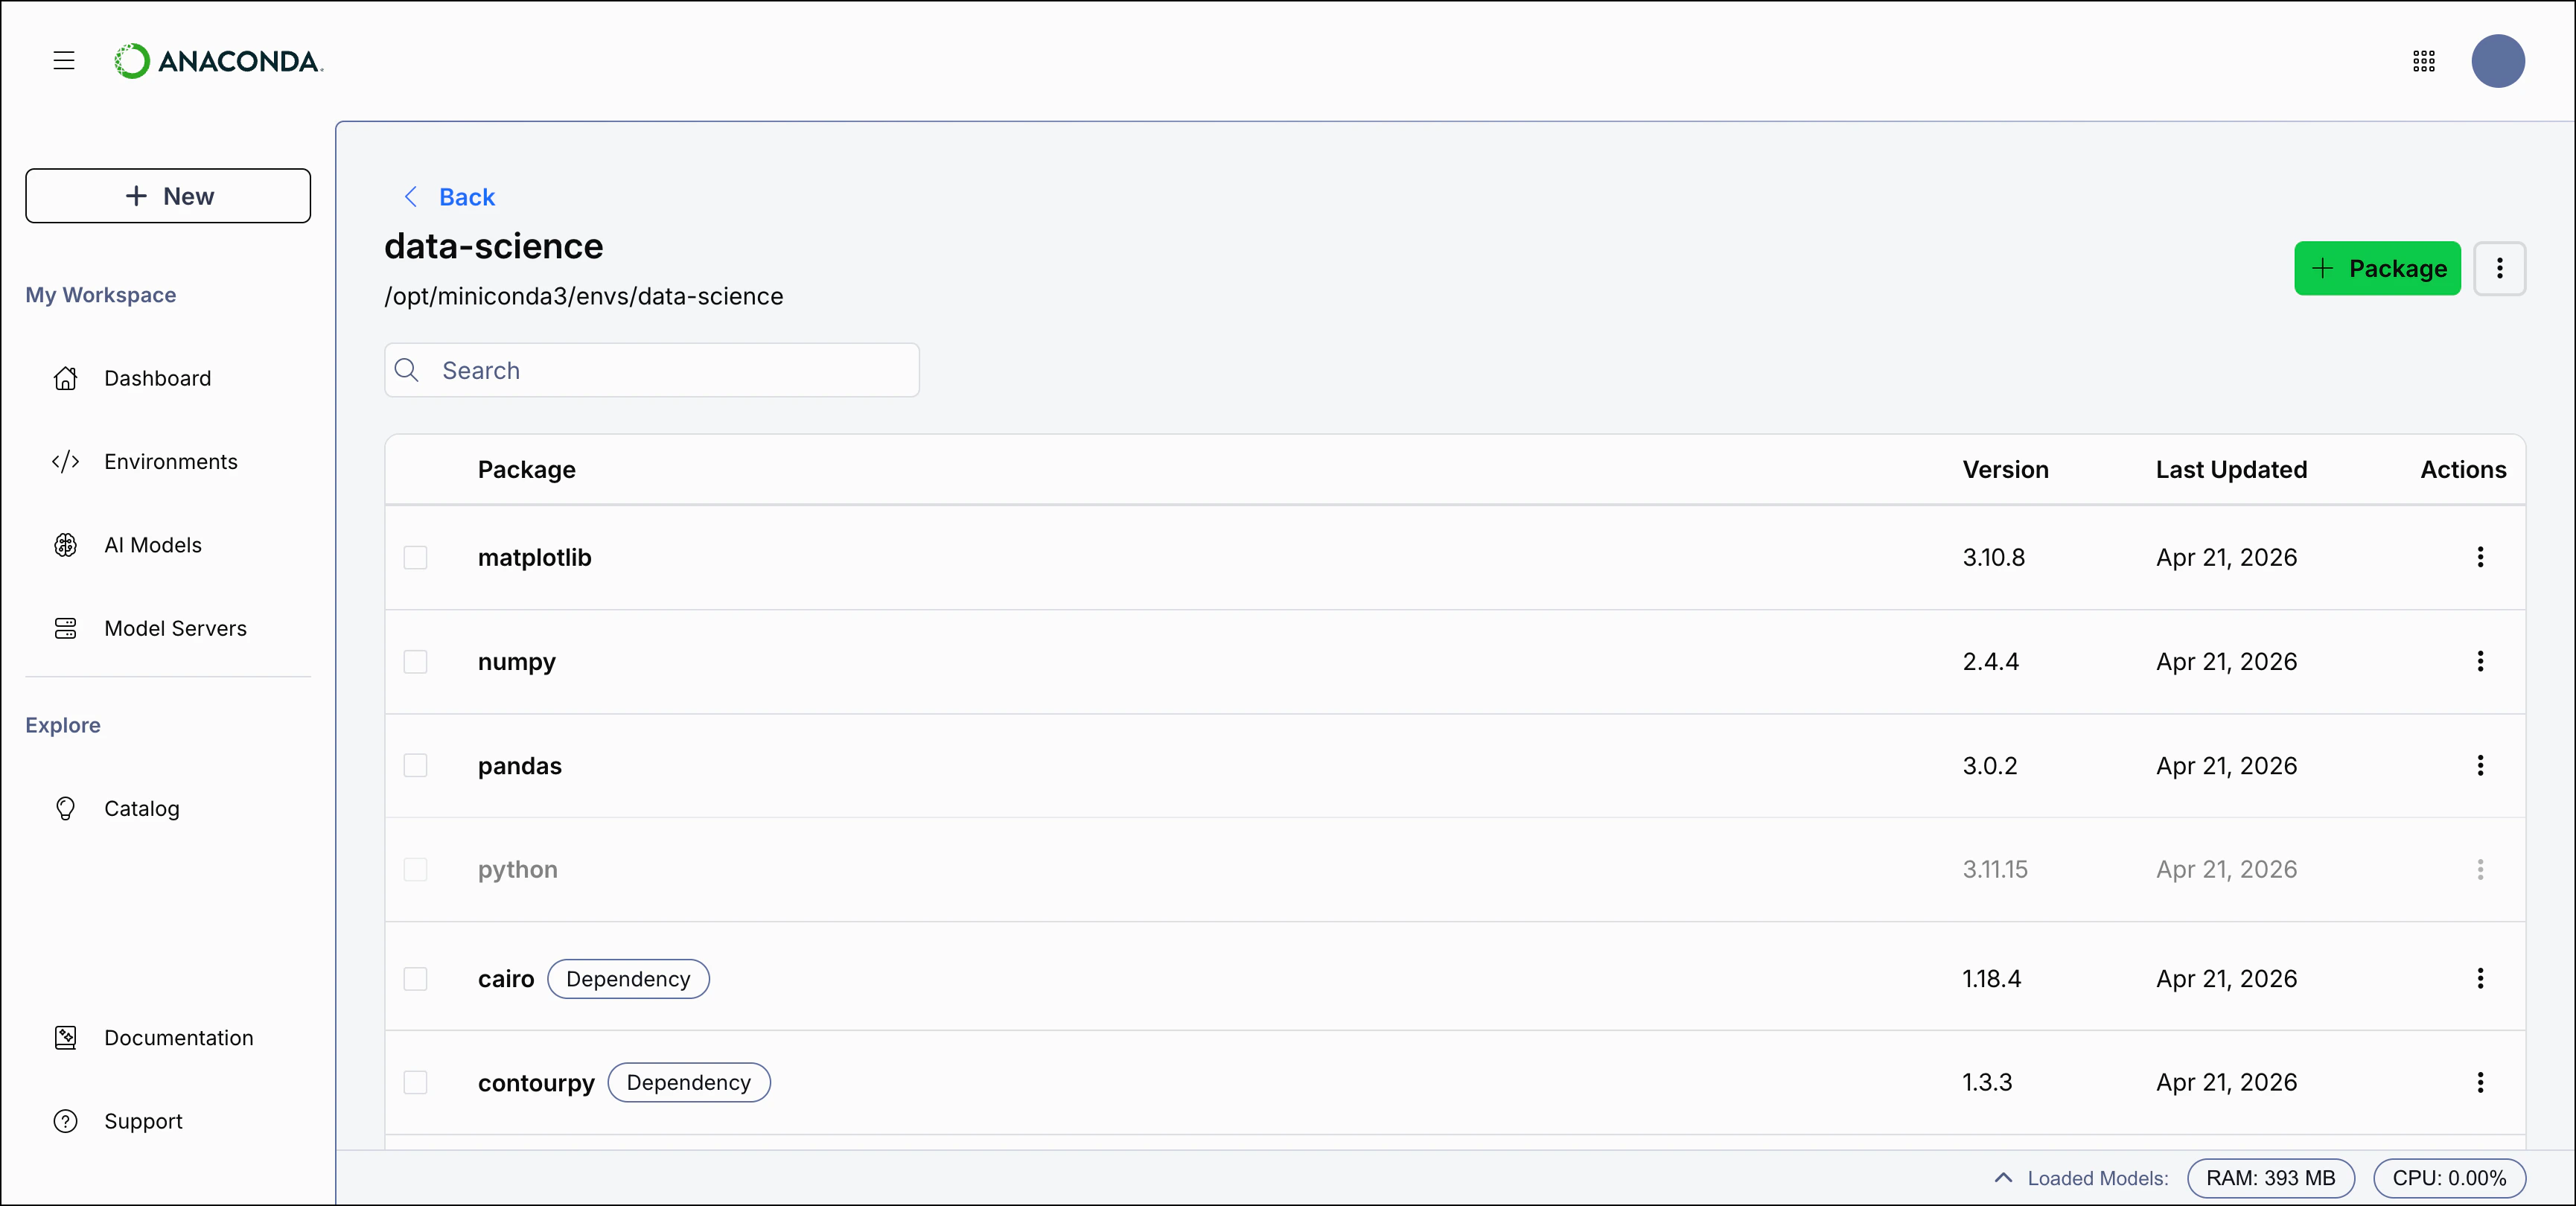
Searching for an environment
Use the Search box to locate an environment by name. Enter all (or part of) an environment’s name to filter the list to display only environments that contain the .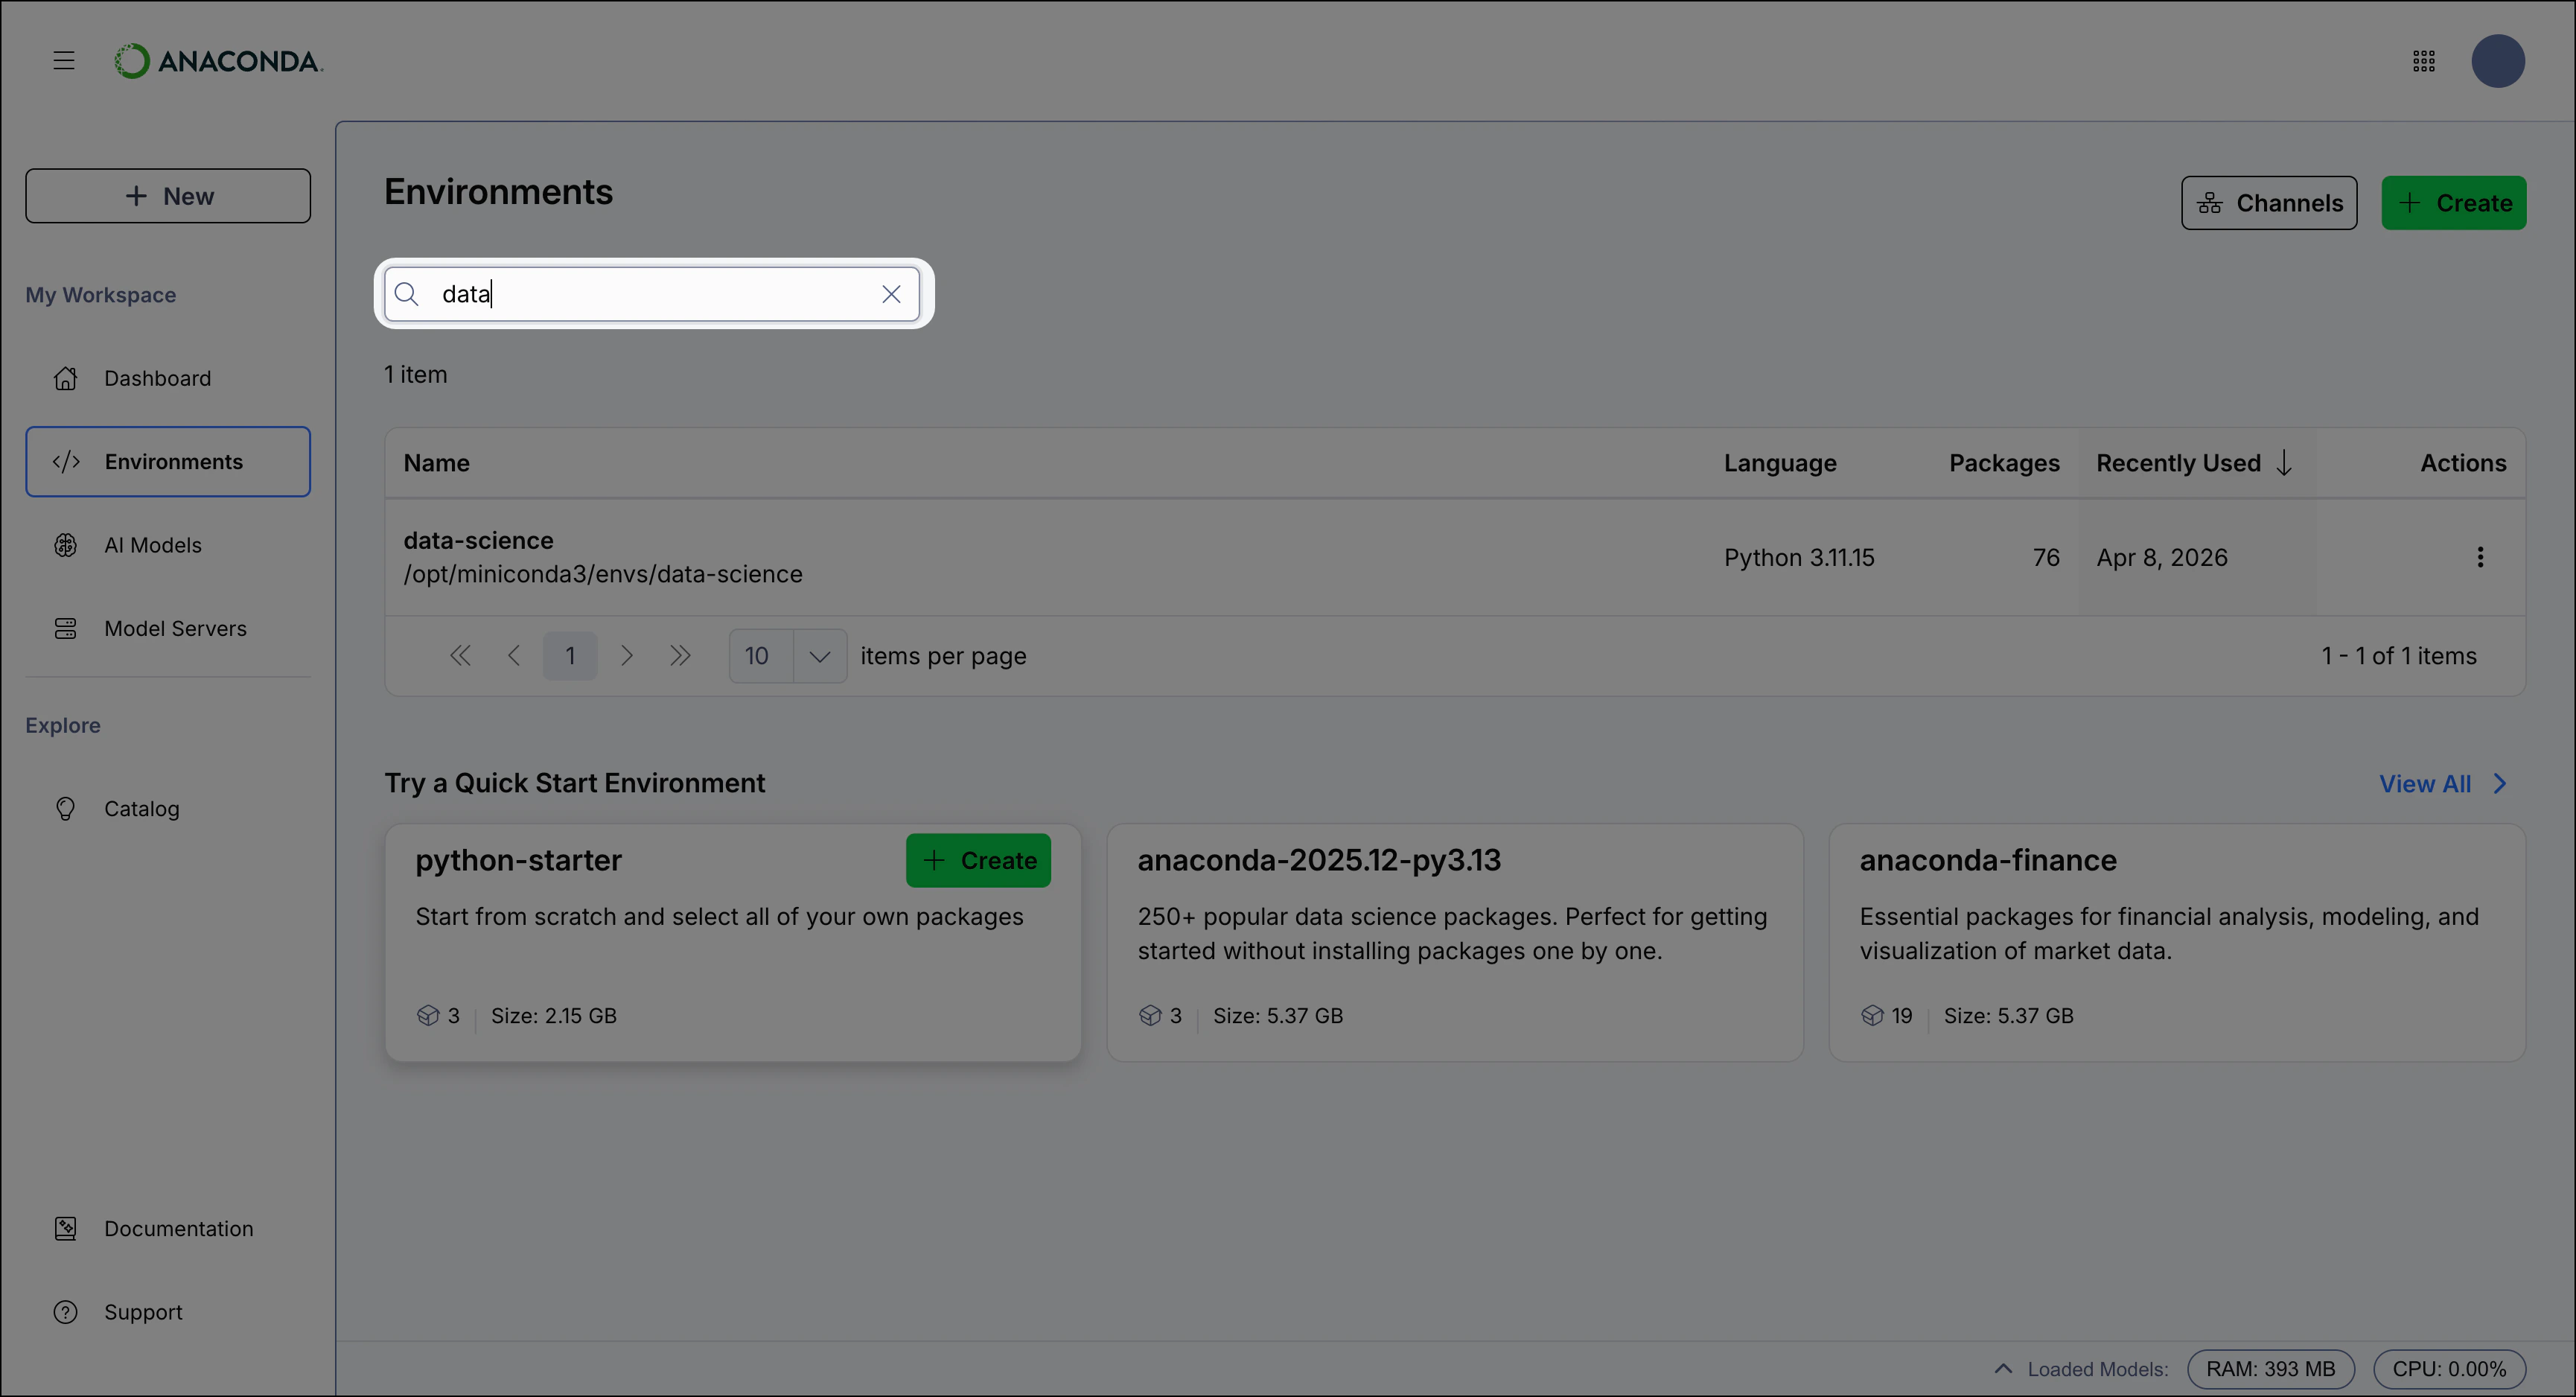
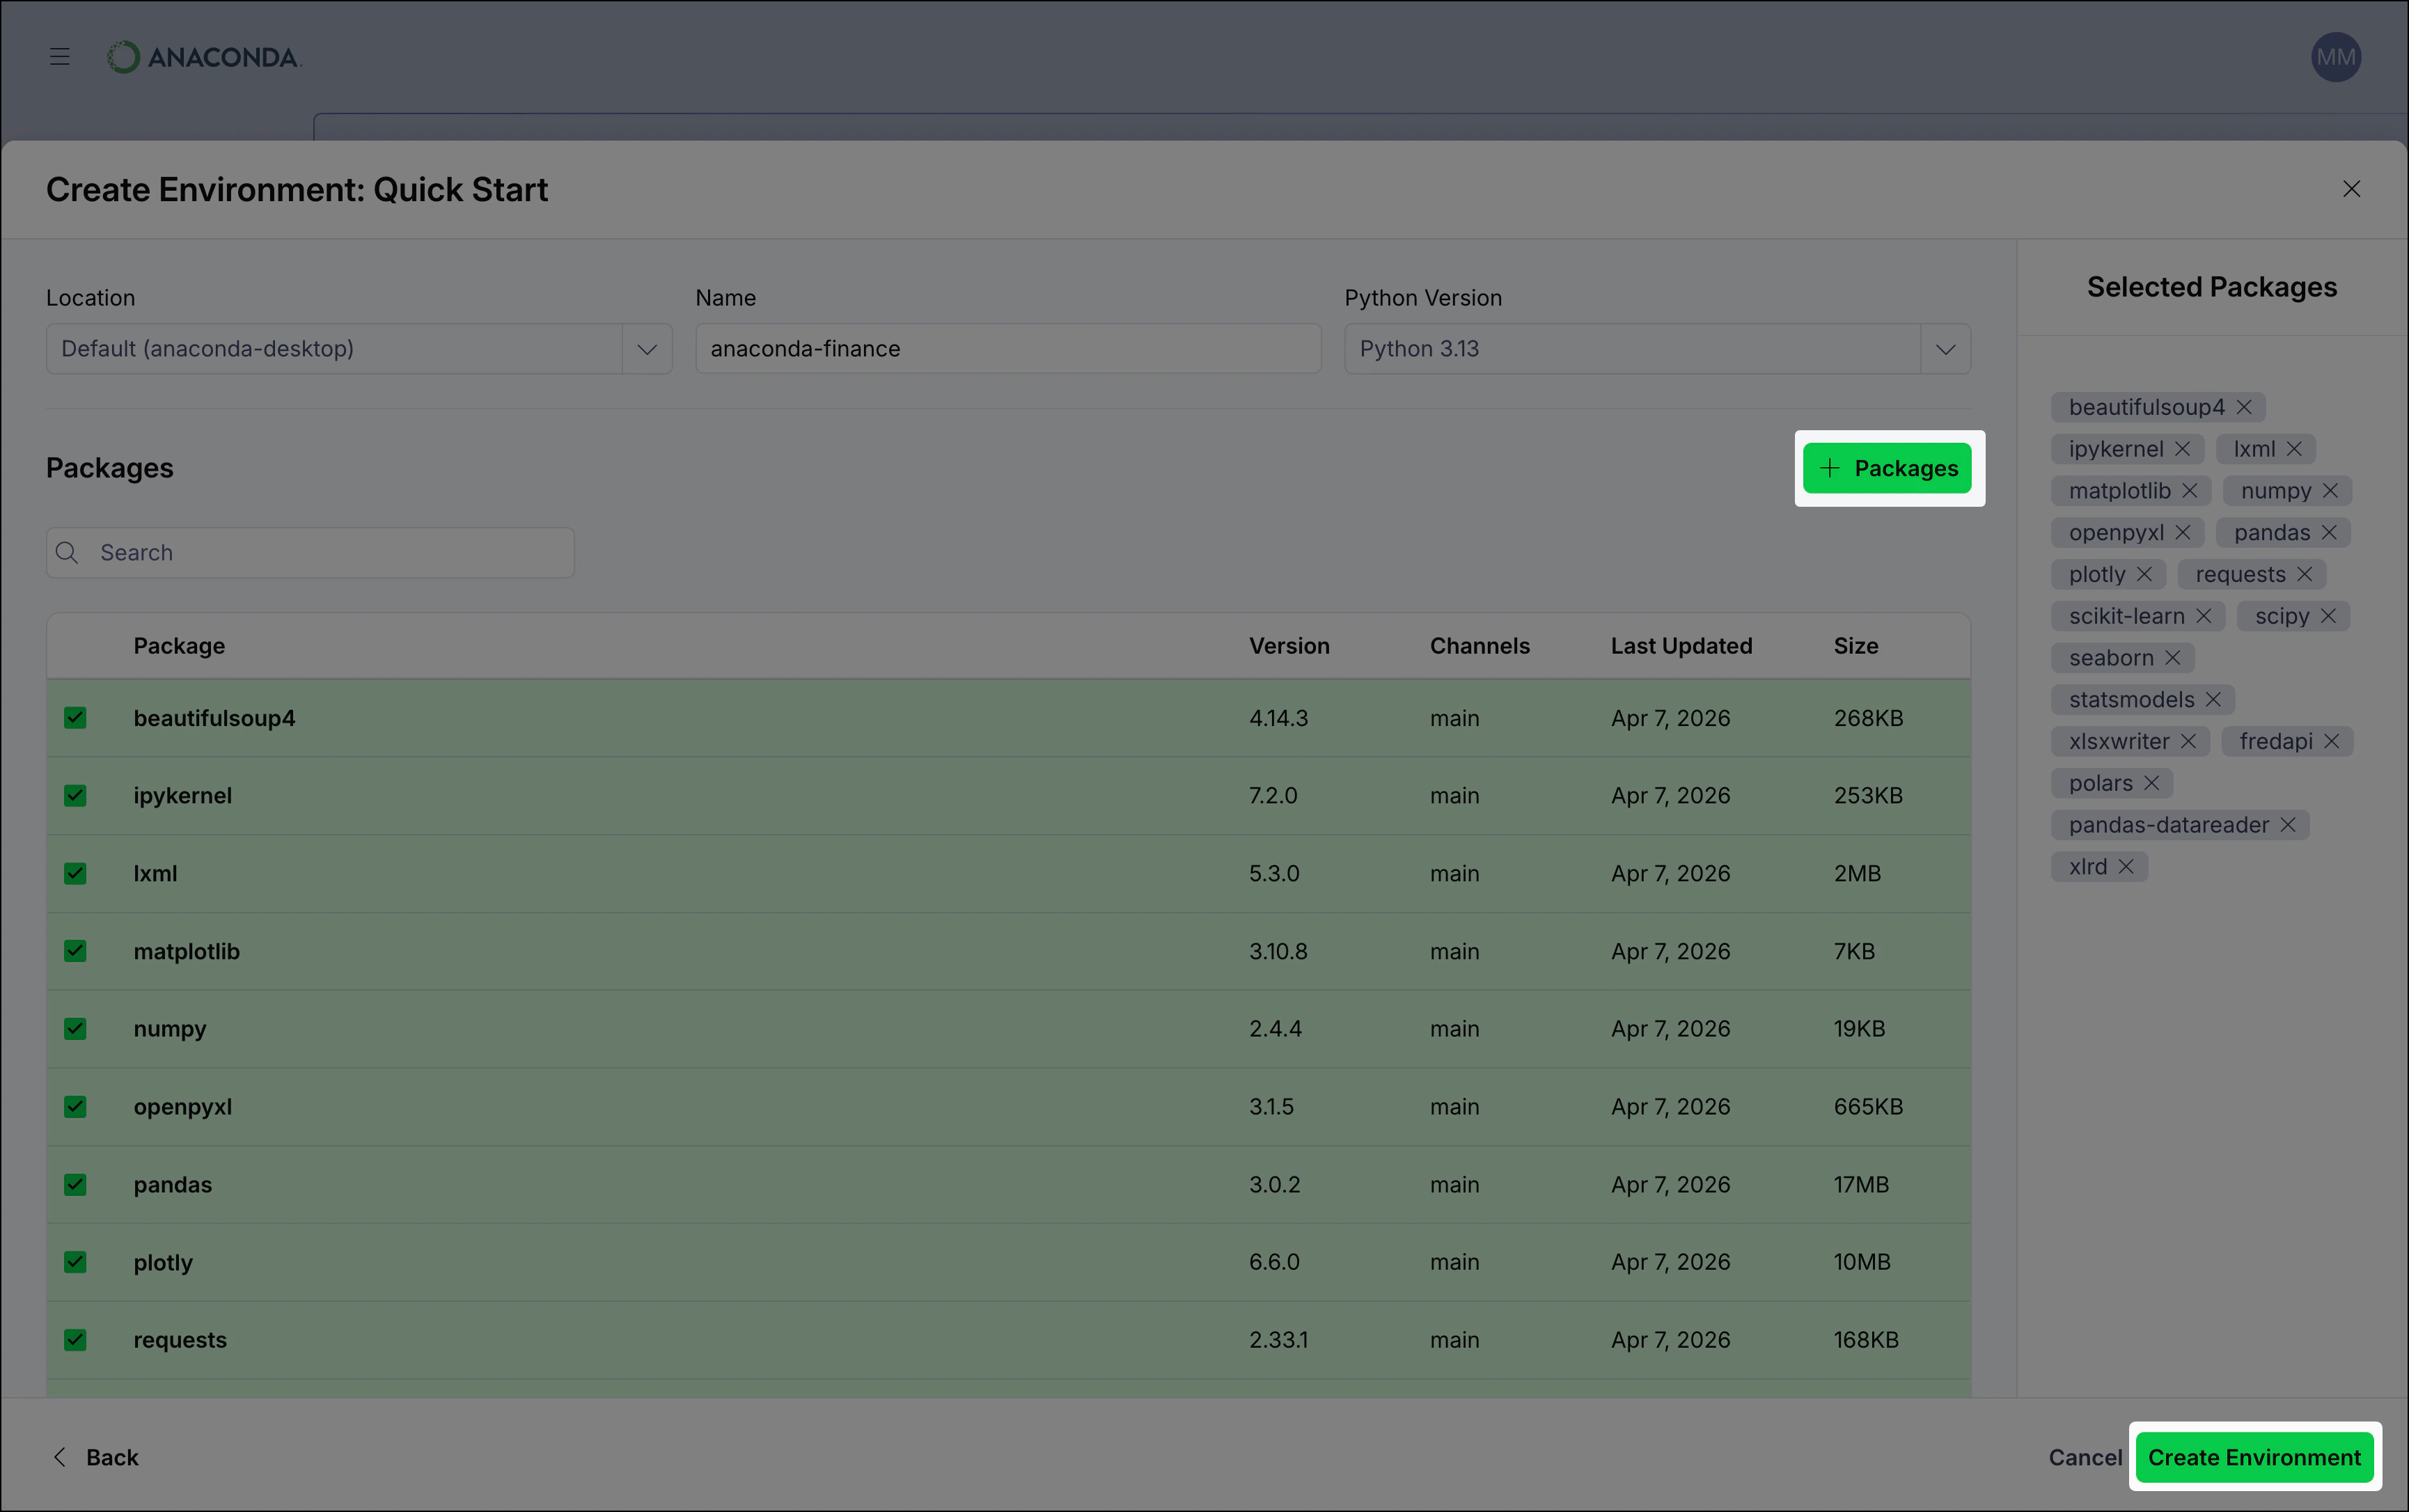
Using a quick start environment
Anaconda Desktop provides a set of quick start environments that come pre-configured with curated packages for a variety of use cases. To install a quick start environment using its default configuration, select the Create button on the environment’s card:
Creating an environment
To create a new environment, select the Create button in the upper-right corner: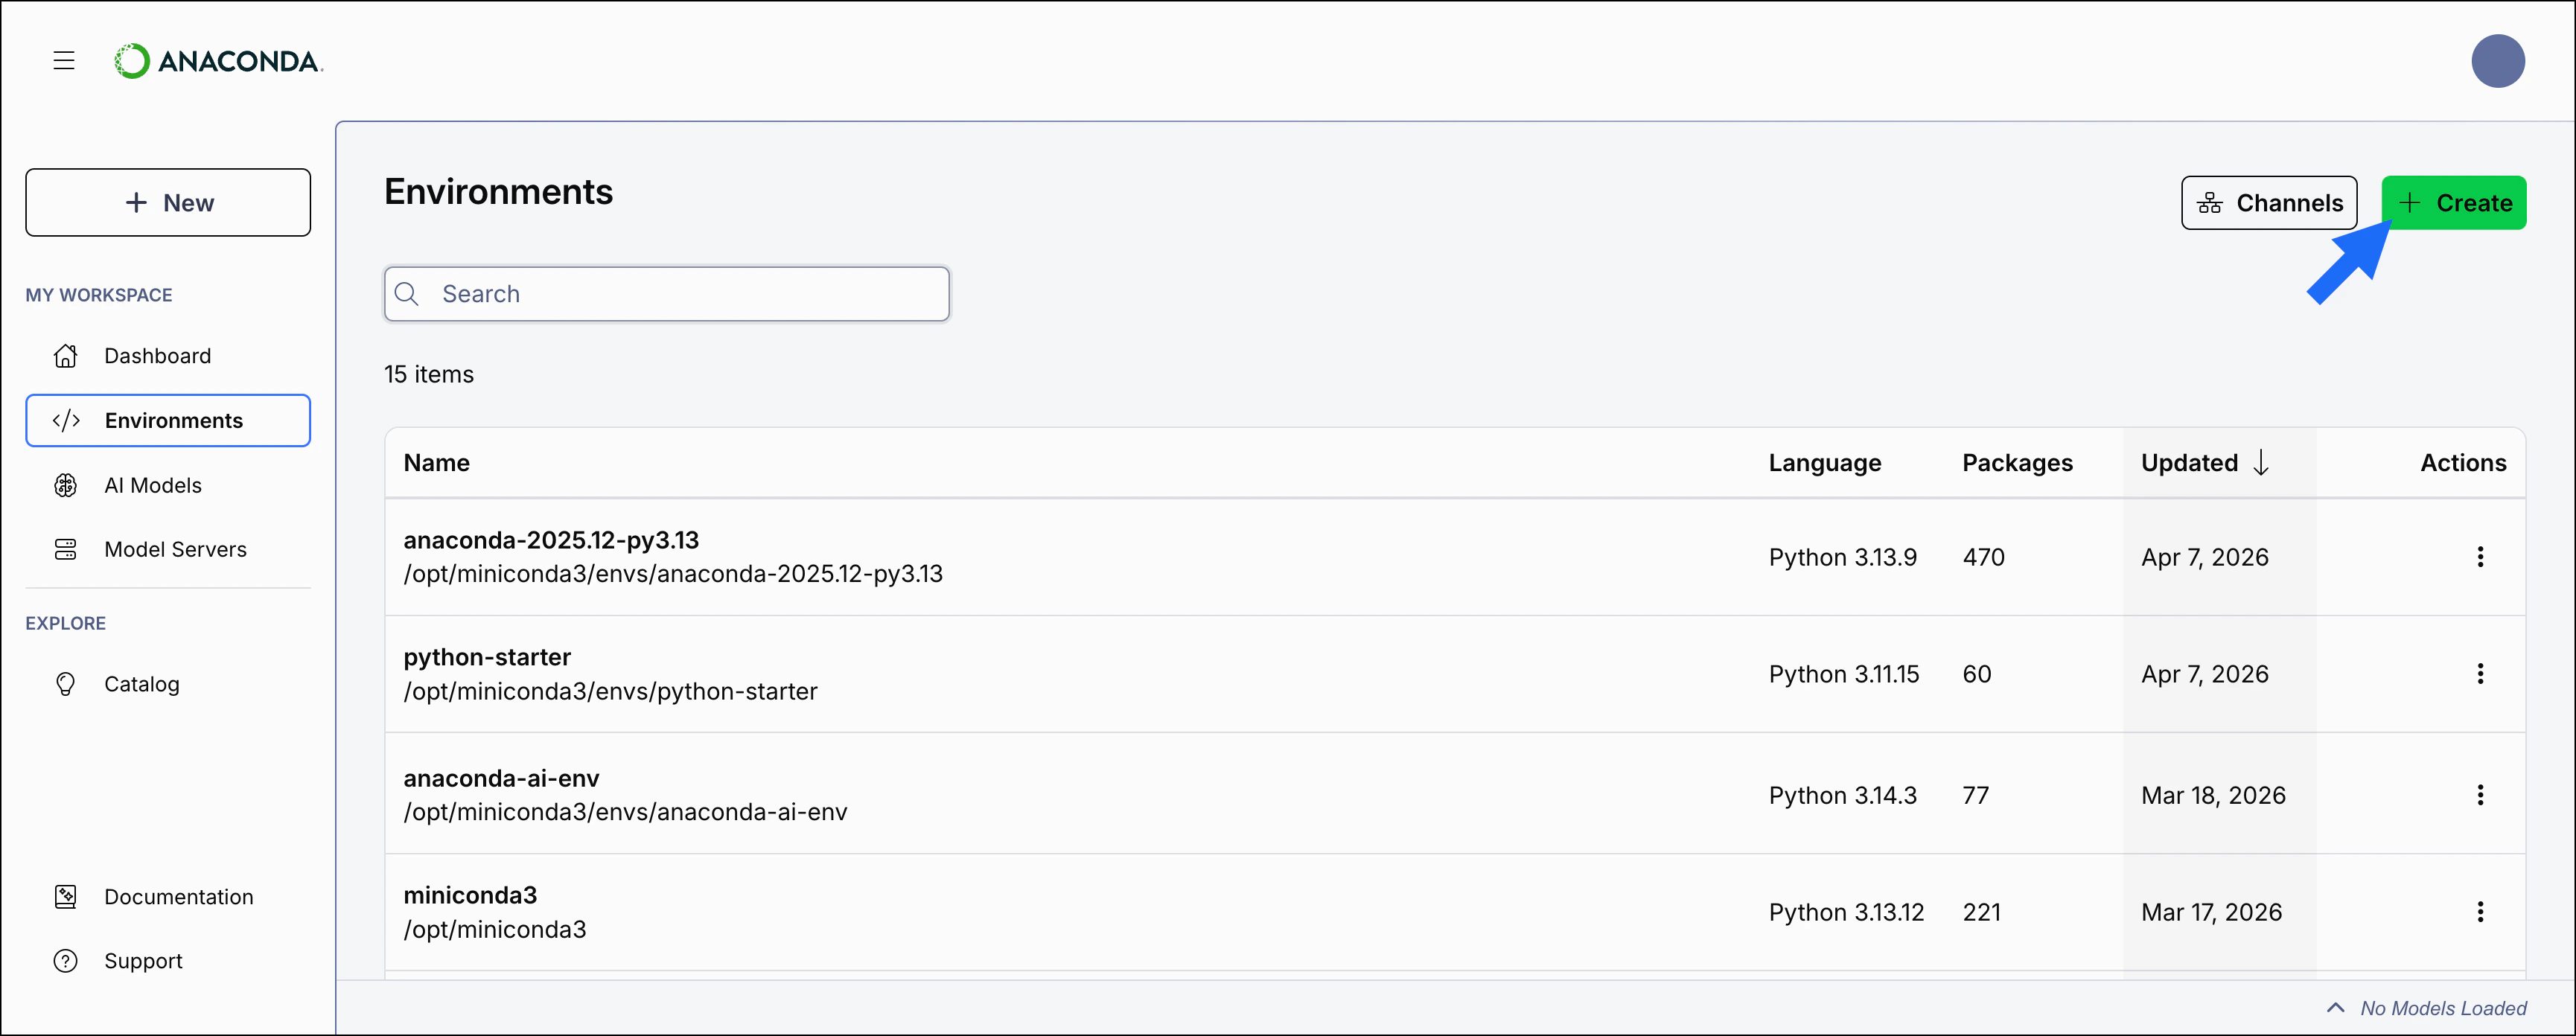
environment.yml file to create the environment, create a new environment manually, or select a quick start environment.
- Creating an environment manually
- Importing an environment
- In the Create Environment dialog, select Create Manually.
- Set configuration options for the environment.
- Select Create Environment to create the environment.
Environment configuration options
When you create a new environment, you can configure it with the following options: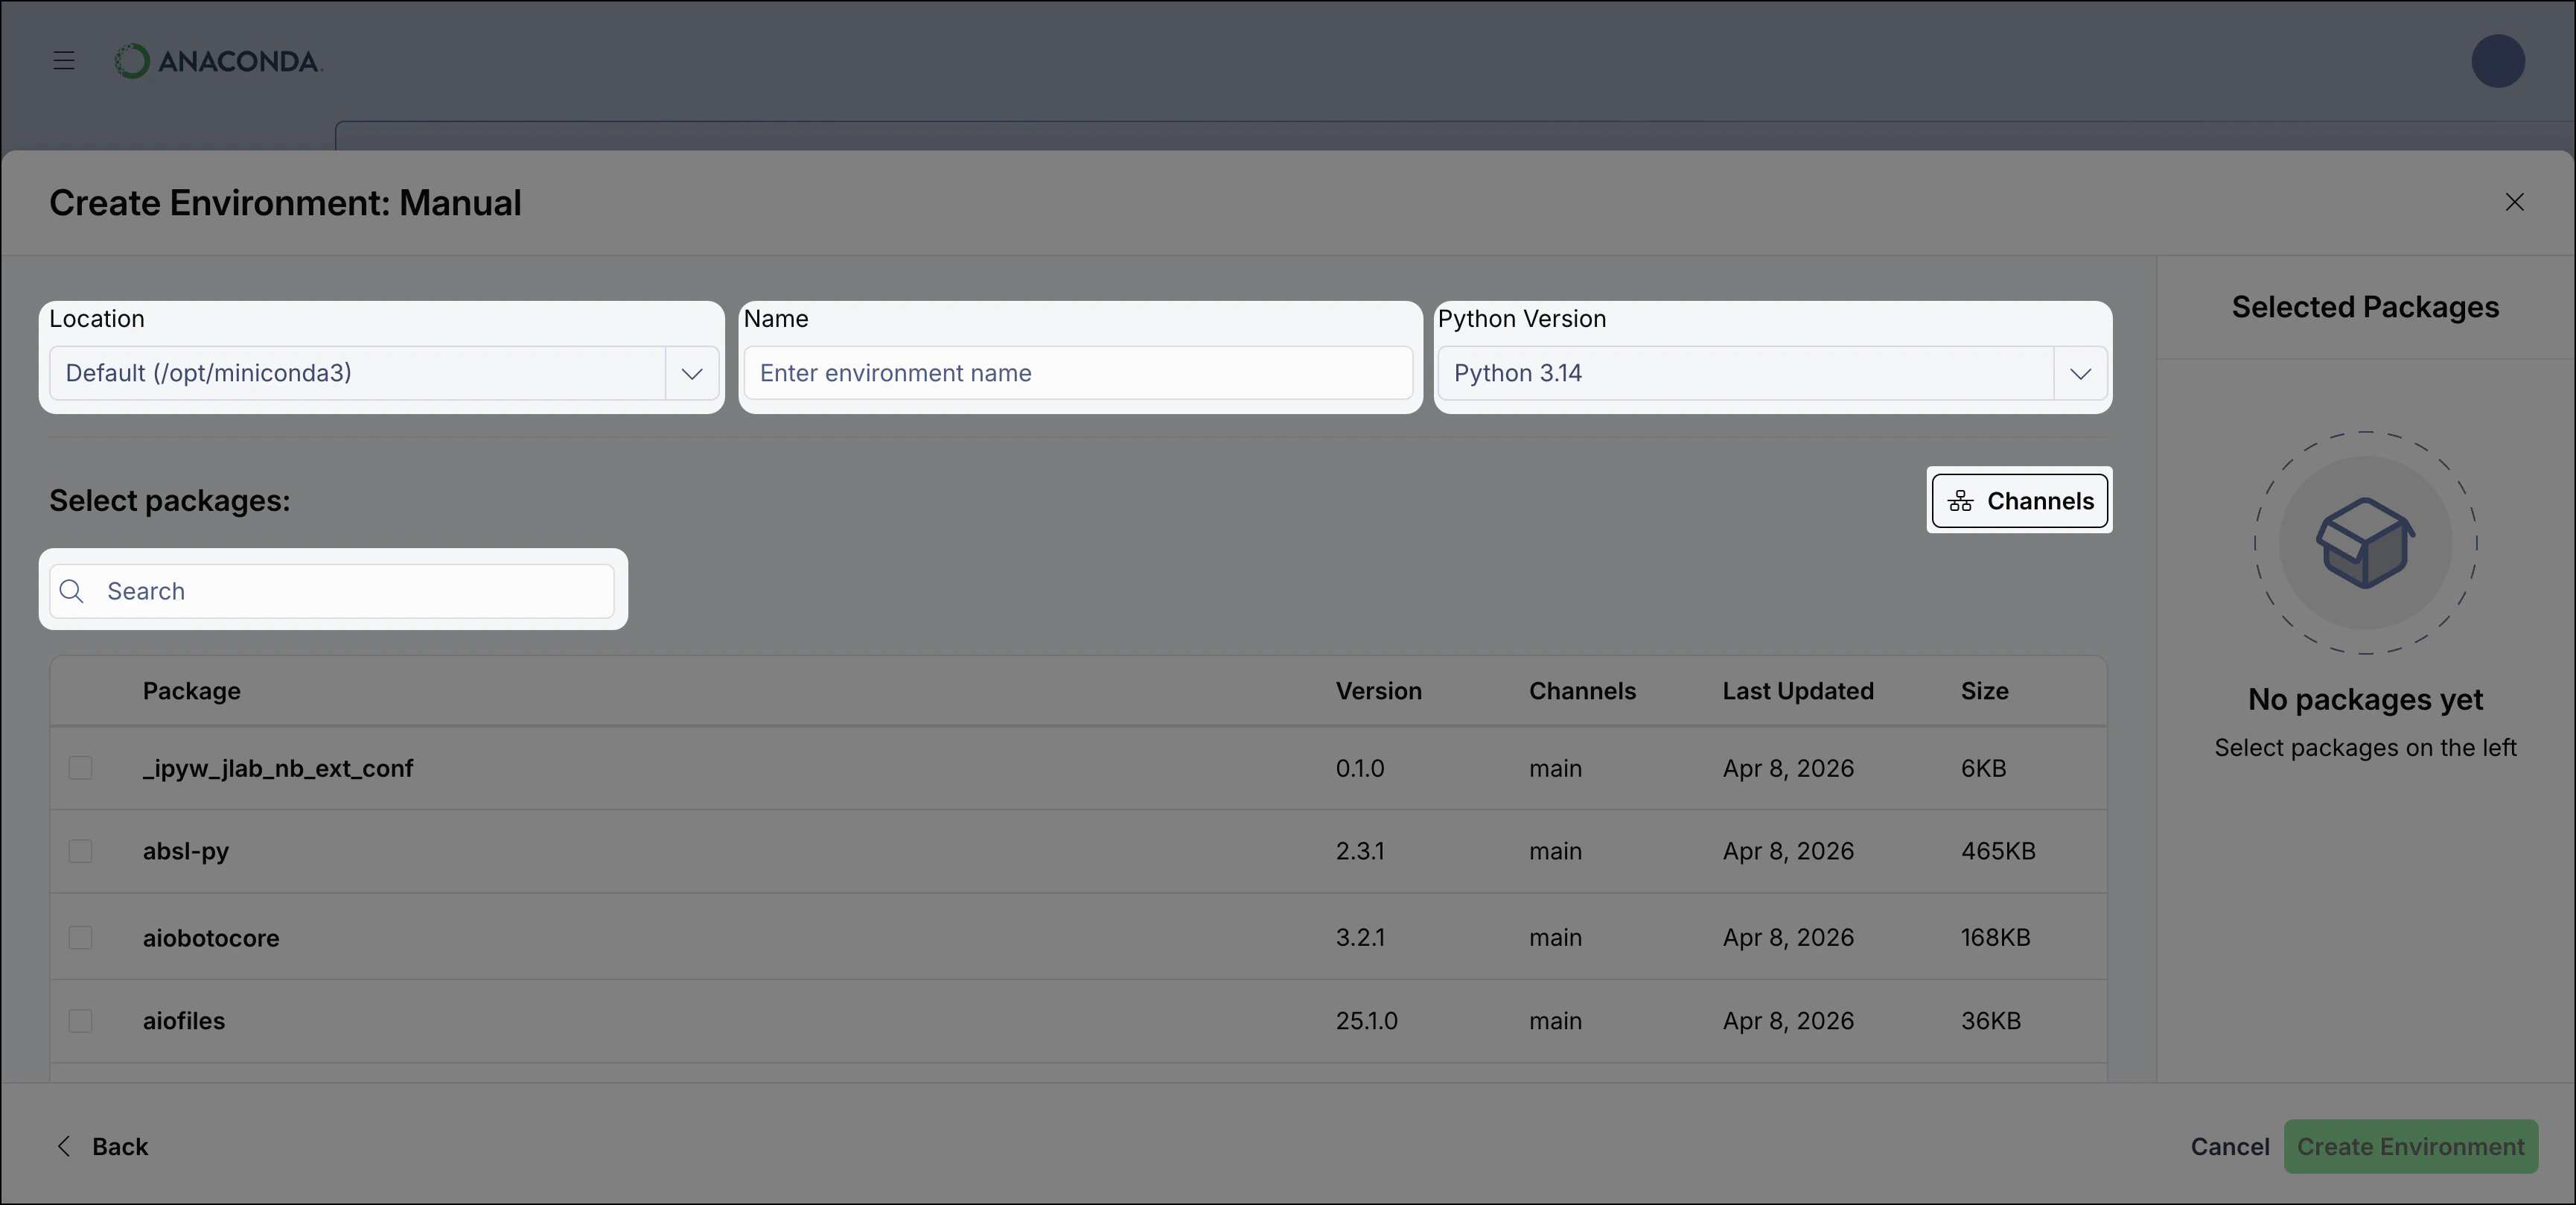
Managing environments
You don’t need to activate an environment to manage it in Anaconda Desktop.
Cloning an environment
To clone an environment:-
Select the Actions button in the environment’s row and select Clone.

-
Set the Location and Name for the new environment. See configuration options for more information.
Environment names must be unique.
- Select Clone to create the new environment.
Exporting an environment
When you export an environment, you create a.yml file that contains the environment’s configuration. This file can be used as a back up for the environment, to recreate the environment on another machine, or to share the environment with other users.
To export an environment:
-
Select Actions beside an environment, then select Export.
- Using your system’s Save dialog, enter a file name for your exported environment and choose a download location.
- Save the file.
Deleting an environment
To delete an environment:-
Select Actions beside the environment, then select Delete.
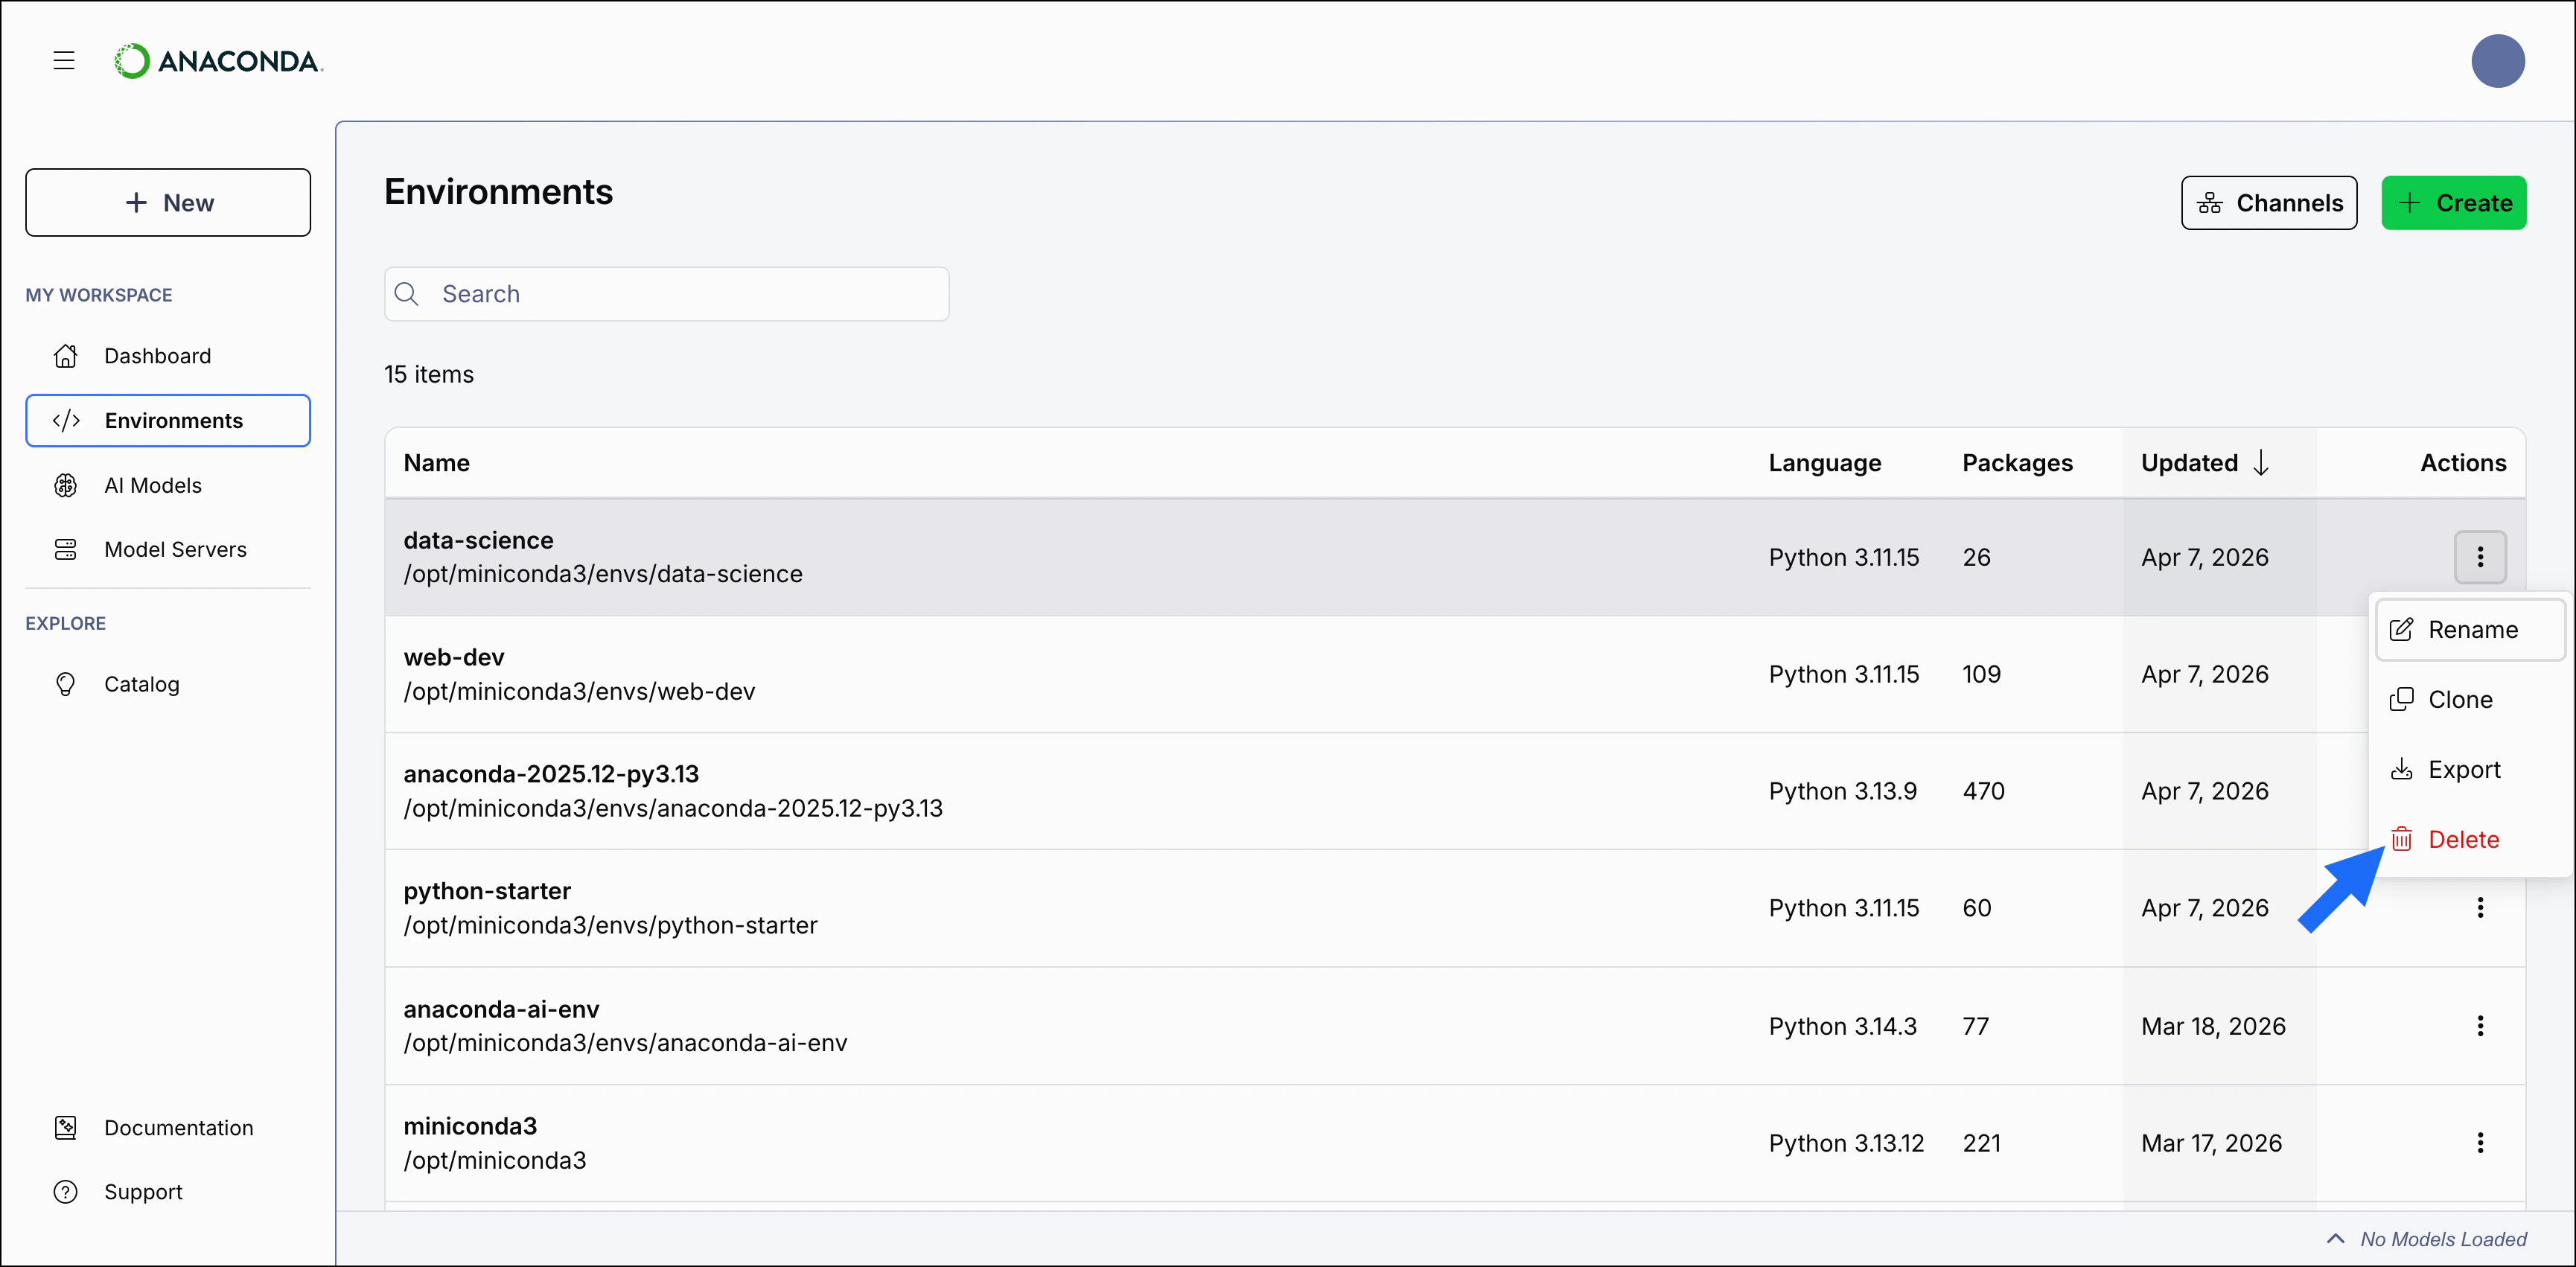
- Select Delete again to confirm you want to delete the environment.