Conda’s getting started guide goes through some of these same instructions while using the conda CLI.
Before you start
You should have Navigator installed. Navigator is included with Anaconda Distribution, but not Miniconda.Starting Navigator
Navigator starts by default when Anaconda Distribution is first installed. If you have installed Anaconda Distribution before, open Navigator using the following instructions:- Windows
- macOS
- Linux
From the Start menu, search for “Anaconda Navigator” and click to open.
Managing Navigator
When Navigator opens, it verifies that Anaconda is installed. If Navigator does not start up properly, see the Troubleshooting page.
Managing application tiles
By default, all application tiles available to launch or install within Navigator are displayed on the Home page. Filter the application tiles with the applications dropdown menu.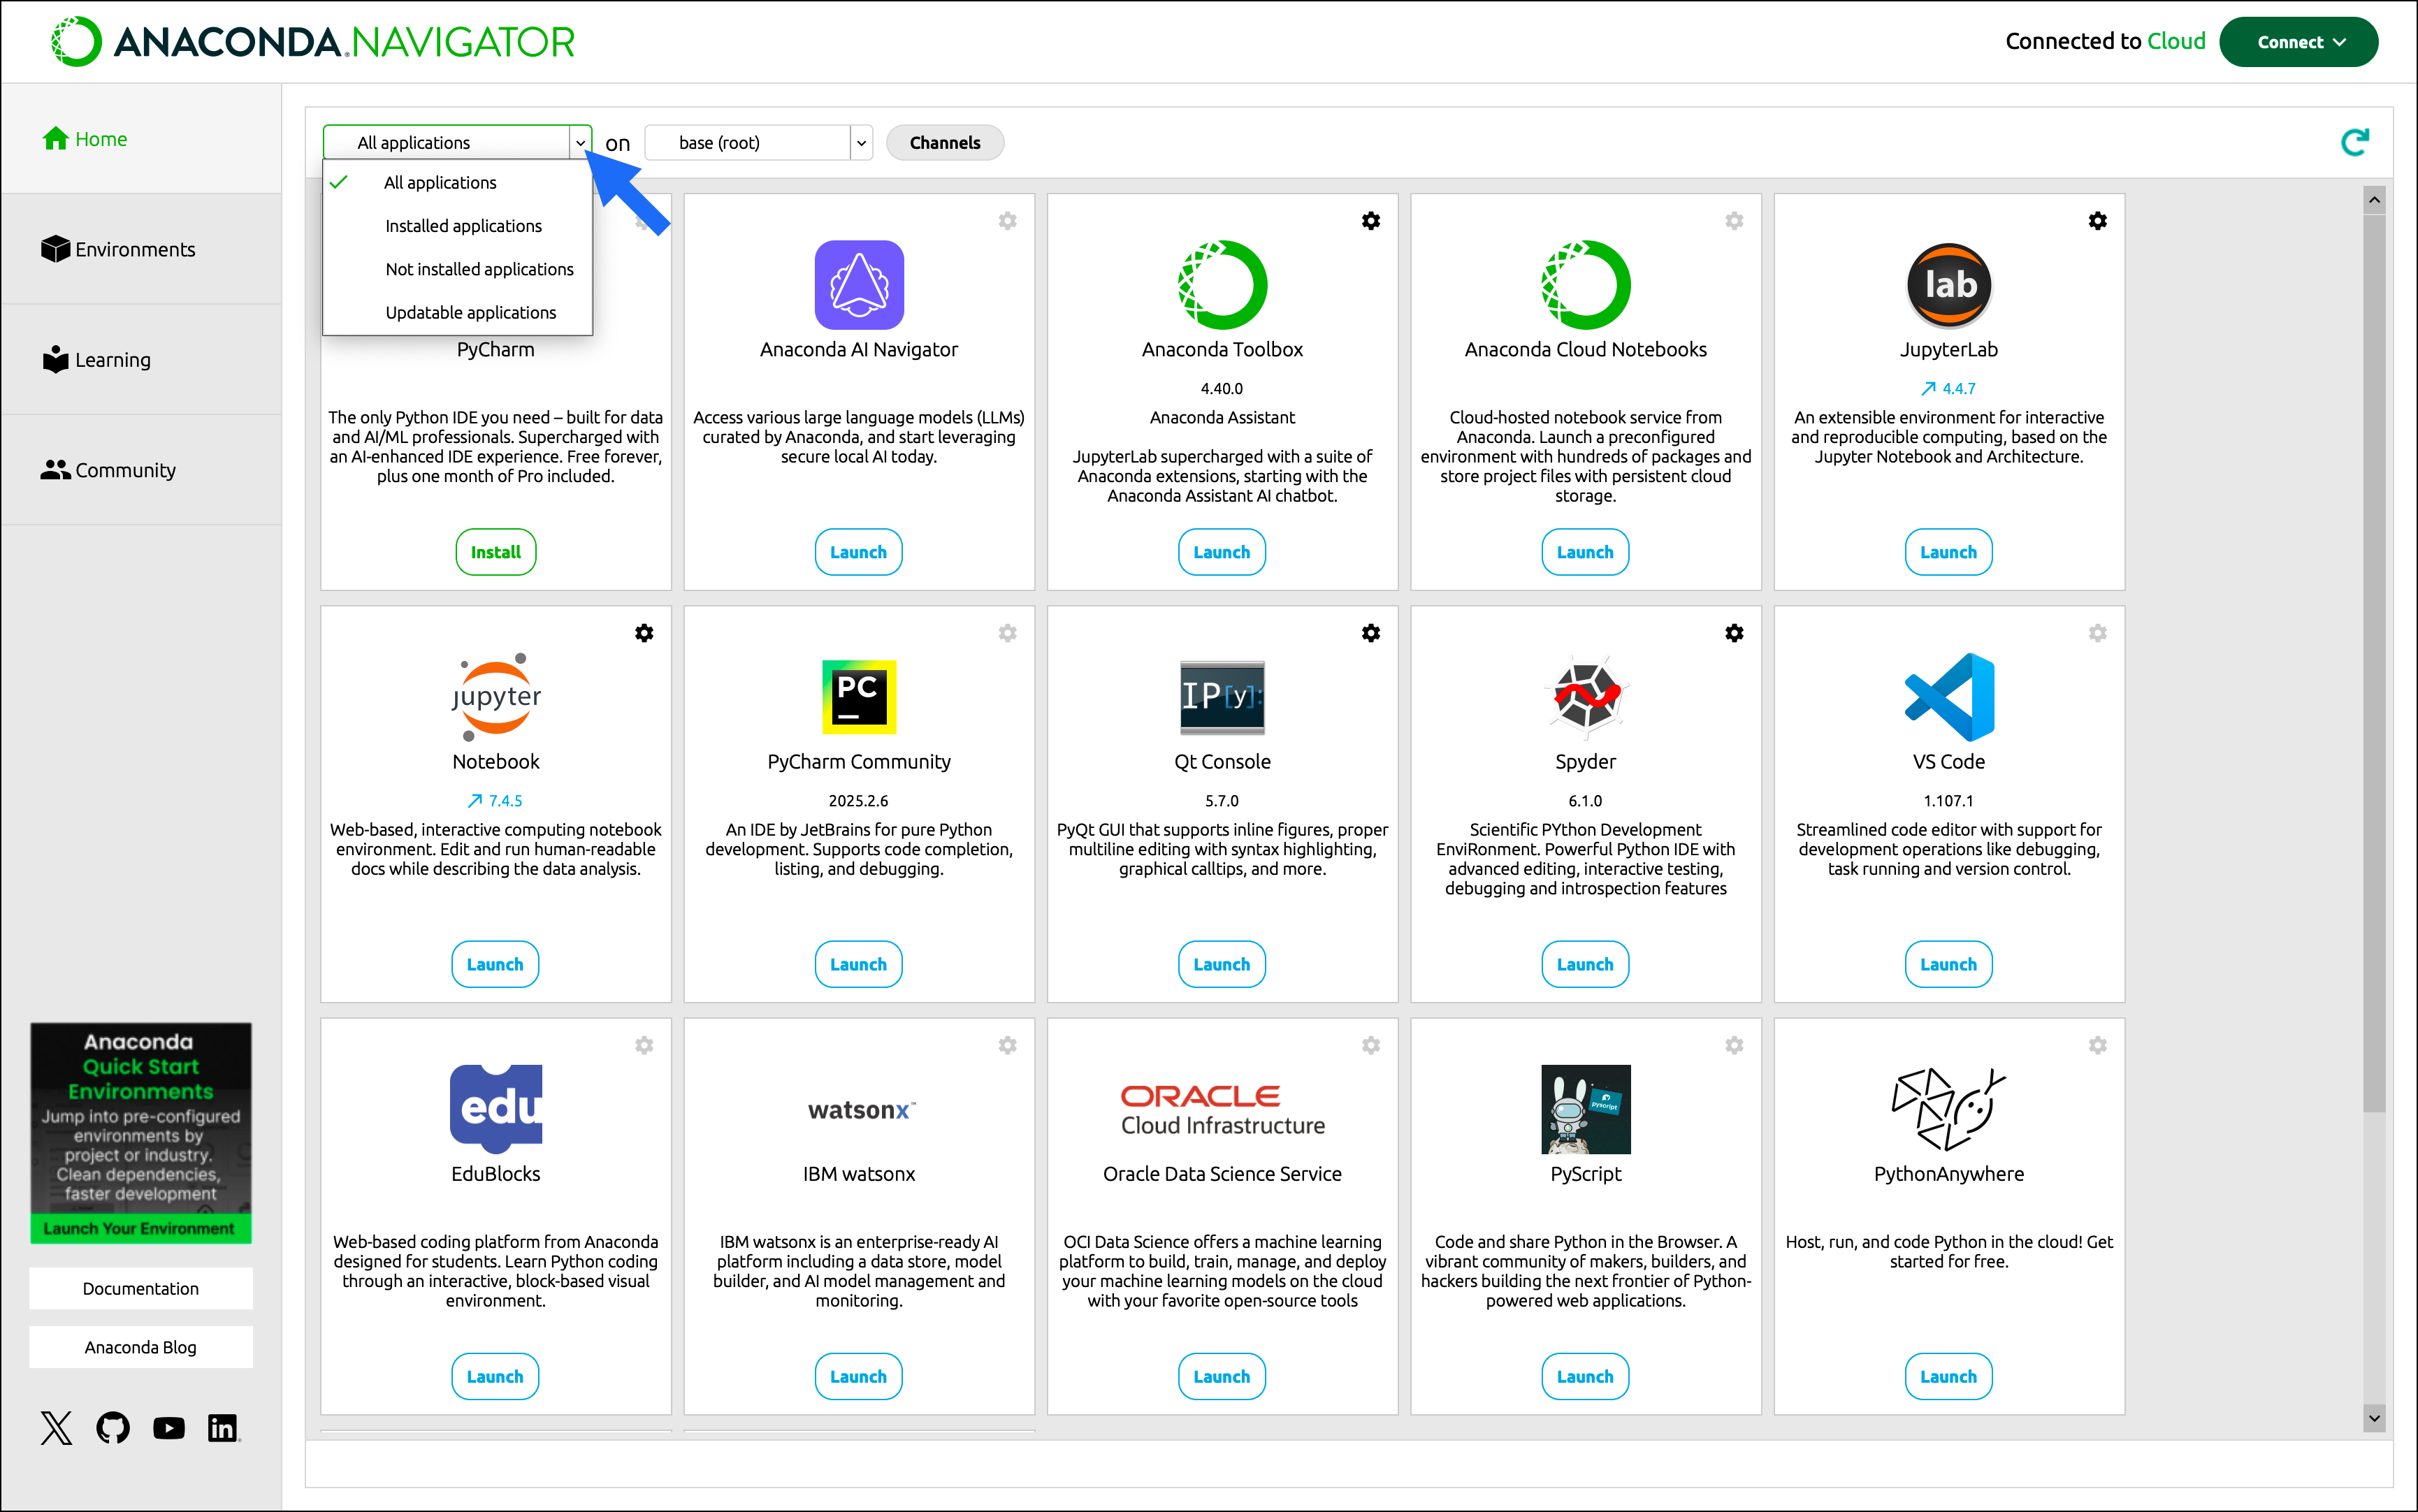
Managing environments
Navigator uses the conda package and environment manager to create conda environments. Conda environments are directories within your file system that contain a specific collection of packages and package dependencies. Environments are isolated from one another and enable you to quickly switch between projects with drastically different needs. In this example, we will create a new environment namedmyenvironment:
-
On the Environments page, click Create.
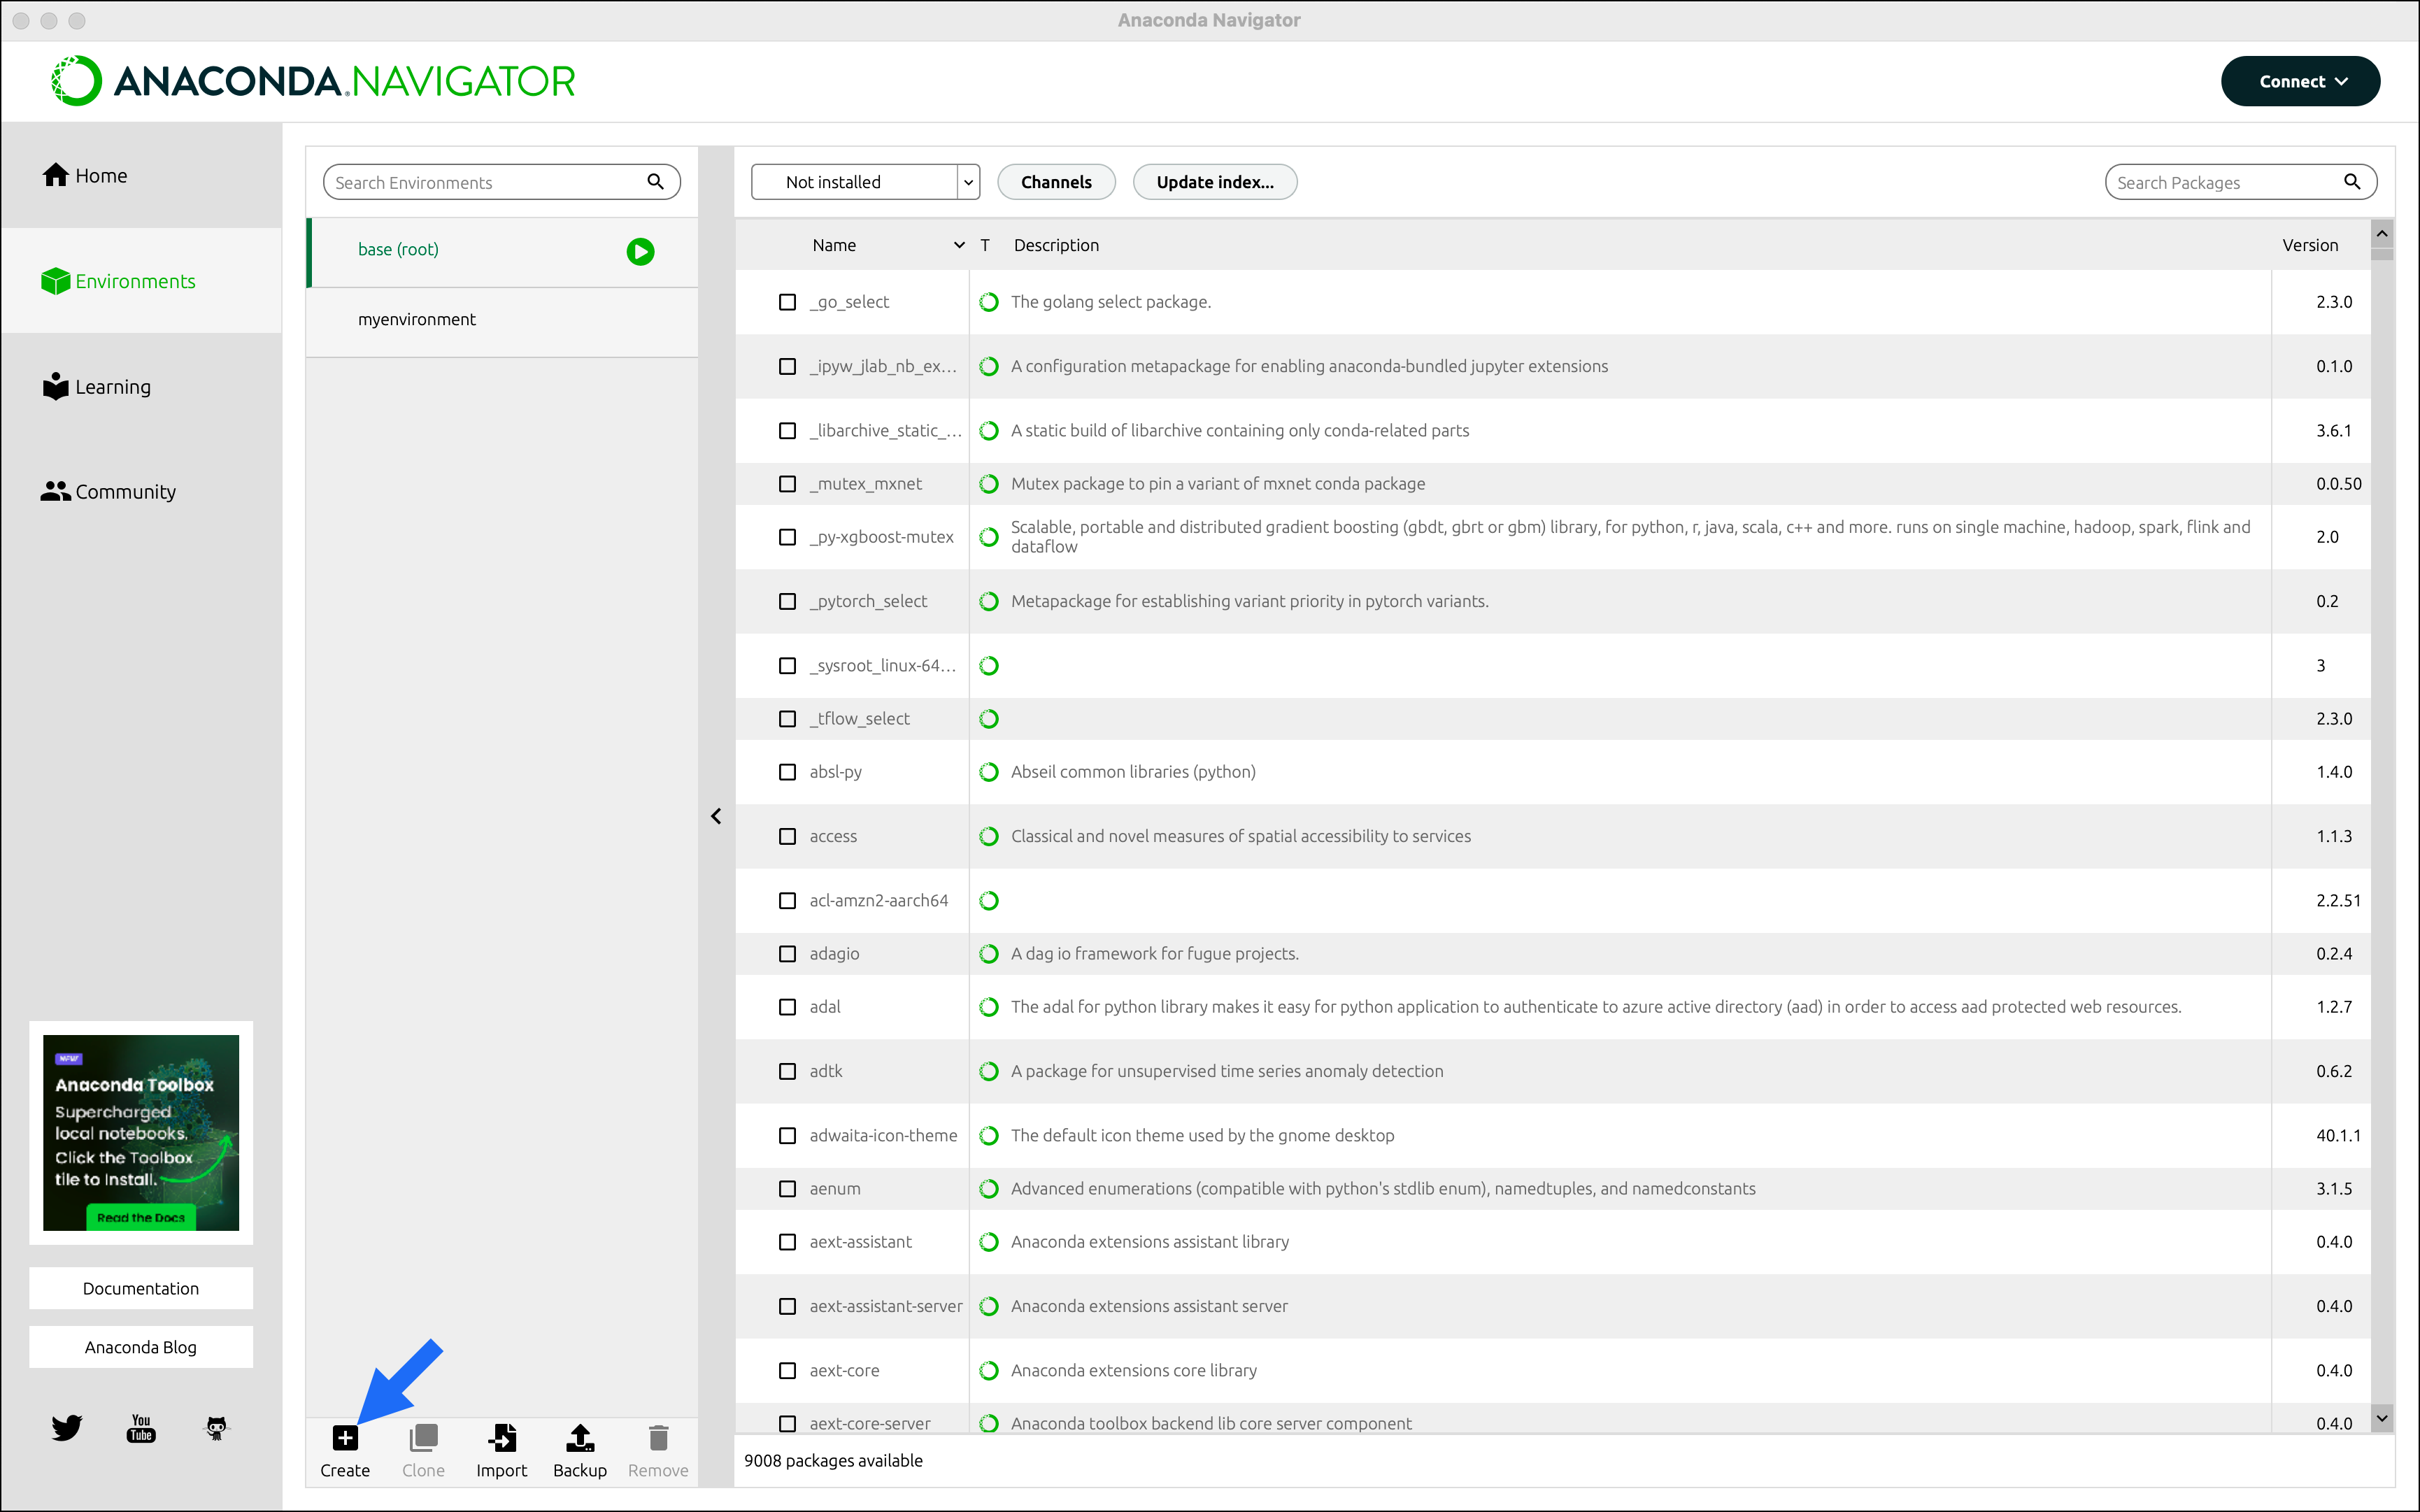
- In the Environment name field, type a descriptive name for your environment.
- Click Create. Navigator creates the new environment and activates it.
-
Now you have two environments: the default environment
base (root)andmyenvironment. - Switch between environments by clicking the name of the environment you want to use. This will deactivate the first environment and activate the environment you just selected.
Managing Python
When you create a new environment, Navigator installs the latest version of Python by default. To use a different version of Python in a given environment:- specify when you create the environment
- change the Python package version in an existing environment
Changing the Python version when creating an environment
In this example, we will create a new environment namedpython314 that contains Python 3.14:
- On the Environments page, click Create.
- In the Environment name field, type the descriptive name “python314”.
- Select the latest version of Python 3.14 from the Python dropdown.
- Click Create.
Changing the Python version in an existing environment
In this example, we will change the Python version ofmyenvironment to Python 3.14:
-
On the Environments page, select
myenvironment(which we created in the Managing environments section above) from the environment list to activate it. -
Select Installed from the package filter dropdown.
- Click the Python package checkbox and hover over Mark for specific version installation.
-
Select one of the 3.14 Python versions from the dropdown that appears.
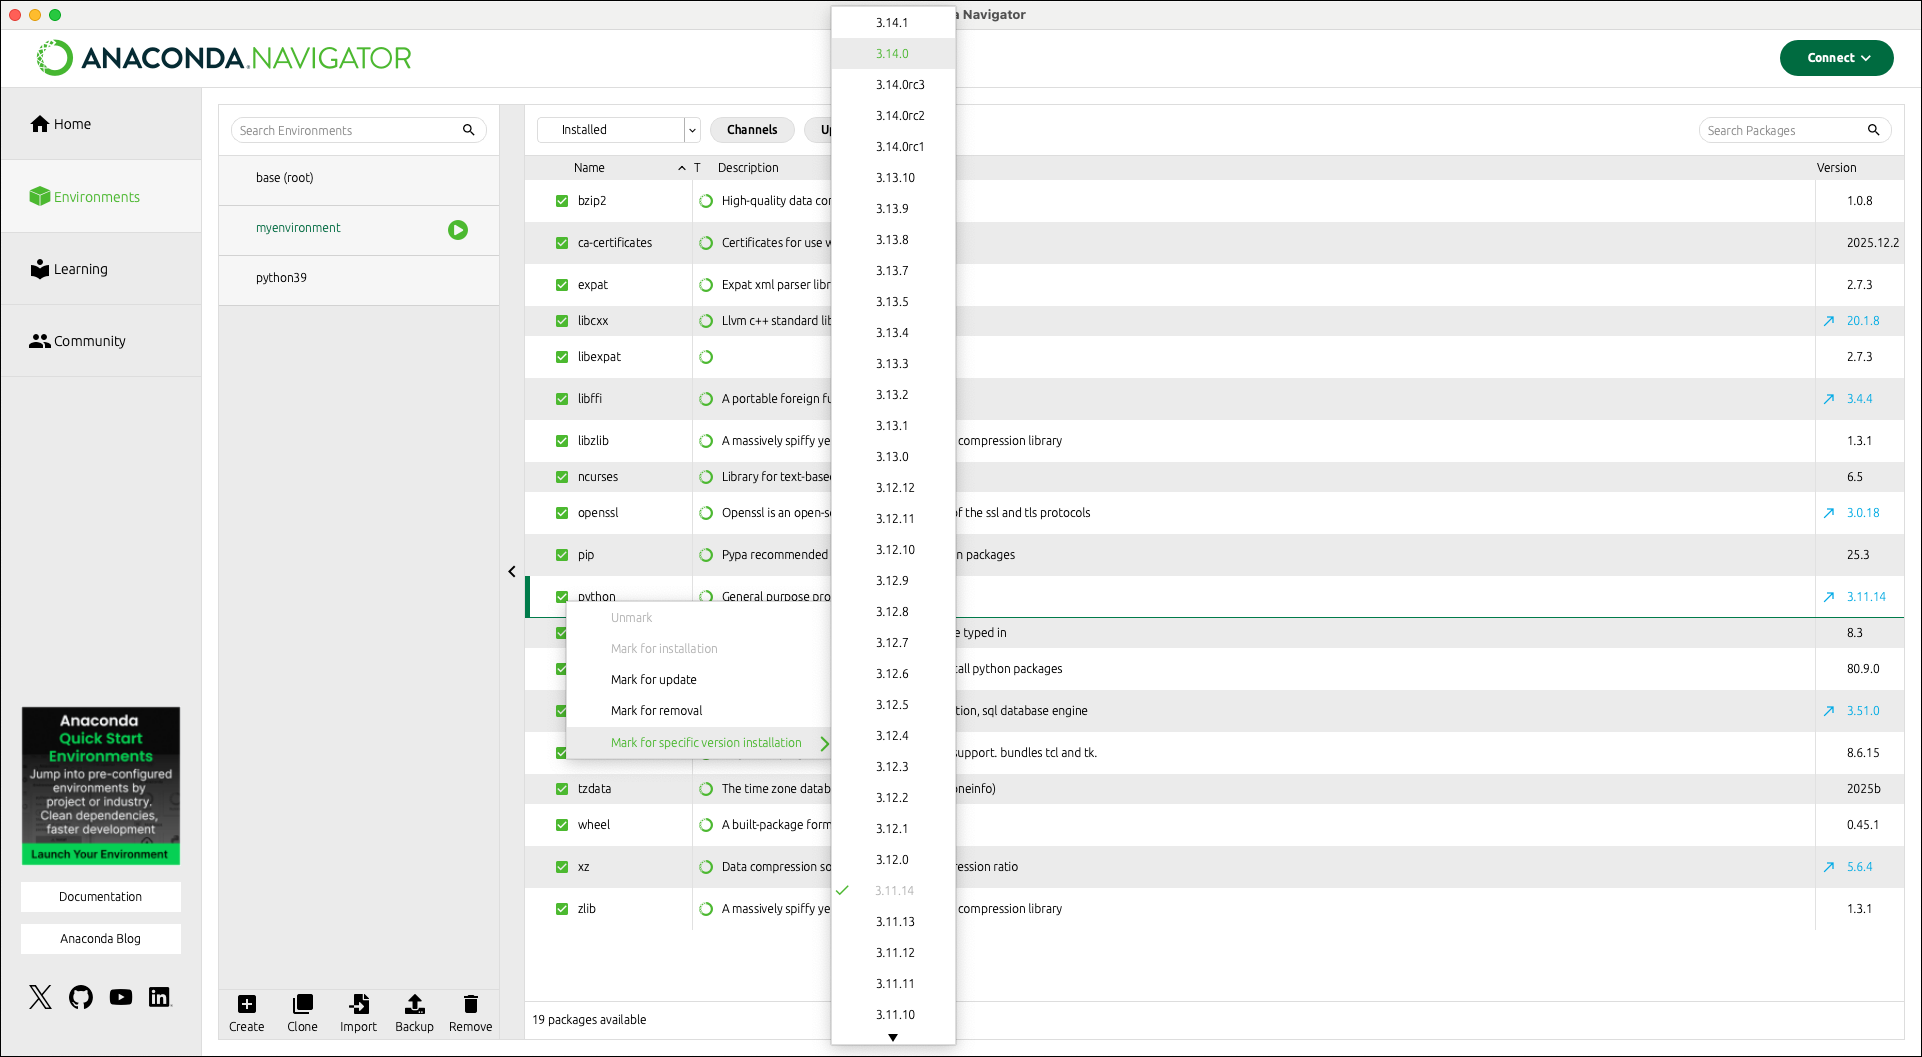
- Click Apply.
- A dialog listing all the packages that will be modified appears. Click Apply.
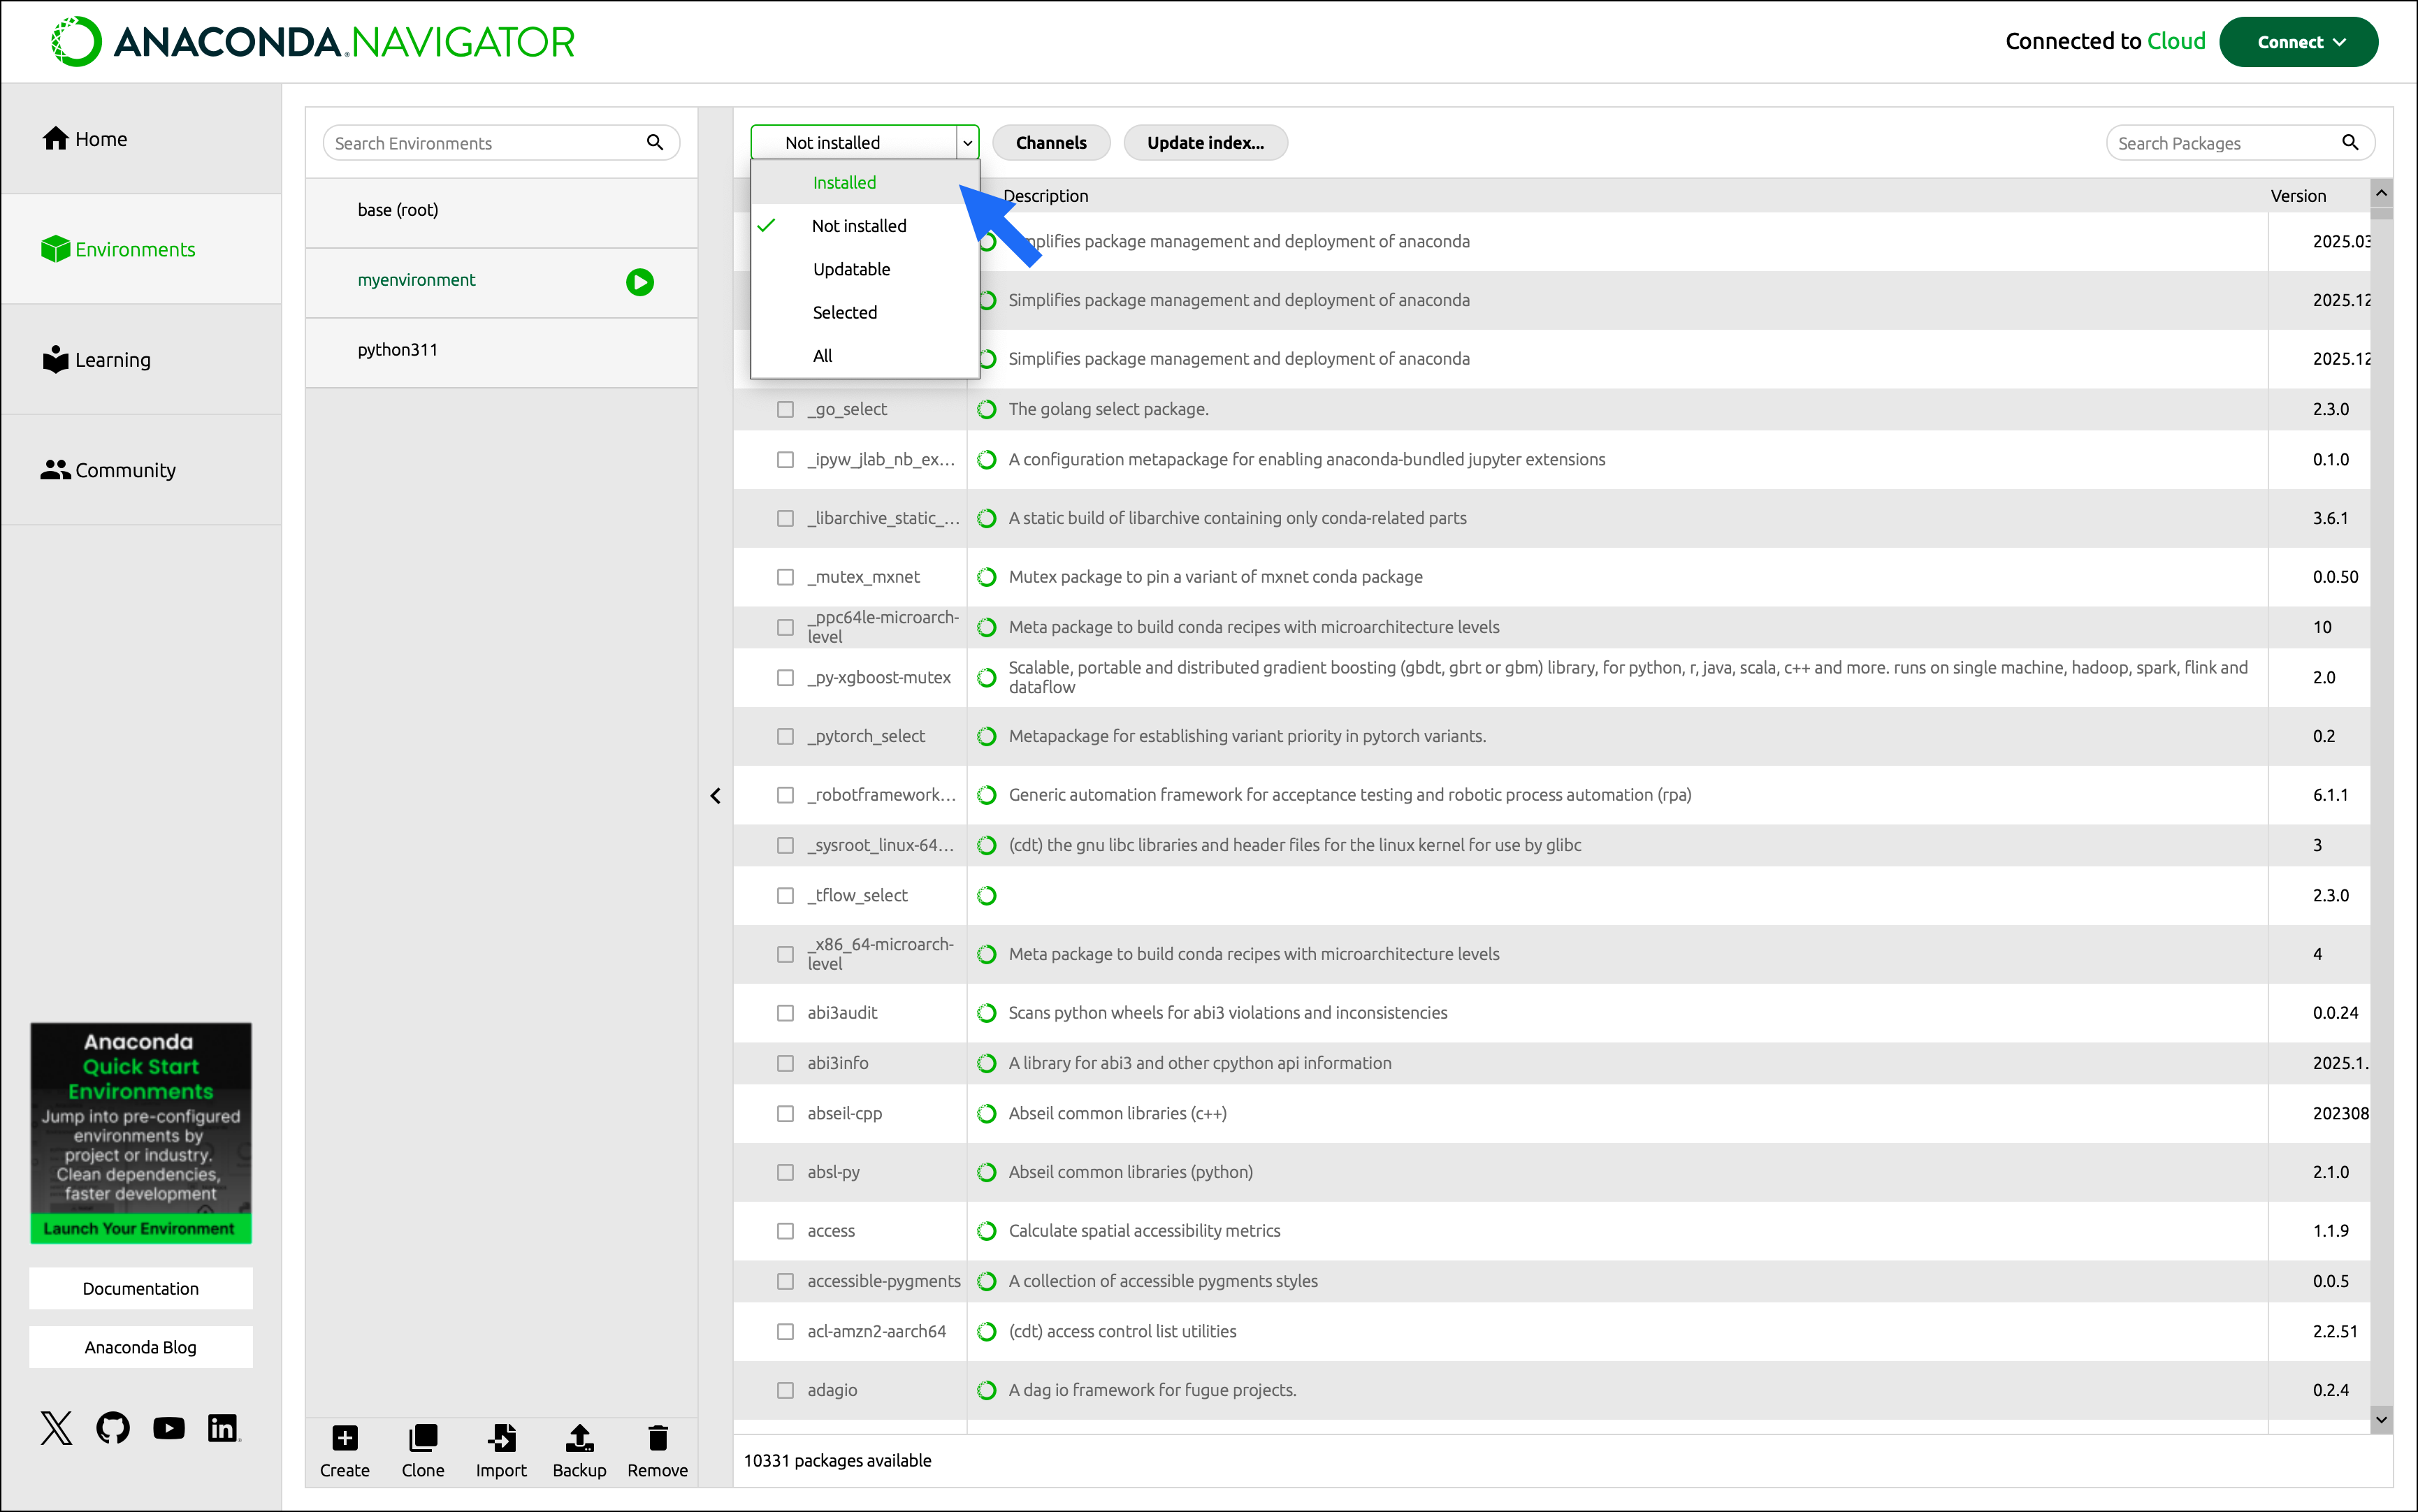
Managing packages
On the Environments page, you can:- View which packages are in each environment
- Search for and install new packages
- Upgrade existing packages
- Delete packages
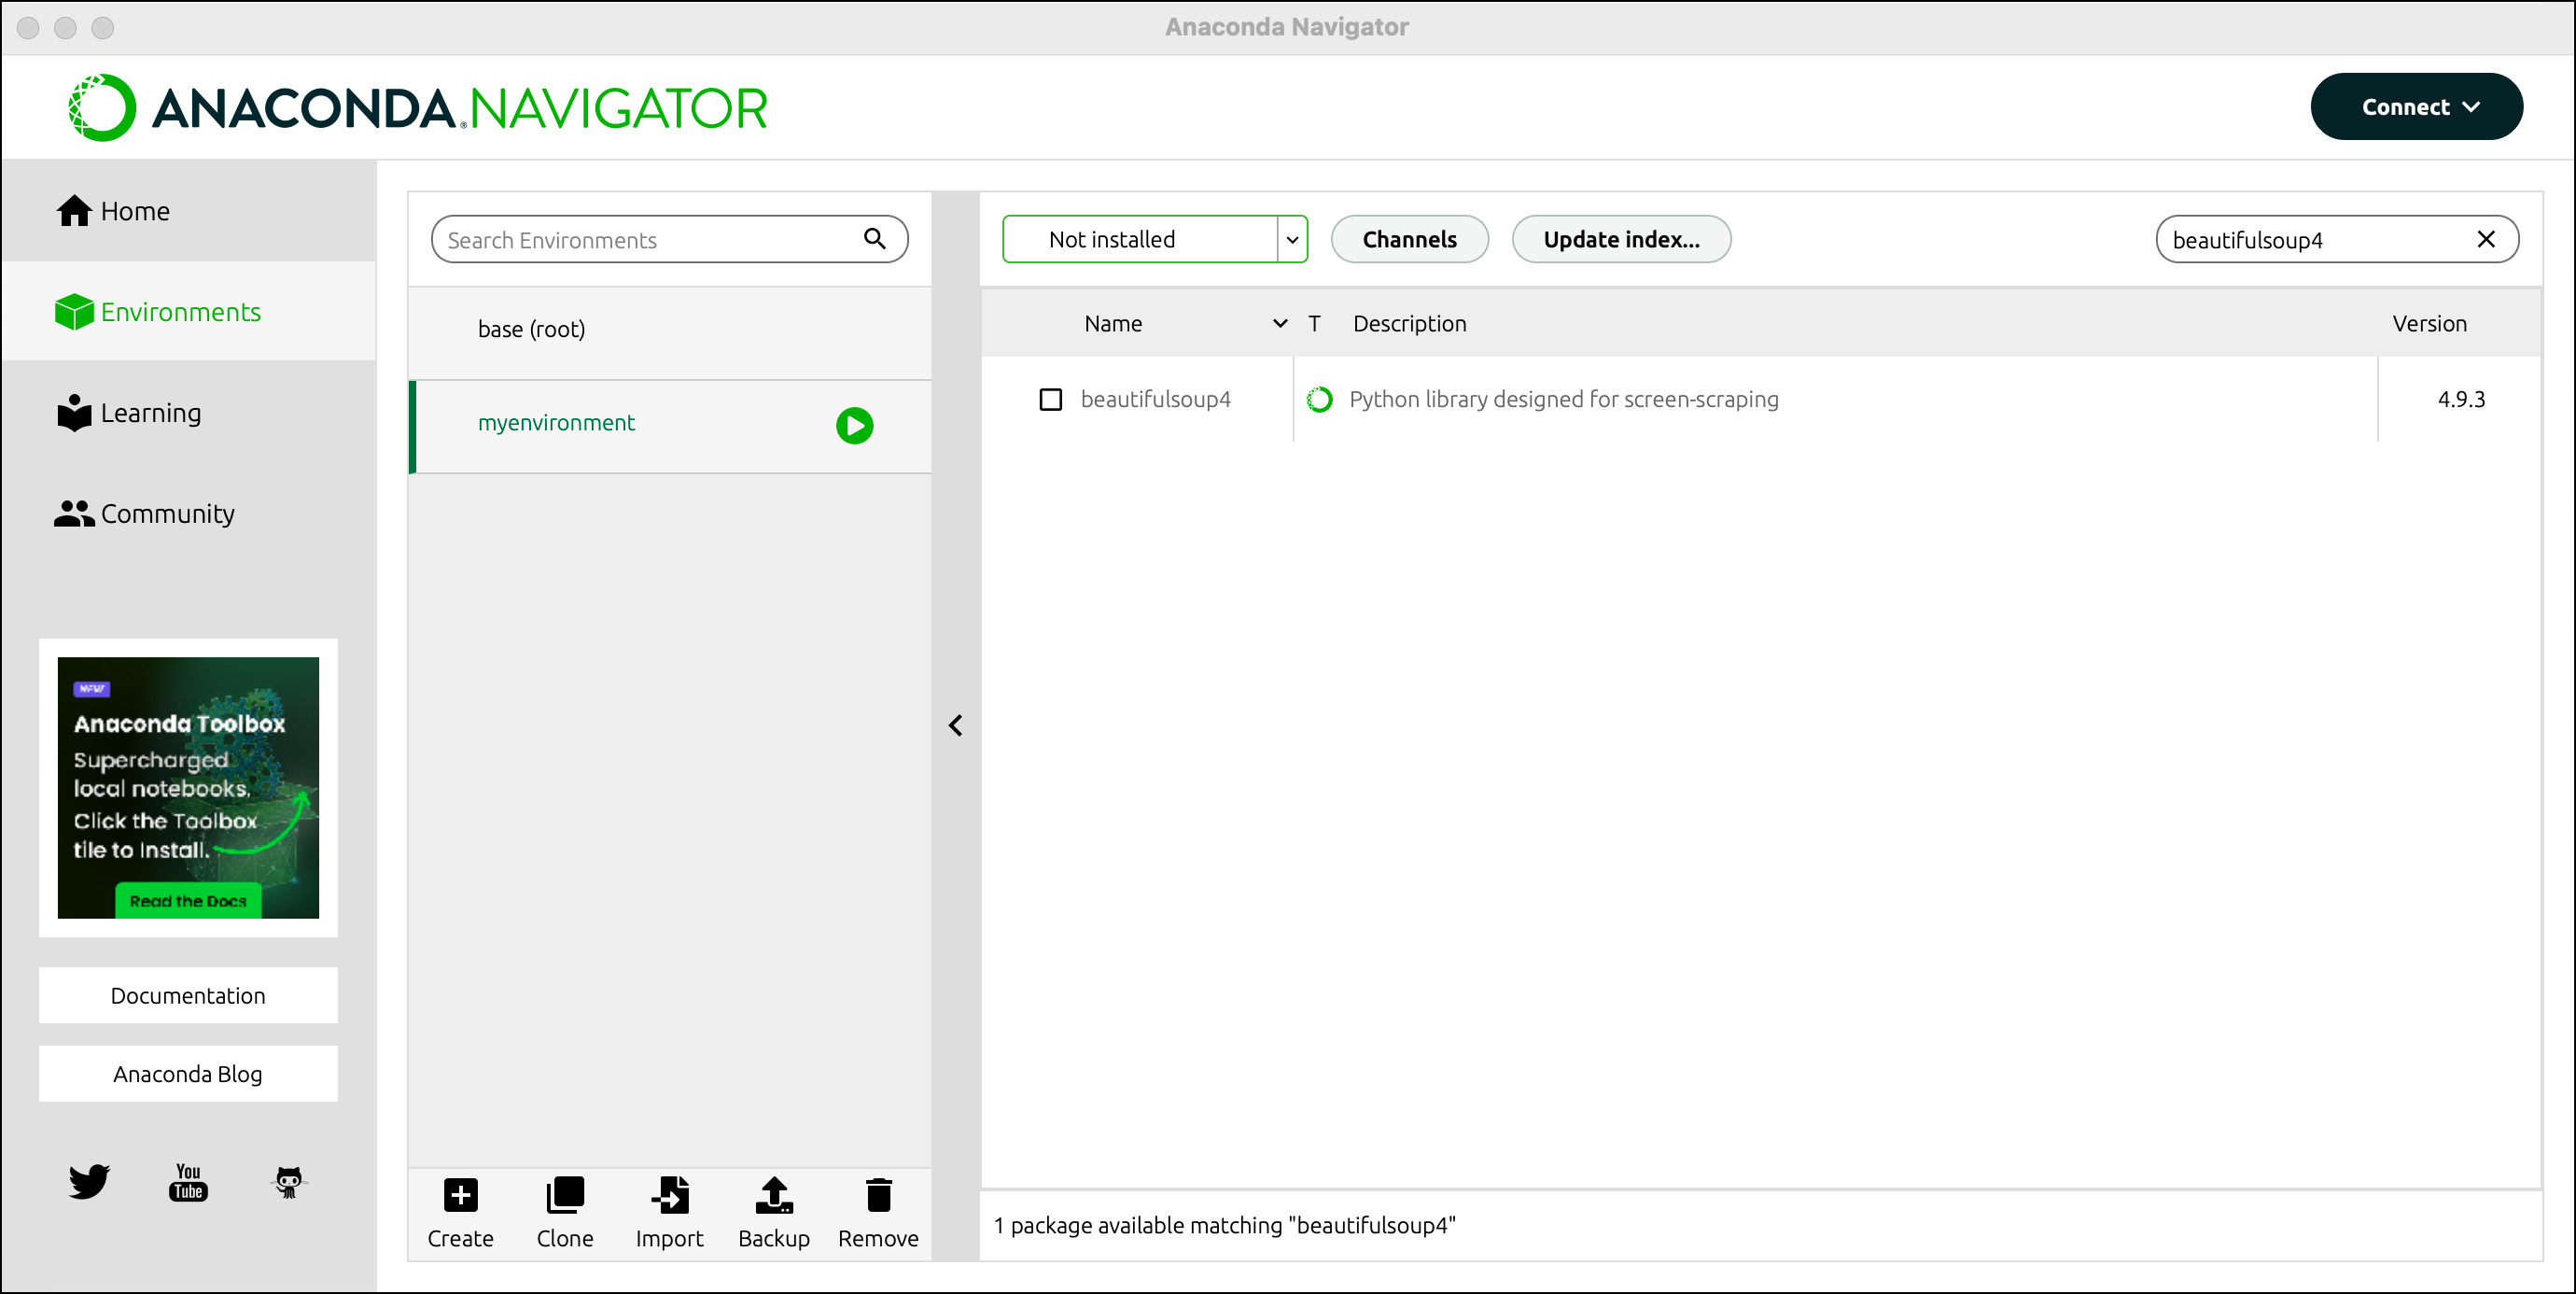
beautifulsoup4 into myenvironment.
-
On the Environments page, select
myenvironmentfrom the environment list to activate it. - Open the package filter dropdown and select Not installed to view a list of packages that are available to install from the you are connected to.
-
Type “beautifulsoup4” into the Search packages box.
-
Select the checkbox beside
beautifulsoup4in the package list. - Click Apply.
- A dialog appears that lists all packages that will be installed. Click Apply.
- Open the package filter dropdown and select Installed.
beautifulsoup4 package is now displayed in the list of installed programs in the current environment.
For more documentation on packages, see Managing packages in the Tutorials section.
Managing channels
Navigator installs packages from locations called channels. Unless configured otherwise, Navigator searches for packages from Anaconda’s public repositories, also know as defaults.Use of Anaconda’s public package repositories is subject to our Terms of Service.
conda-forge.
In this example, we will add a channel connection to conda-forge in Navigator’s channel manager:
- Click Channels.
- Click Add….
- Enter “conda-forge” into the textbox that appears.
- Press Enter (Windows)/Return (Mac) on your keyboard.
- Click Update channels.
conda-forge.
For more documentation on managing channels in Navigator, see Managing channels in the Tutorials section.