Understanding connections
Let’s take a look at the different elements within Code Snippets.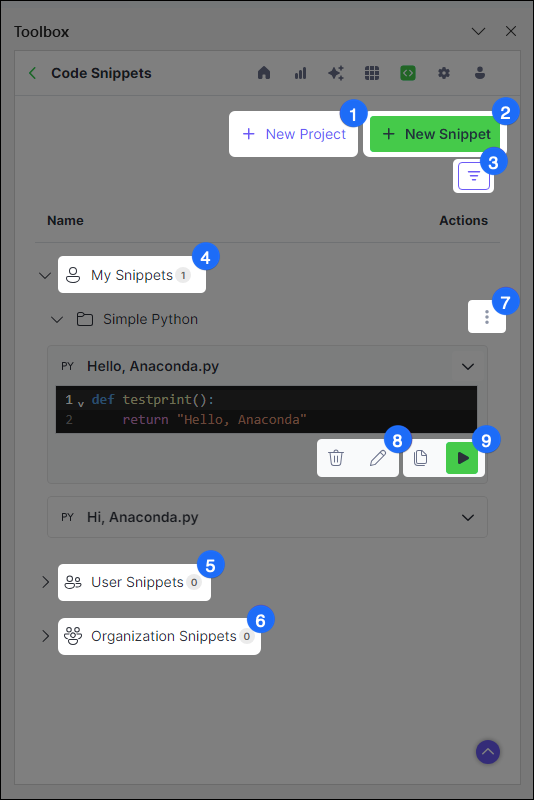
Project actions
Edit, delete, and share projects
Running snippets
Multiple methods for adding and running snippets in a workbook
Create a project
When you first access Code Snippets, you are prompted to create a new project. You can think of projects as folders for storing your snippets. You must create a project before uploading your first snippet. Create a project at any time using the following steps:- Click + New Project.
- Enter a unique title for your project and an optional description.
-
Designate the project owner(s) for your project. By default, you are set as the only project owner.
Administrators and project owners are the only users allowed to edit projects. Anaconda.com organization administrators have full permissions for any projects owned by their organization.
- (Optional) Provide access to your project by inviting users from one of your organizations.
- Click Save.
Sharing a snippet
You can share a snippet with others in your organization by sharing the project containing that snippet. This can be done as you’re creating a new project or at any time using the following steps:- Click actions beside a project for which you have edit permissions, then click Edit.
-
Provide access to your project by inviting users from one of your organizations.
- Under Your Organizations, select an organization.
- Under Organization Users, select a user to share your project with.
- Choose whether the user should have read or write access to your project.
- Click Save.
Uploading a snippet
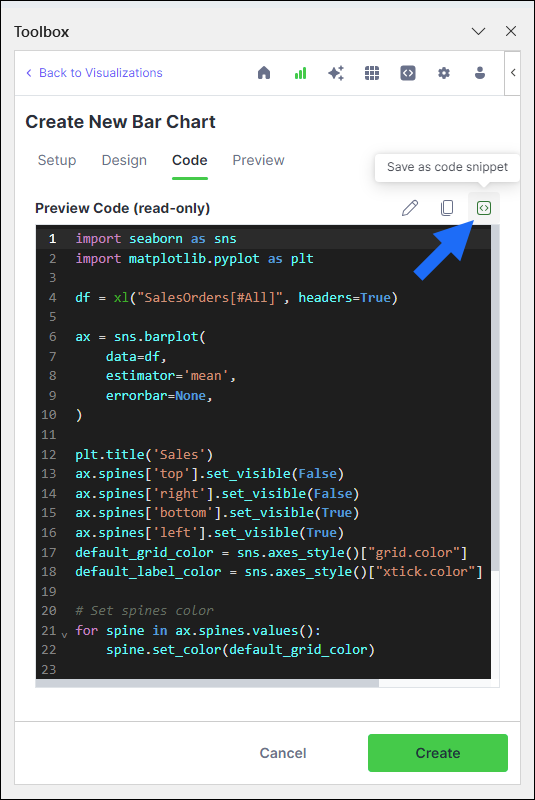
With a project in Anaconda’s cloud storage, you can now create a snippet and upload it to that project. This can be done from Code Snippets or, if you want to save code generated while creating visualizations of your data, you can upload a snippet from Visualize with Python.- Upload from Code Snippets
- Upload from Visualize with Python
- Click + New Snippet.
- Under Project, select an existing project to house your snippet.
- Under Snippet Title, provide a title for your snippet.
- Select a language, then enter your code in the code editor. Alternatively, click + Add From Grid to add existing code from your workbook.
- Click Save to Cloud.
Adding snippets to a workbook
When you’re ready to make use of your saved snippets, import them to a workbook using the following steps:-
Expand the dropdown beside your snippet. A preview of your snippet appears.
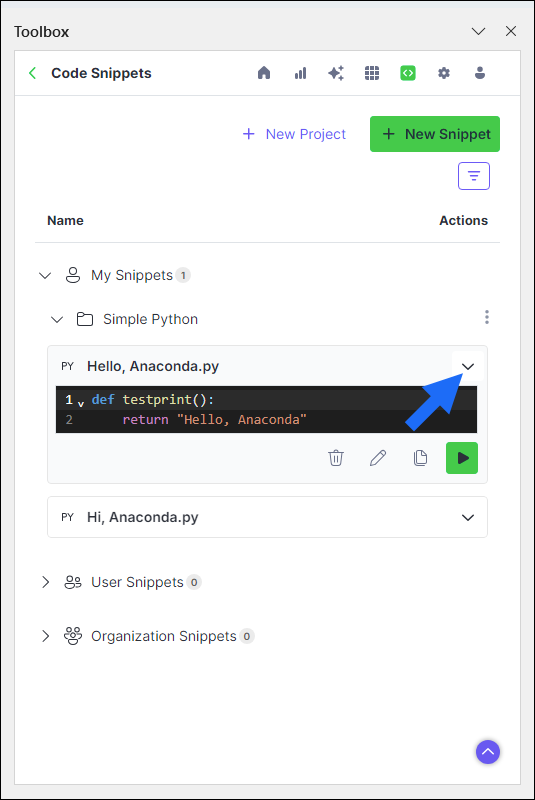
- You can now import your snippet in one of two ways:
- Run in cell
- Copy code
- Click Run in cell.
- Select the cell where you want to insert the snippet, then click OK.
Editing a snippet
Changes made to a saved snippet in a workbook will not automatically update that snippet in Anaconda’s cloud storage. Instead, you must make changes to the snippet directly within the Anaconda Toolbox extension.- Expand the dropdown beside your snippet. A preview of your snippet appears.
-
Click Edit.
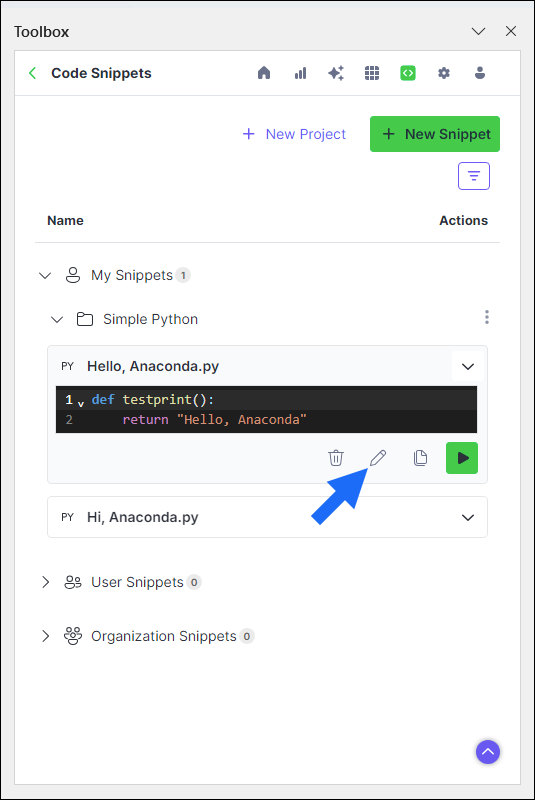
-
Adjust your snippet, then click Save to Cloud.
Changing the title of your snippet will create a new snippet, rather than updating the existing one.