Prerequisites
Before starting, ensure you have:- Administrator access to an Anaconda organization
- An Anaconda organization access
- Docker installed on your local machine
- A Databricks workspace with admin privileges
- Enabled the Community channel for your organization.
Setup and configuration
Create a Channel
- Sign in to Anaconda.com.
- Click Channels.
- Click Add Channel.
- Name your channel
databricks. - Set the channel’s Type to Virtual.
- Open the Source dropdown and select main.
- Set the channel’s Access to Internal.
- Click Save.
Create and apply a policy
- Click Create under POLICIES.
-
Name your policy
databricks. -
Configure the policy filter as follows:
Exclude package if:
PlatformIs notlinux-64andPlatformIs notnoarch - Click Save.
-
Apply your policy to the
databrickschannel you created earlier. For more information, see Applying a Policy.
Build a Custom Docker Image
To create a secure Python environment in Databricks, you’ll need to build a custom Docker image. This image includes your conda-based environment and can be used when launching a cluster through Databricks Container Services.For more information, see Customize containers with Databricks Container Service and GitHub - databricks/containers.
-
Create a directory on your local machine called
dcs-condaby running the following command: -
Enter your new
dcs-condadirectory and create aDockerfilefile inside thedcs-condadirectory: -
Add the following content to the
Dockerfilefile, depending on your Databricks Runtime version:Replace <TOKEN> with your organization access token.
Replace <ORG_ID> with your organization ID — found in your organization’s URL —https://anaconda.com/app/organizations/<ORG_ID\>. -
Create an
env.ymlfile inside thedcs-condadirectory: -
Add the following content to the
env.ymlfile:Replace <ORG_ID> with your organization ID — found in your organization’s URL —https://anaconda.com/app/organizations/\<ORG_ID\>.Please check the recommended package versions in the System environment section of the Databricks Runtime release notes and compatibility documentation. -
Build the Docker image:
-
Tag and push your custom image to a Docker registry by running the following commands:
Launch a Cluster using Databricks Container Service
Databricks recommends using OAuth for authorization instead of Personal Access Tokens (PATs). OAuth tokens refresh automatically and reduce security risks associated with token leaks or misuse. For more information, see Authorizing access to Databricks resources.
- Open your Databricks workspace.
- Select Compute from the left-hand navigation, then click Create compute.
- On the New compute page, specify the Cluster Name.
-
Under Performance, set the Databricks Runtime Version to a version that supports Databricks Container Service. For example - Runtime: 15.4-LTS.
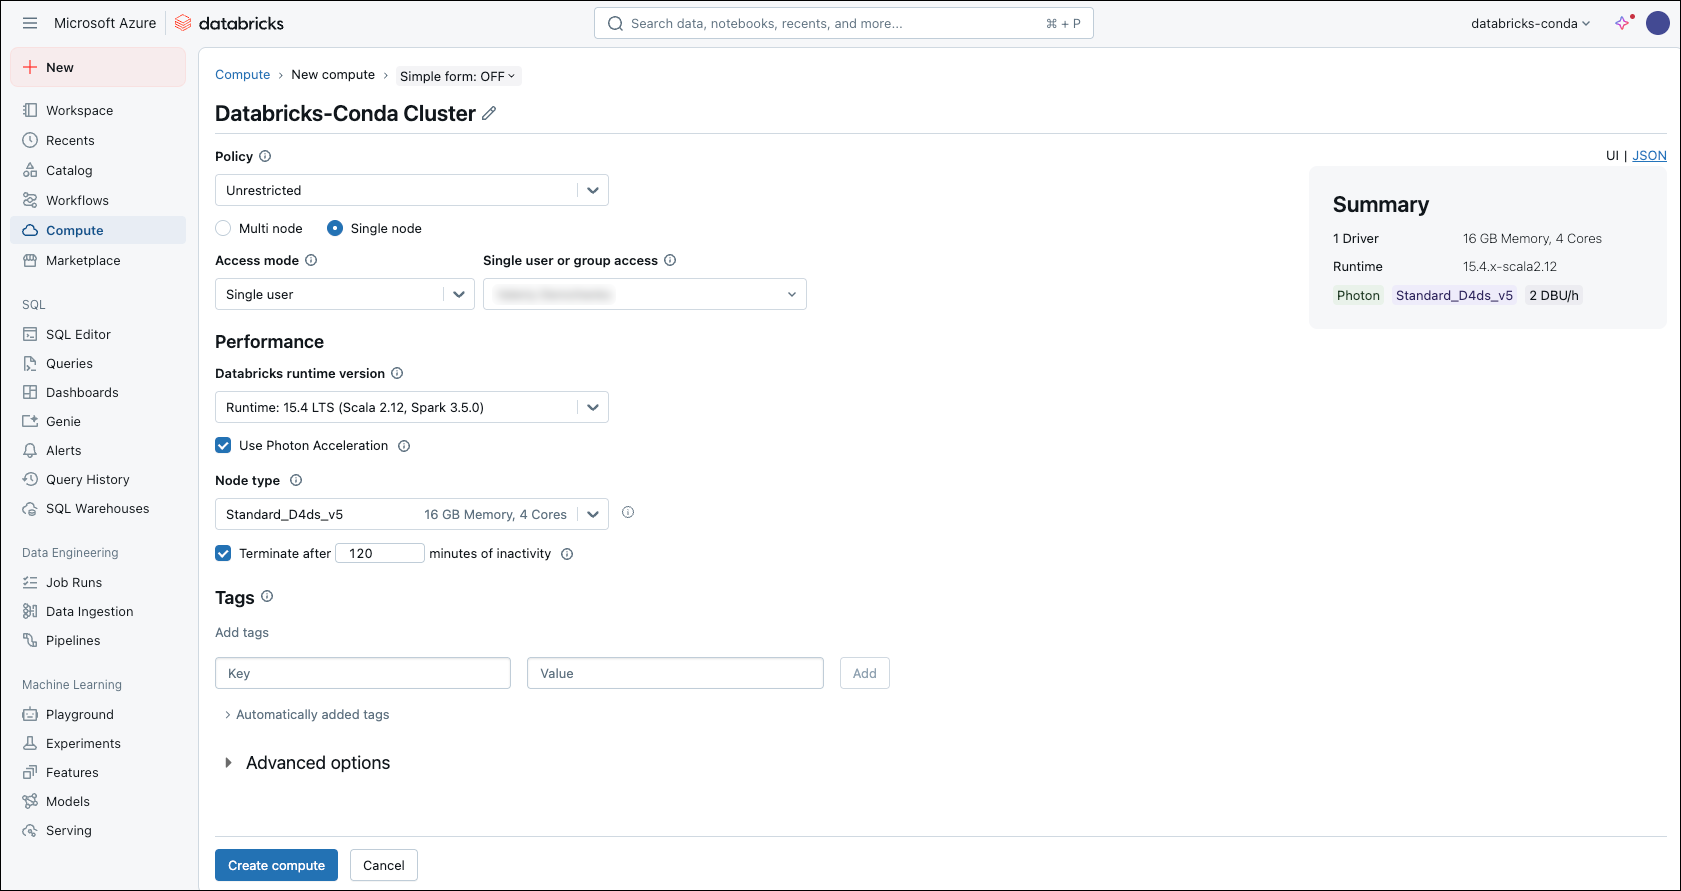 This version is under long-term support (LTS). For more information, see Databricks support lifecycles.
Databricks Runtime for Machine Learningdoes not support Databricks Container Service. - Open the Advanced options dropdown and select the Spark tab.
-
Add the following Spark configurations:
To access volumes on Databricks Container Service, add the following configuration to the compute’s Spark config field as well:
spark.databricks.unityCatalog.volumes.enabled true.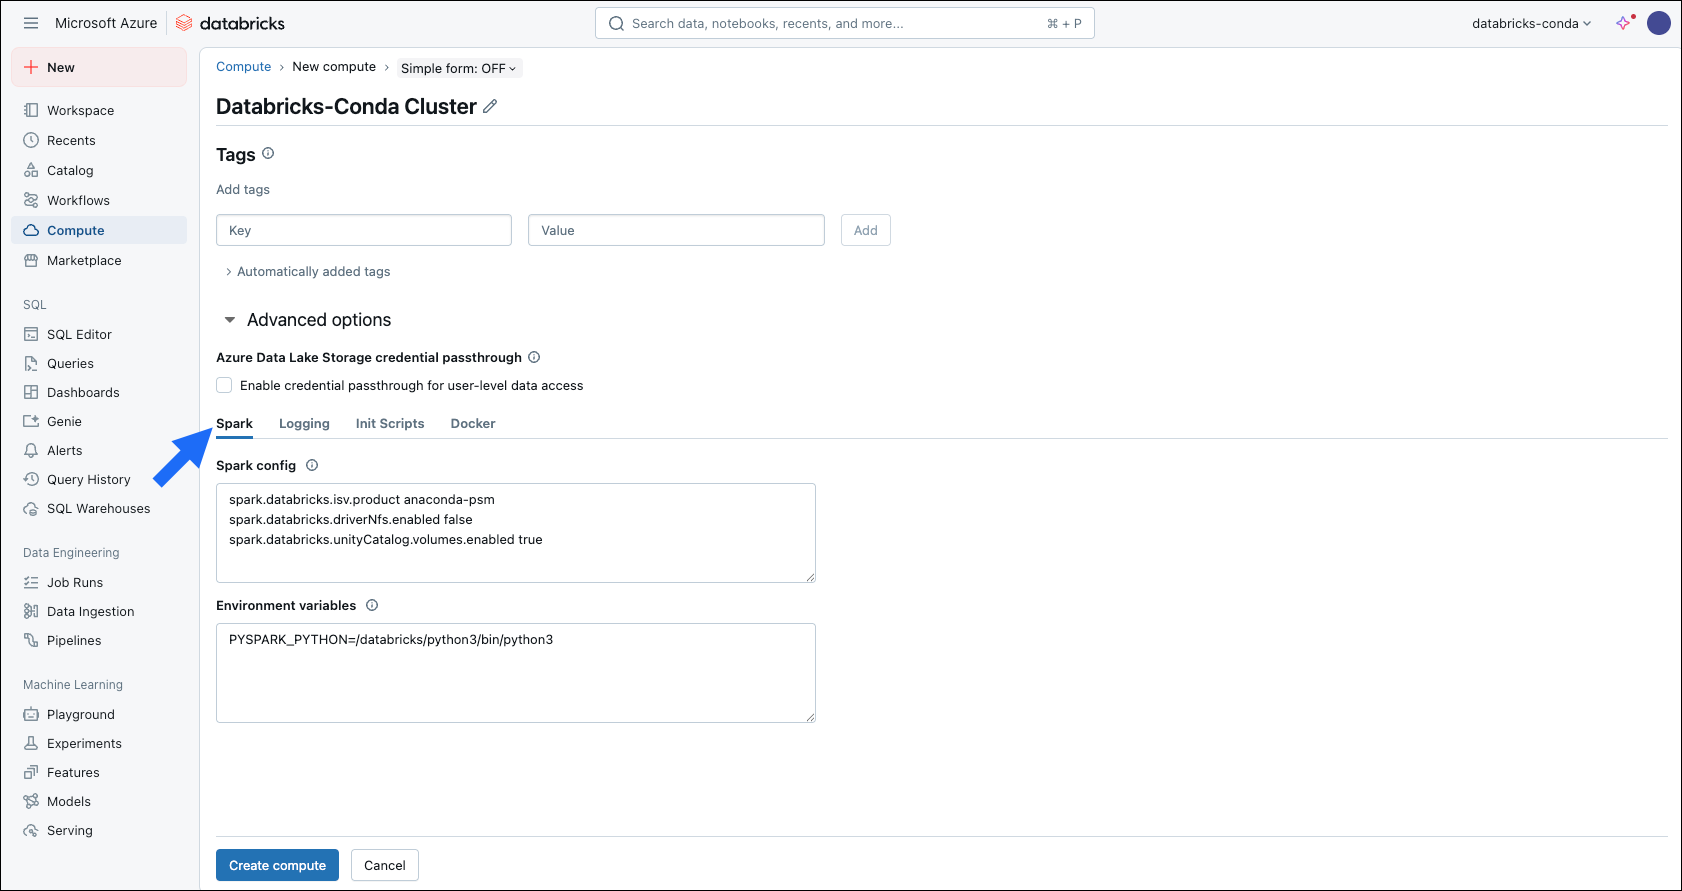
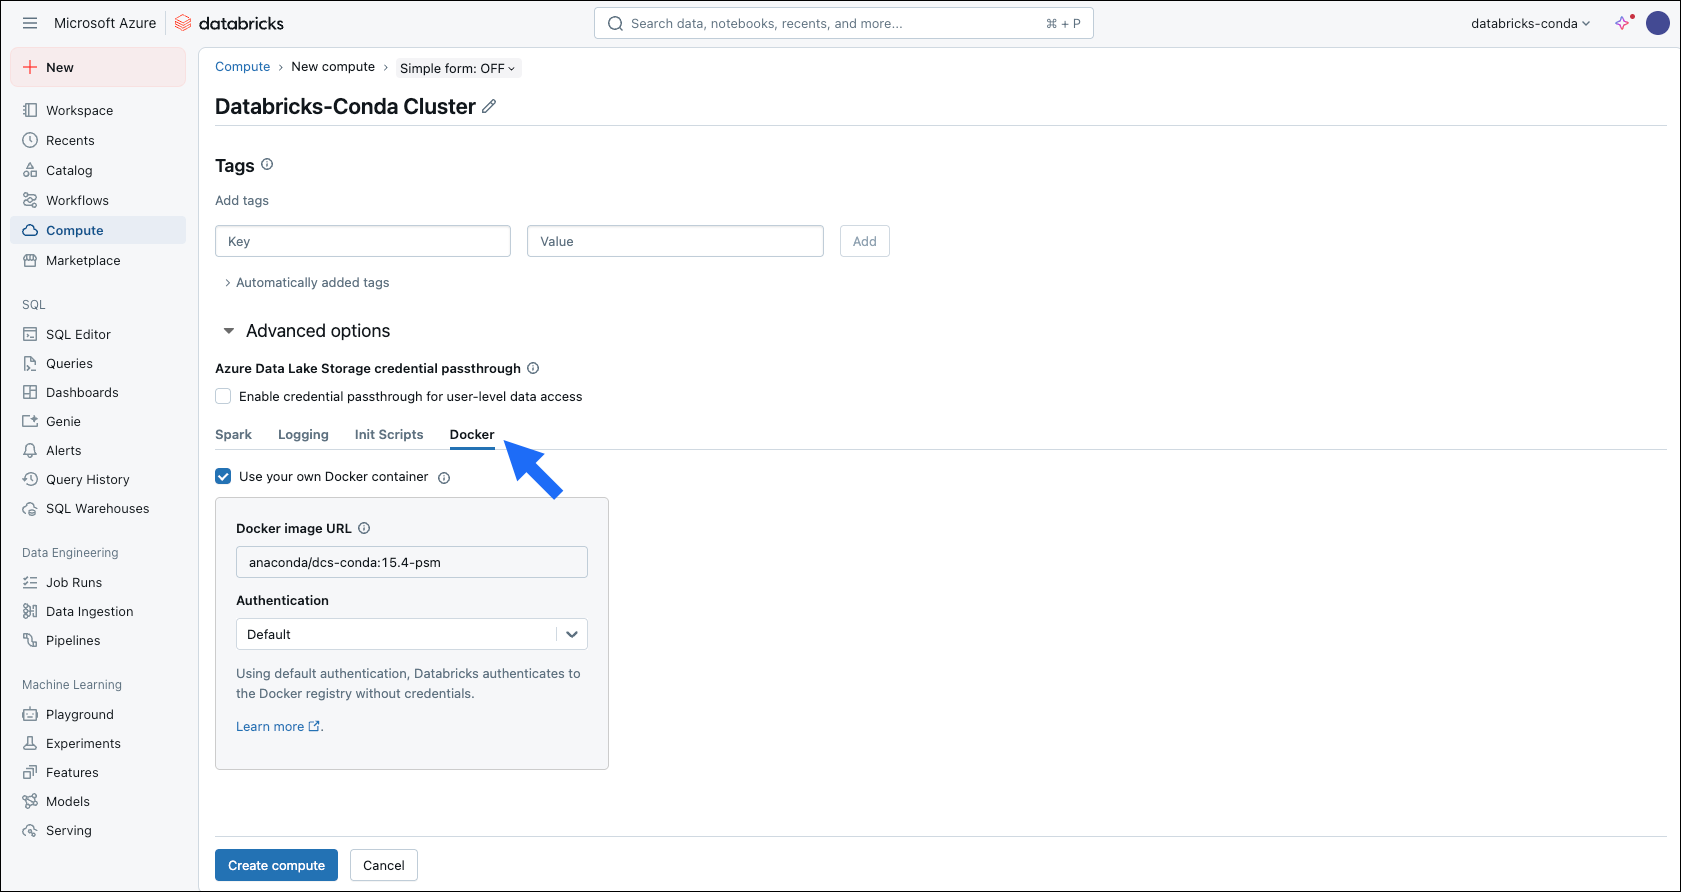
- Select the Docker tab.
- Select the Use your own Docker container checkbox.
-
Enter your custom Docker image in the Docker Image URL field.
Docker Image URL examples
- Docker Hub -
<organization>/<repository>:<tag> - Amazon ECR -
<aws-account-id>.dkr.ecr.<region>.amazonaws.com/<repository>:<tag> - Azure Container Registry -
<your-registry-name>.azurecr.io/<repository-name>:<tag>
- Docker Hub -
- Open the Authentication dropdown and select an authentication method.
- Click Create compute.
Create a Notebook and connect it to your cluster
- Click New in the top-left corner, then click Notebook.
- Specify a name for the notebook.
-
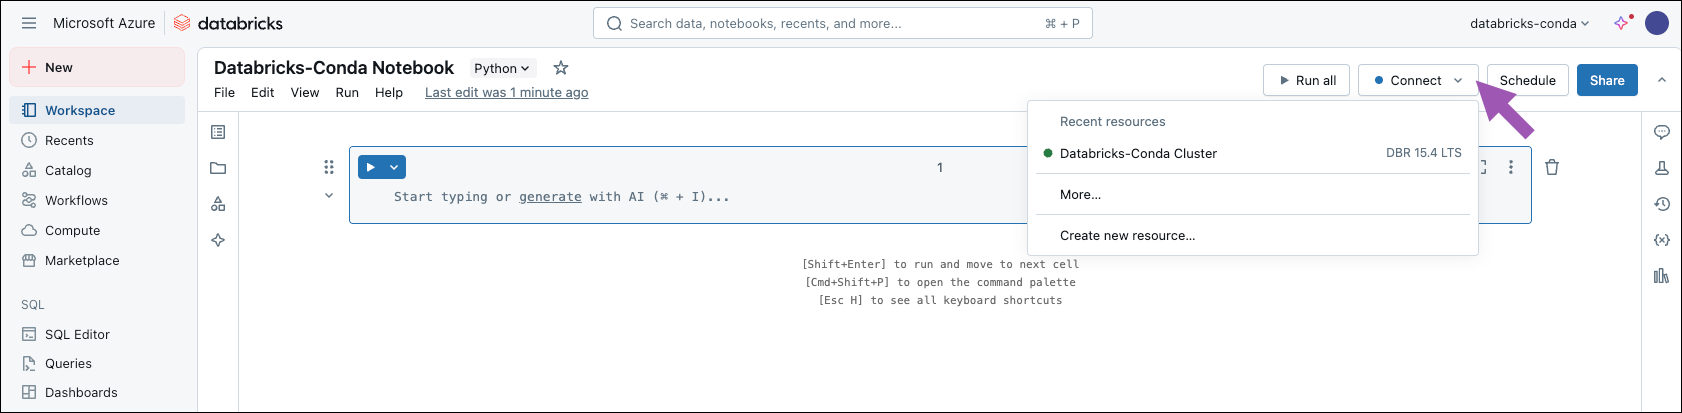
Click Connect, then select your cluster from the resource list.
Verify your conda installation
-
In your notebook, run one of the following commands to check that conda is installed:
Both commands run shell code from the notebook.
!conda --helpruns the command in the current shell.%sh conda --helpstarts a subshell, which is useful for multi-line scripts, but might not have the same environment or path.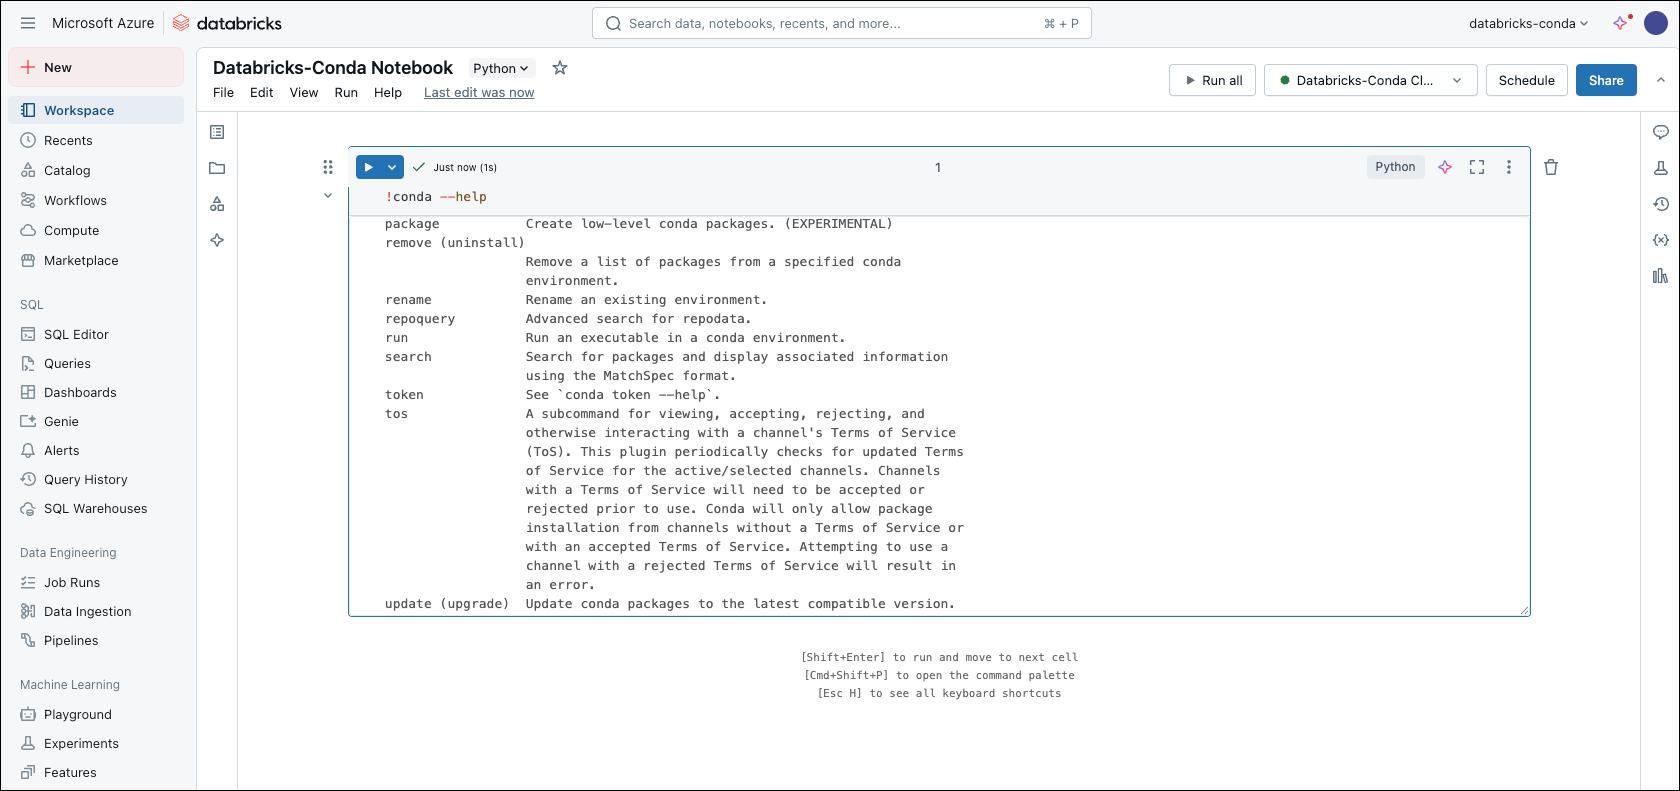
-
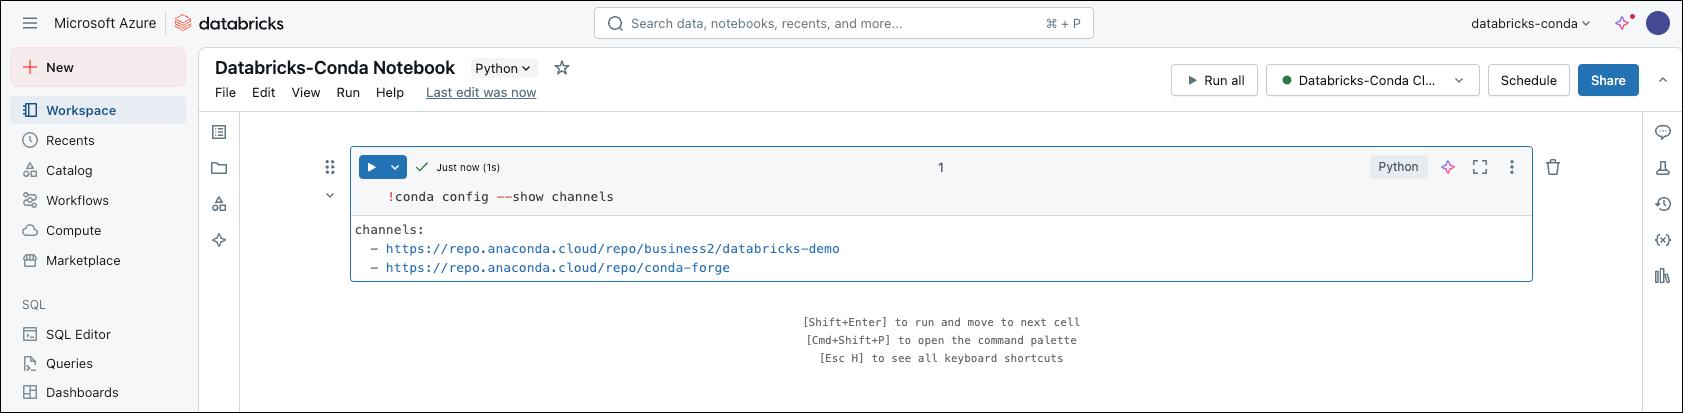
In your notebook, run the following command to check your source channels:
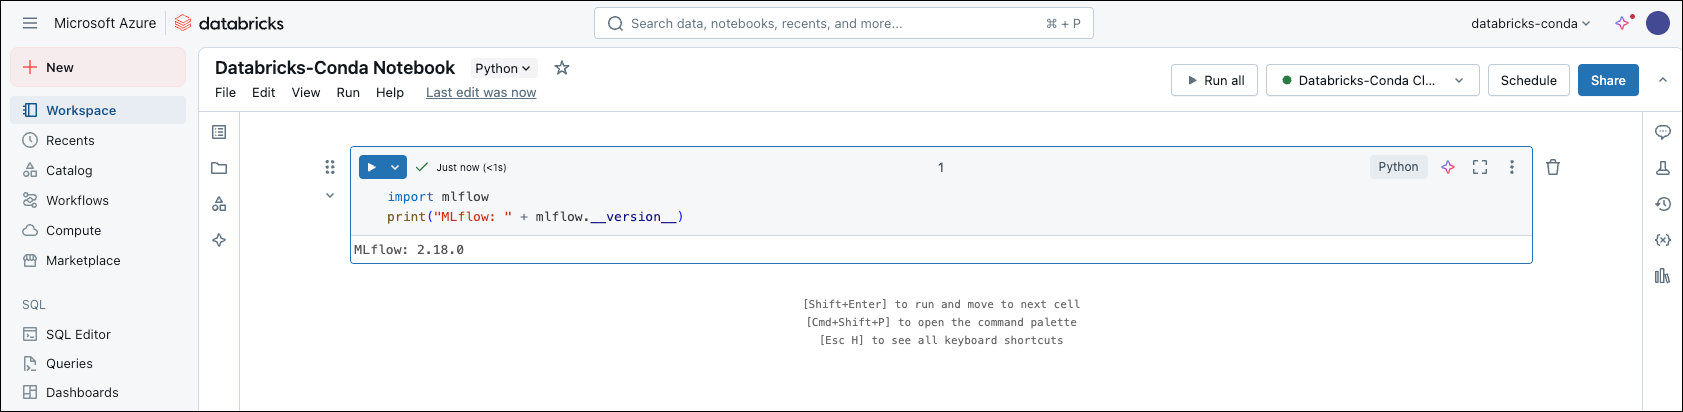
Install MLflow from your Anaconda organization channel
MLflow is available through your Anaconda organization channel for use in your Databricks environment.
-
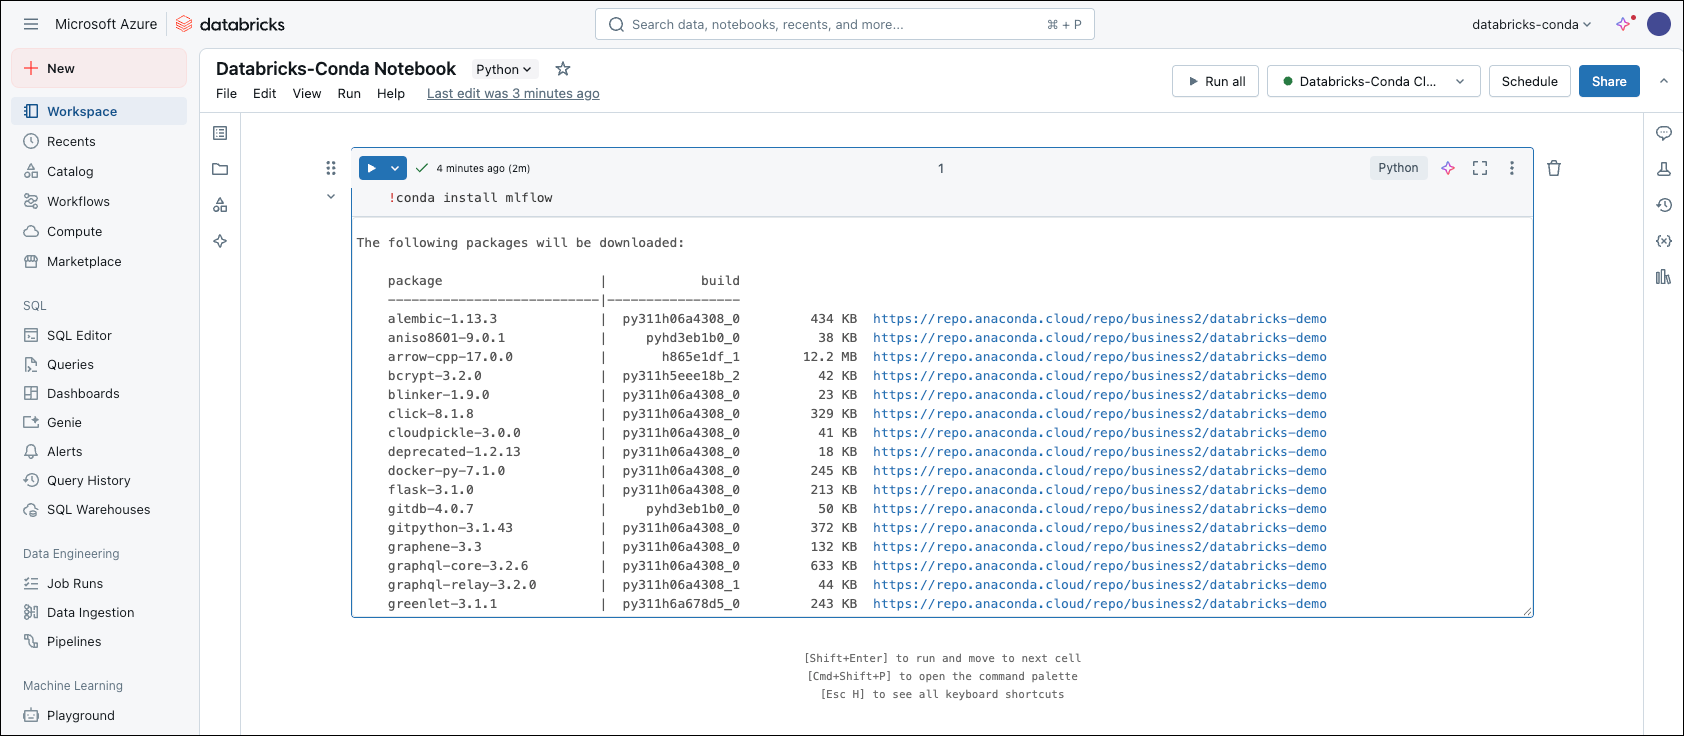
In your notebook, install MLflow from your Anaconda organization channel:
This command installs MLflow and all of its dependencies from your Package Security Manager channel.
-
In your notebook, verify the installation: