

- You can use cloud workstations through VS Code, Cursor, Windsurf, or SSH, backed by cloud instances hosted as part of the platform in your cloud account.
- You can access the platform from any existing development environment, such as a laptop or a cloud-based environment.
Get access to the platform
Admin step Before you can authenticate, an administrator needs to invite you to the platform by adding your email in the user management view. Once you are invited, you can log in to the platform through your configured SSO provider.Tokens are personal. Users should not share their personal access tokens. If you need shareable access tokens that are not tied to a person, see Programmatic access via machine users.
Connect to the platform
You can connect to the platform from your existing development environment or with a cloud workstation.If you have an existing installation of open-source Metaflow in your environment and you want to use Anaconda Platform in that same environment, follow instructions for Use my existing Metaflow environment.
- Use my existing environment
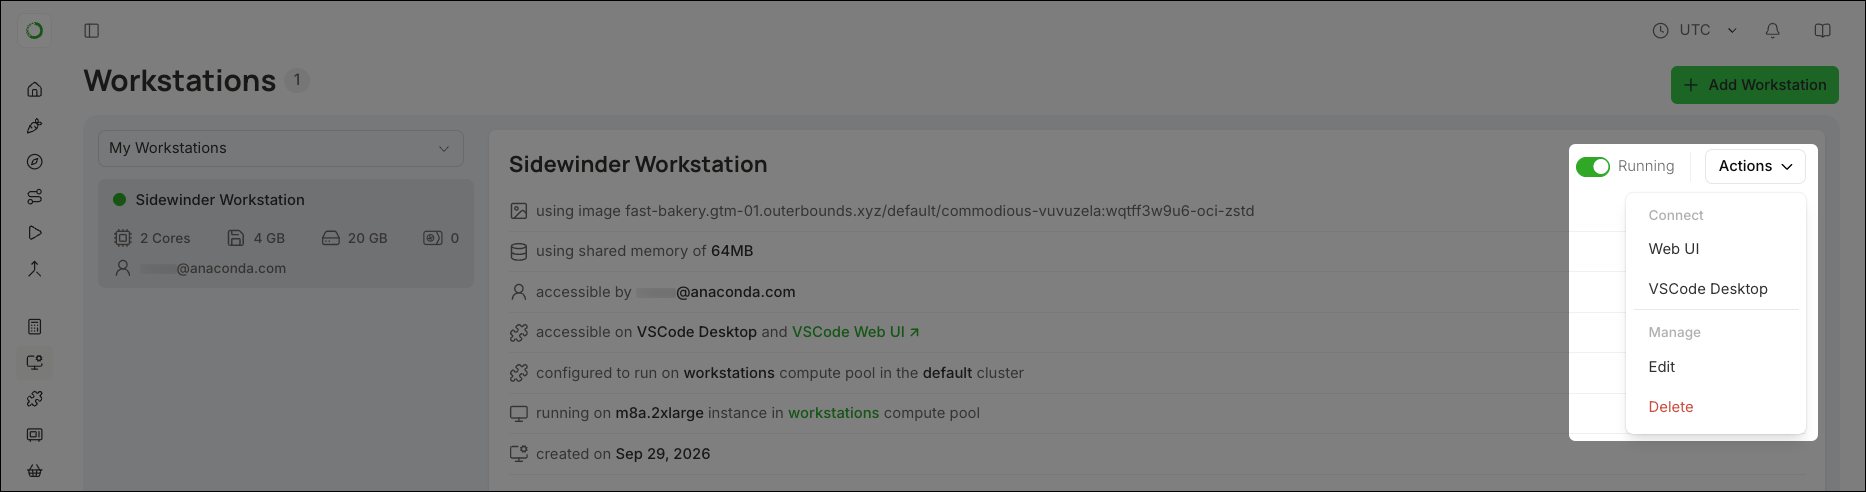
- Use a cloud workstation
- Use my existing Metaflow environment
-
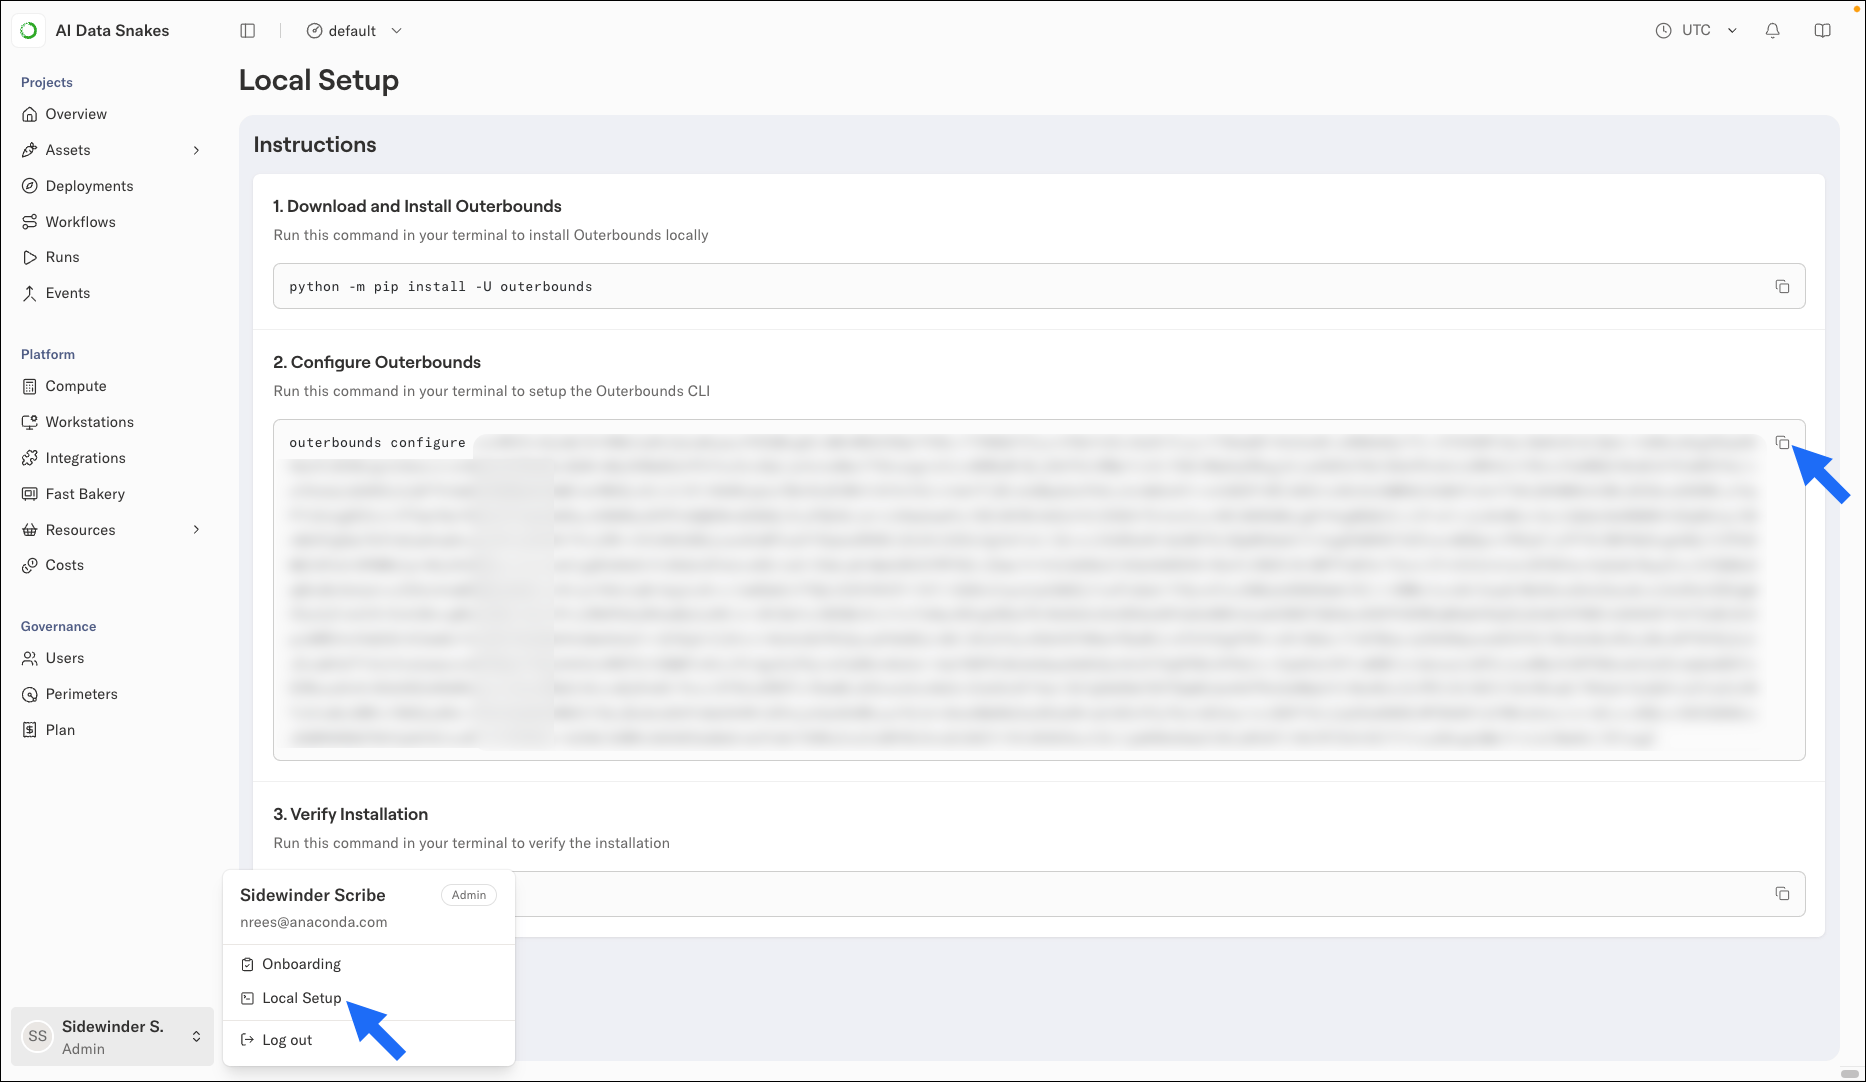
Click your profile in the lower-left corner to open your Local Setup page:
-
Open a terminal and install the
outerboundspackage:- conda
- uv
- pip
-
Copy the configuration command shown on your Local Setup page and run it in your terminal:
The configuration command saves your access token in a system-wide configuration file. You are now ready to start using the platform.If you encounter problems connecting to the platform, run
outerbounds check -vto validate your setup. All checks should display...OK. If your checks do not pass, contact your administrator for help.
 Local Setup page:
Run your first flows
Once you have configured access to the platform, you can run a simple Metaflow flow to confirm that everything works.Hello world
-
In your IDE, create a directory named
first-flowwith a file inside calledhello.py, or create the directory and file by running the following commands in your terminal:This command creates a new directory inside your current working directory. -
Save the following code snippet in
hello.py: -
Run the flow:
If you see “Hello world! 👋” in the terminal’s return, the flow ran successfully. You should also see a link to the Runs view, which shows all workflow executions taking place on the platform.
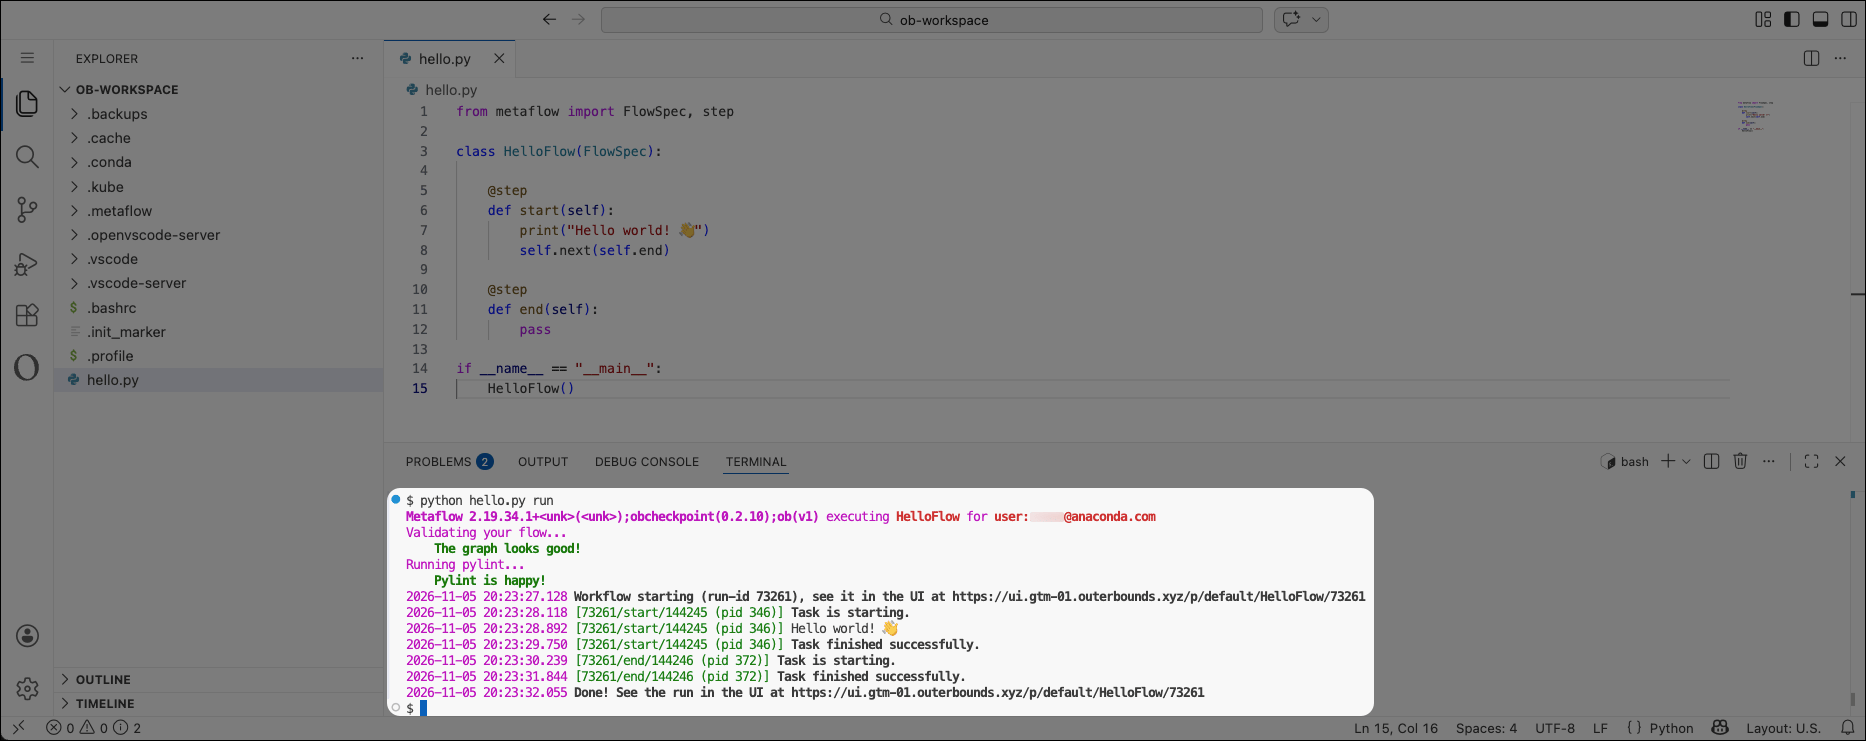
 Runs view, which shows all workflow executions taking place on the platform.
Hello artifacts
Metaflow automatically saves any data you assign to aself. variable as an artifact. Artifacts let your steps share data and let you inspect that data after a run finishes.
-
Replace the contents of
hello.pywith the following code snippet:Thestartstep assigns values toself.greetingandself.x, and theendstep reads and updates them. Metaflow moves this data between steps for you, even when the steps run on separate cloud instances, as they do when you scale your flows to the cloud. -
Run the flow again:
-
Open the Runs view and select the latest
HelloFlowrun. -
Select the
starttask, then select the Cards tab:The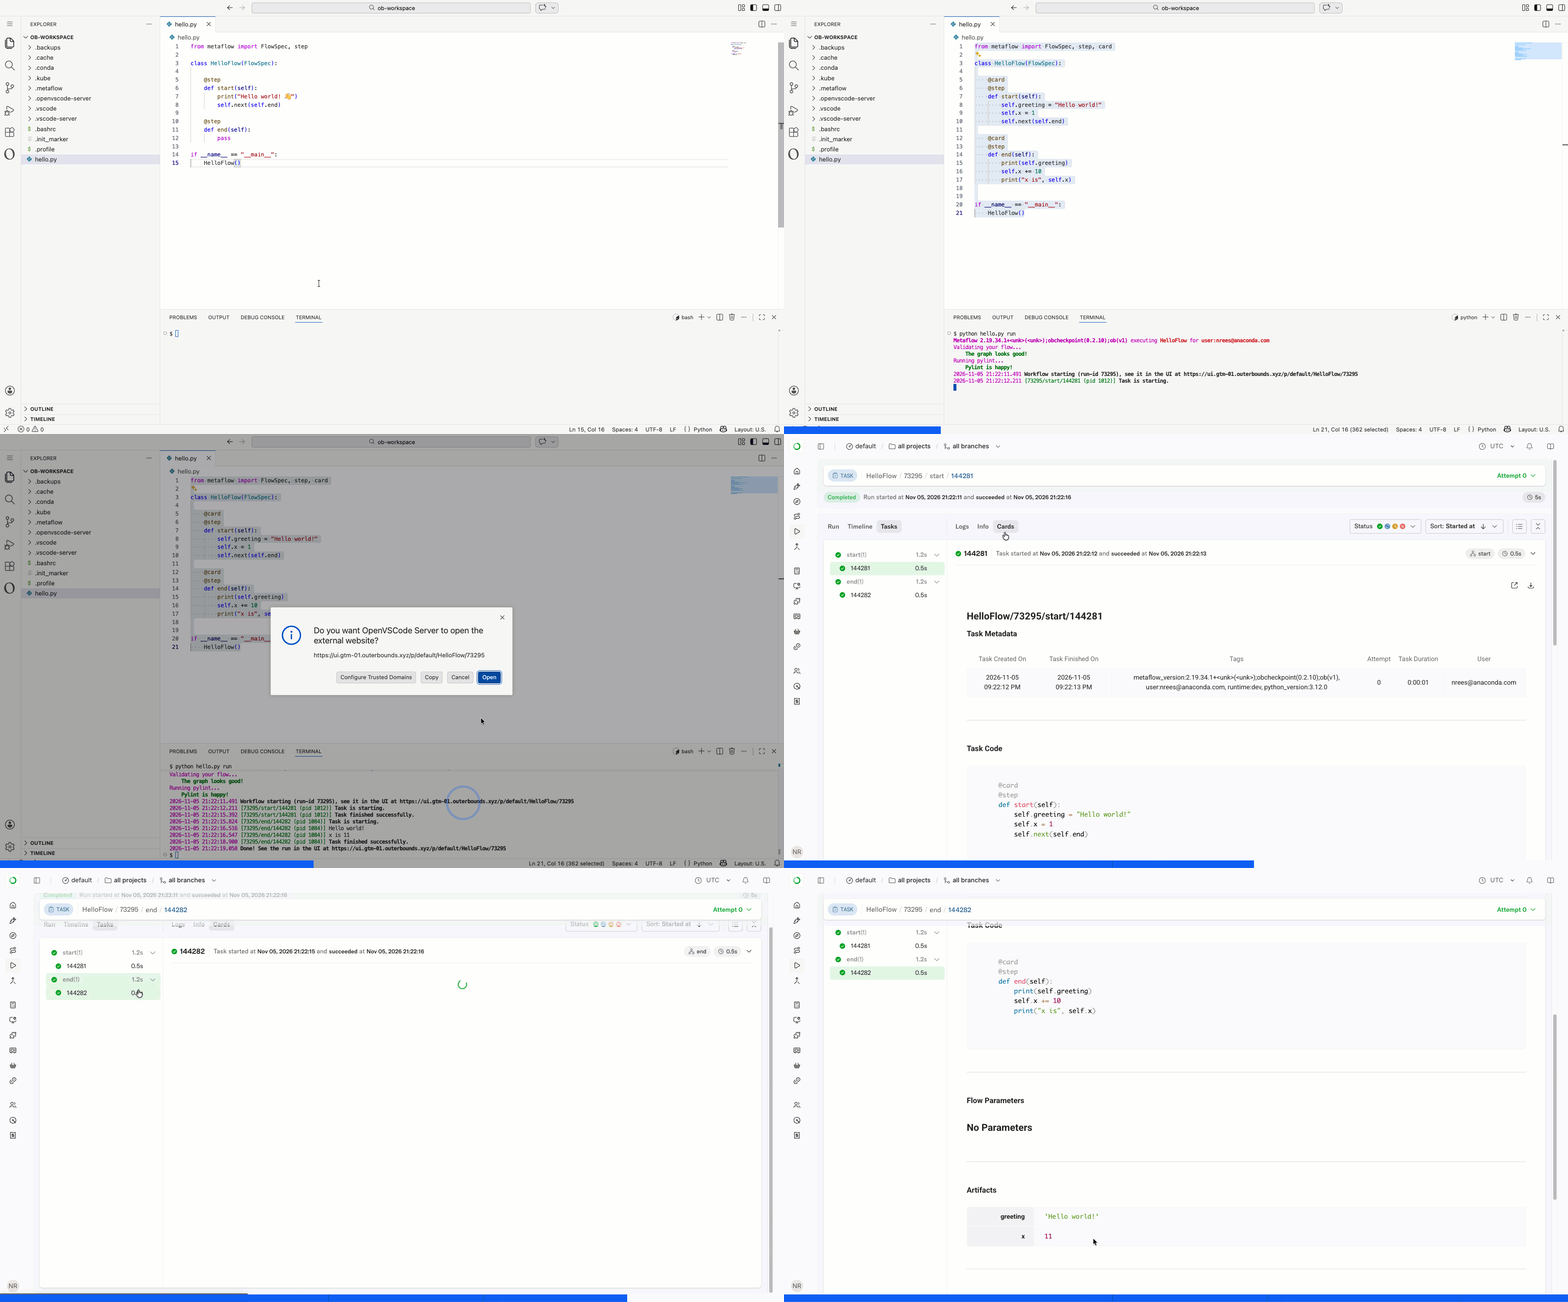
@carddecorator adds this card to the task view. To see how the value ofxchanges between steps, compare the cards for thestartandendtasks.