> ## Documentation Index
> Fetch the complete documentation index at: https://anaconda.com/docs/llms.txt
> Use this file to discover all available pages before exploring further.
# Wing IDE
export const PdfDownload = ({href, children = "Download PDF"}) =>
{children}
;
Deprecated
This page is no longer maintained, and may be out of date. It will be removed on September 30, 2026. To download a PDF copy of this page for your reference, click the **Download PDF** button below.
[Wing IDE](https://www.wingware.com/) is an IDE designed specifically for the Python
programming language. Wing IDE is offered in a paid Pro version and in free Personal and 101 versions.
These instructions refer to Anaconda Distribution exclusively, but will also work with Miniconda.
To set up your Wing IDE installation to use Anaconda:
1. Navigate to the Python configuration window:
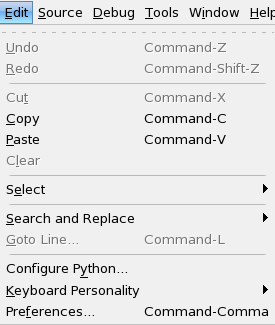
* In Wing 101, in the **Edit** menu, select Configure Python.
* In Wing Personal and Wing Pro, in the **Project** menu, select Project Properties.
The Wing 101 menu looks like this:
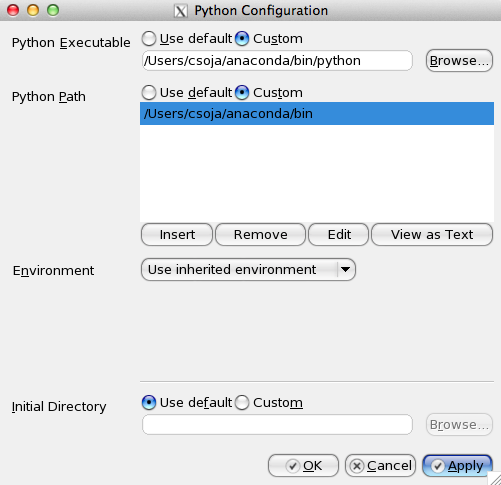
 2. Beside Python Executable, click the Custom radio button.
3. Click the Browse button and navigate to your [Anaconda Python interpreter path](/docs/getting-started/working-with-conda/ides/python-path).
4. For Python Path, click the Custom radio button.
5. Click the Insert button and browse to your [Anaconda Python interpreter path](/docs/getting-started/working-with-conda/ides/python-path).
6. Click the OK button:
2. Beside Python Executable, click the Custom radio button.
3. Click the Browse button and navigate to your [Anaconda Python interpreter path](/docs/getting-started/working-with-conda/ides/python-path).
4. For Python Path, click the Custom radio button.
5. Click the Insert button and browse to your [Anaconda Python interpreter path](/docs/getting-started/working-with-conda/ides/python-path).
6. Click the OK button:
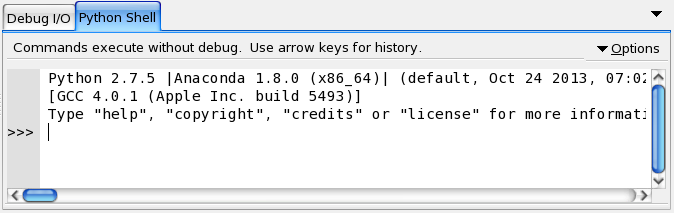
 7. If you are prompted to reload your Python shell, do so. After the reload, Anaconda is displayed on the **Python Shell** tab:
 Wing IDE is now set up to Anaconda's Python.
For more information, see
the [Wing IDE documentation](https://www.wingware.com/support).
Wing IDE is now set up to Anaconda's Python.
For more information, see
the [Wing IDE documentation](https://www.wingware.com/support).