> ## Documentation Index
> Fetch the complete documentation index at: https://anaconda.com/docs/llms.txt
> Use this file to discover all available pages before exploring further.
# Managing System Administrators
Data Science & AI Workbench distinguishes between System Administrators responsible for authorizing Workbench platform *users*, and System Administrators responsible for managing Workbench *resources*. This enables enterprises to grant the permissions required for configuring each to different individuals, based on their area of responsibility within the organization.
* System Administrators who are granted permission to access the **Authentication Center** can [configure authentication for all platform users](/docs/data-science/latest/admin/user-mgmt/main), including platform Admins. See [managing users](./users) for information on how to create and manage Authentication Center Admins.
* System Administrators who are granted permission to access the **Operations Center** can [manage Workbench resources](/docs/data-science/latest/admin/resources/main) and [configure advanced platform settings](/docs/data-science/latest/admin/advanced/settings).
The login credentials for the Operations Center are initially set as part of the [post-install configuration process](/docs/data-science/latest/install/config). Follow the steps outlined below to authorize additional Admin users to manage cluster resources, [using the Operations Center UI](#managing-operations-center-admins-using-the-ui) or [using a command line](#managing-operations-center-admins-using-a-command-line). If you prefer to use OpenID Connect (OIDC), see [Configuring Operations Center Admins using Google OIDC](./oidc).
## Managing Operations Center Admins using the UI
1. Open the **My Account** dropdown menu and select *Admin Console*.
2. Select **Manage Users** to access the Keycloak user interface (UI).
3. Log in using your Keycloak admin account credentials.
4. Select **Settings** in the login menu in the upper-right corner.
5. Select **Users** from the left-hand navigation.
6. Click **+ New User** in the upper-right corner.
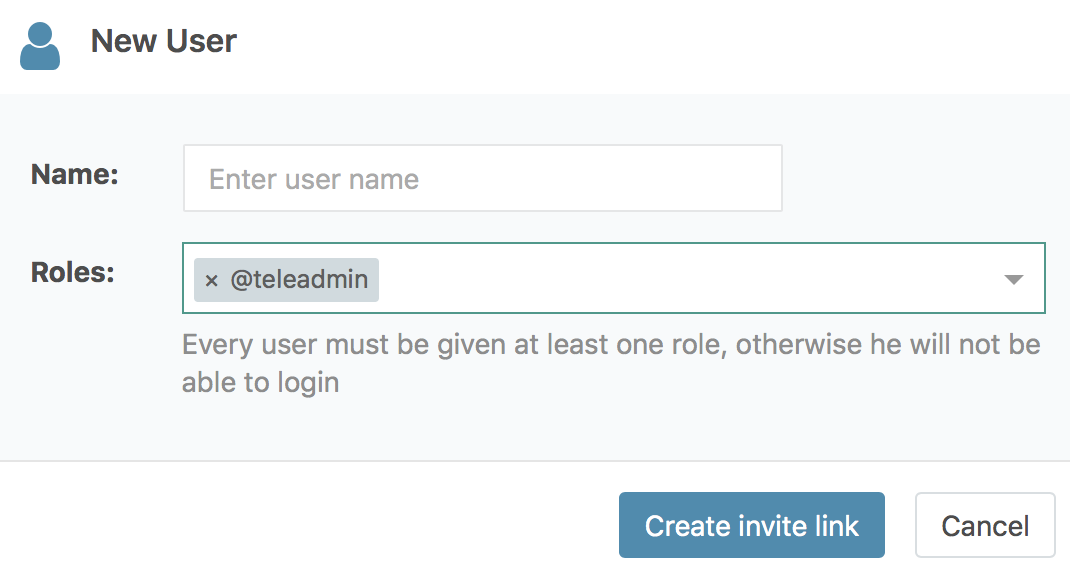
7. Select `@teleadmin` from the **Roles** drop-down list, and click **Create invite link**.
 8. Copy the invitation URL that is generated, replace the private IP address with the fully qualified domain name of the host, if necessary, and send it to the individual using your preferred method of secure communication. They’ll use it to set their password, and will be automatically logged in to the Operations Center when they click **Continue**.
To generate a new invitation URL, select **Renew invitation** in the **Actions** menu for the user.
8. Copy the invitation URL that is generated, replace the private IP address with the fully qualified domain name of the host, if necessary, and send it to the individual using your preferred method of secure communication. They’ll use it to set their password, and will be automatically logged in to the Operations Center when they click **Continue**.
To generate a new invitation URL, select **Renew invitation** in the **Actions** menu for the user.
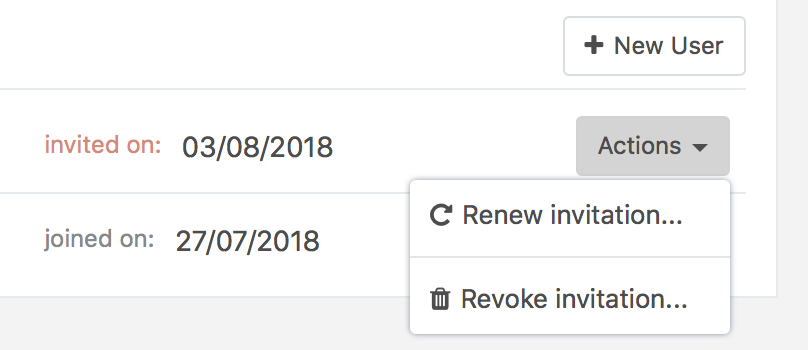 Select **Revoke invitation** to prevent them from being able to use the invitation to create a password and access the Operations Center. This effectively deletes the user before they have a chance to set their credentials.
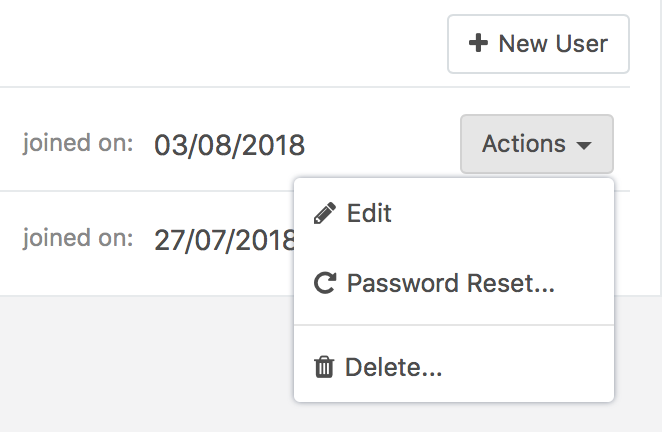
To delete—or otherwise manage—an Operations Center user after they have set their credentials and completed the authorization process, select the appropriate option from the **Actions** menu.
Select **Revoke invitation** to prevent them from being able to use the invitation to create a password and access the Operations Center. This effectively deletes the user before they have a chance to set their credentials.
To delete—or otherwise manage—an Operations Center user after they have set their credentials and completed the authorization process, select the appropriate option from the **Actions** menu.
 ***
## Managing Operations Center Admins using a command line
**To create a new Admin:**
Run the following commands *on the Workbench master node*, replacing `` and `` with the email address and password for the user:
```sh theme={null}
sudo gravity enter
gravity --insecure user create --type=admin --email= --password= --ops-url=https://gravity-site.kube-system.svc.cluster.local:3009
```
To verify that the user was created, run the following command:
```sh theme={null}
sudo gravity resource get users
```
**To update an Admin user’s password:**
To update an Admin user’s password, you’ll need to delete the user account, then re-create it, replacing `` and `` with the email address and new password:
```sh theme={null}
sudo gravity enter
gravity --insecure user delete --email= --ops-url=https://gravity-site.kube-system.svc.cluster.local:3009
gravity --insecure user create --type=admin --email= --password= --ops-url=https://gravity-site.kube-system.svc.cluster.local:3009
```
***
## Managing Operations Center Admins using a command line
**To create a new Admin:**
Run the following commands *on the Workbench master node*, replacing `` and `` with the email address and password for the user:
```sh theme={null}
sudo gravity enter
gravity --insecure user create --type=admin --email= --password= --ops-url=https://gravity-site.kube-system.svc.cluster.local:3009
```
To verify that the user was created, run the following command:
```sh theme={null}
sudo gravity resource get users
```
**To update an Admin user’s password:**
To update an Admin user’s password, you’ll need to delete the user account, then re-create it, replacing `` and `` with the email address and new password:
```sh theme={null}
sudo gravity enter
gravity --insecure user delete --email= --ops-url=https://gravity-site.kube-system.svc.cluster.local:3009
gravity --insecure user create --type=admin --email= --password= --ops-url=https://gravity-site.kube-system.svc.cluster.local:3009
```