> ## Documentation Index
> Fetch the complete documentation index at: https://anaconda.com/docs/llms.txt
> Use this file to discover all available pages before exploring further.
# Adding and removing nodes
export const Danger = ({children}) => {
return ;
};
You can view, add, edit and delete server nodes from Data Science & AI Workbench using
the Admin Console’s Operations Center. If you would prefer to use a command
line to join additional nodes to the Workbench master, follow [the instructions
provided below](#using-the-command-line-to-add-nodes).
**NOTES:**
* Workbench does not support running heterogeneous versions in the same
cluster. Before adding a new node, *verify that the node is operating the same
version of the OS as the rest of the cluster*.
* If you’re adding a GPU node, make sure it meets the [GPU requirements](/docs/data-science/latest/environment-prep/gravity-prep#gpu-requirements).
* Each installation can only support a single Workbench master node, as this node
includes storage for the platform. **DO NOT add an additional Workbench master node
to your installation**.
***
**To manage the servers on your system:**
1. Log in to Workbench, select **Menu** in the top
right corner and click the **Administrative Console** link displayed at the
bottom of the slide out window. You must be logged in with a user assigned to
the `ae-admin` role.
2. Click **Manage Resources**.
3. Log in to the Operations Center using the Administrator credentials
[configured after installation](/docs/data-science/latest/install/config).
4. Select **Nodes** from the menu on the left to display the configured nodes
in your cluster, their IP address, hostname and profile.
**To add an existing server to Workbench:**
1. Click the **Add Node** button at the top right.
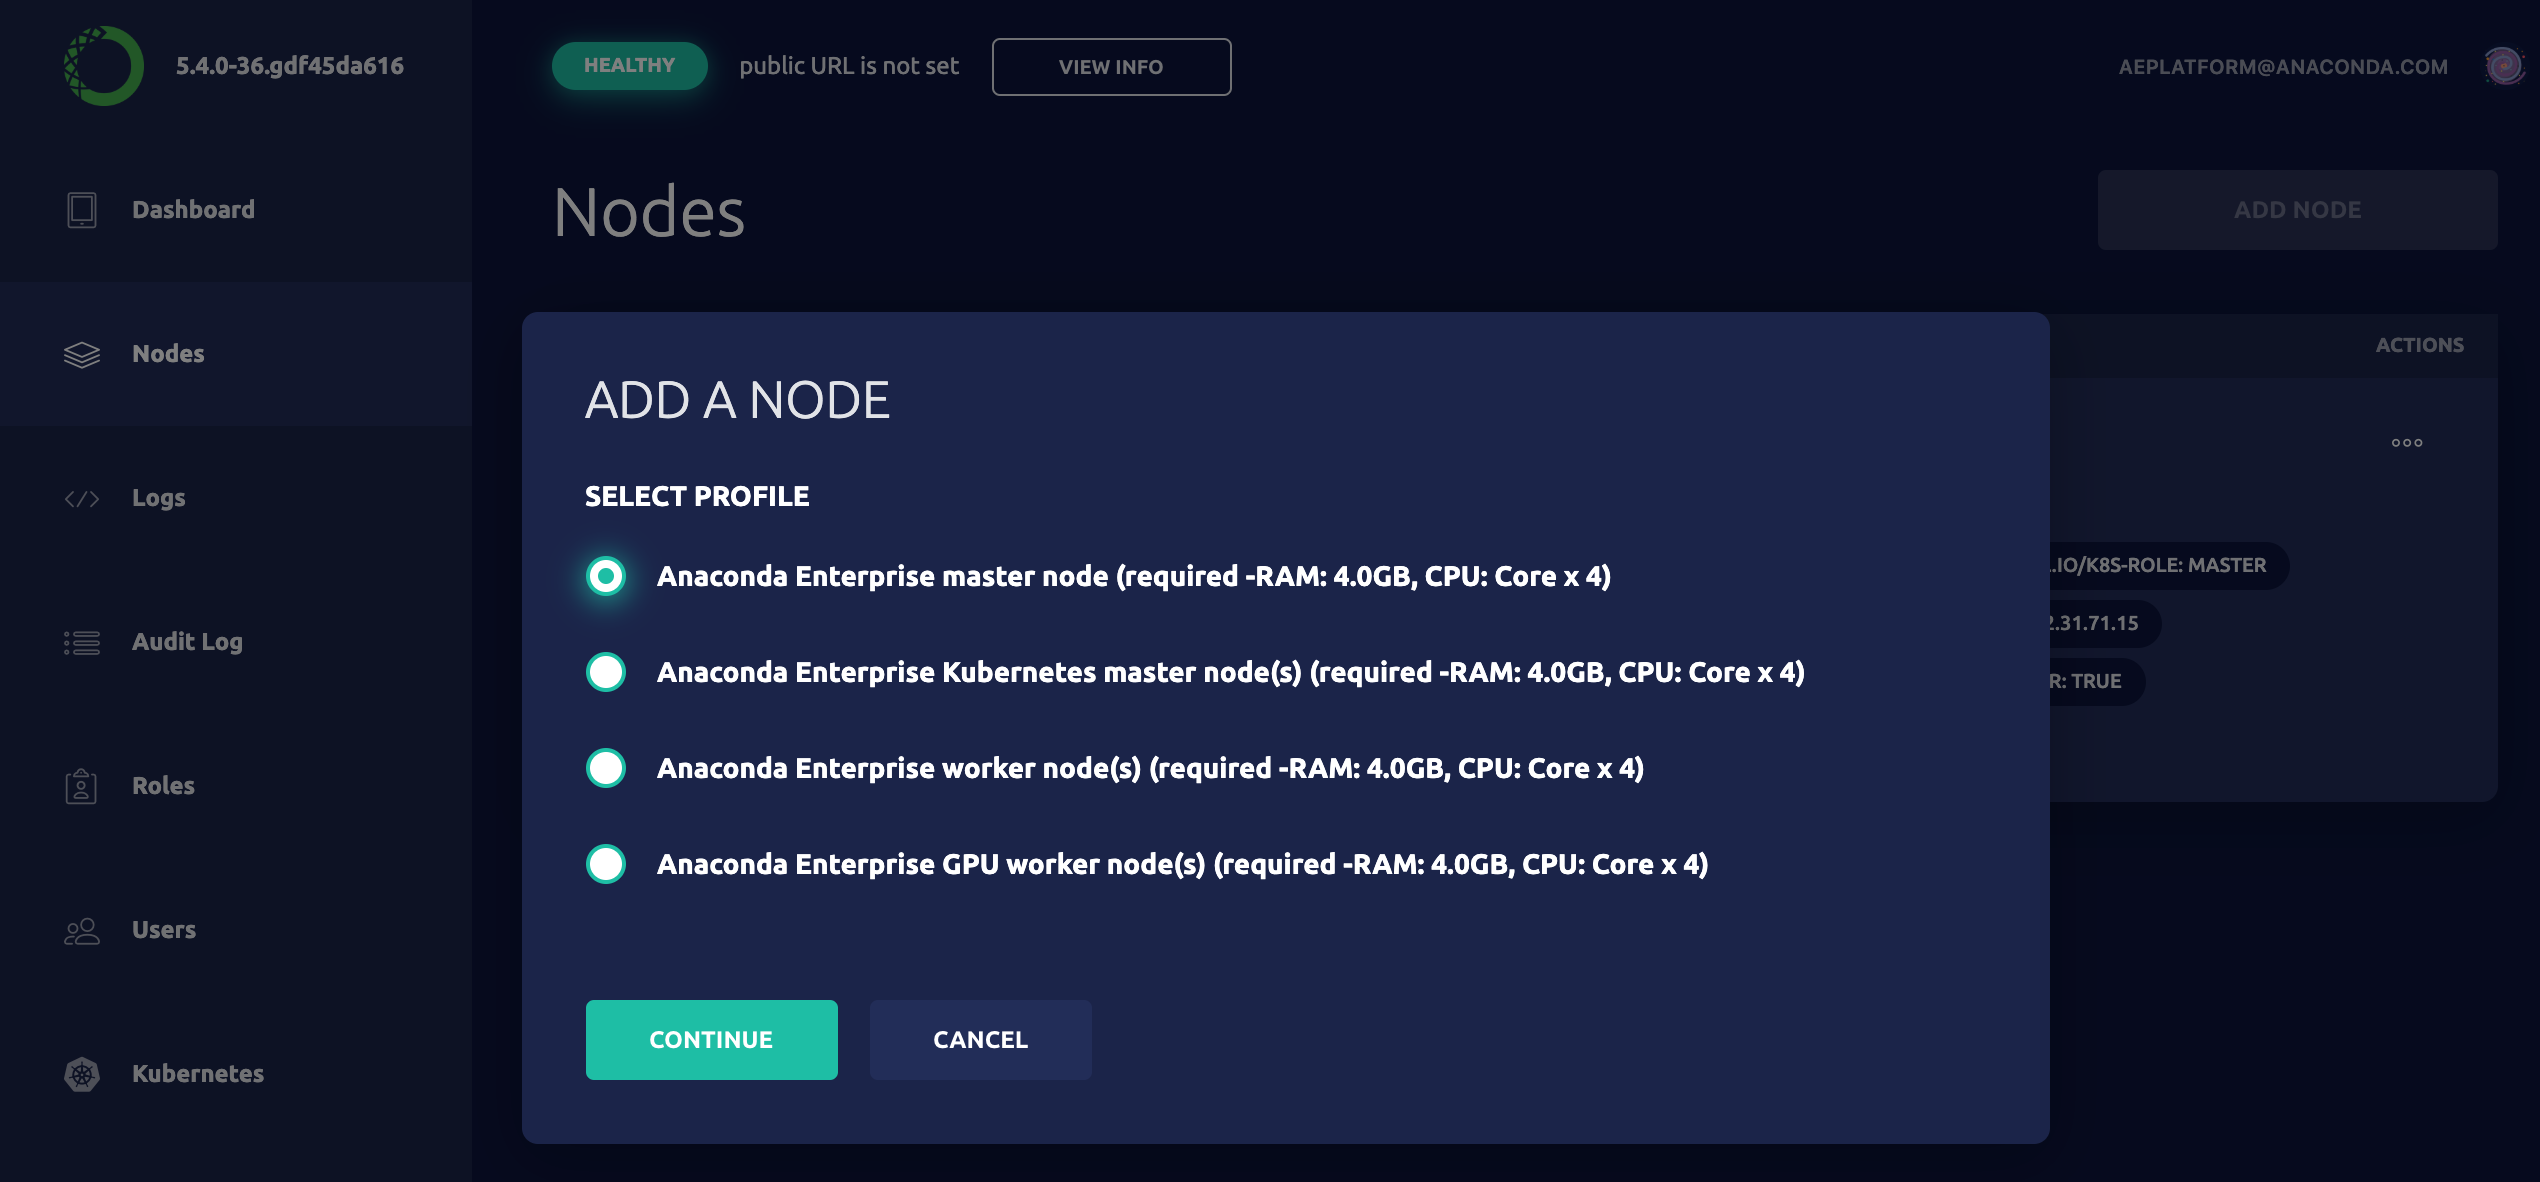 2. Select an appropriate profile for the server and click **Continue**.
3. Copy and paste the command provided into a terminal window to add the server.
When you refresh the page, your server will appear in the list.
**To remove a server node:**
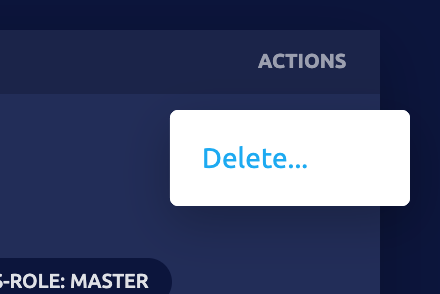
Click **Actions** at the far right of the node you want to remove and select **Delete…**.
2. Select an appropriate profile for the server and click **Continue**.
3. Copy and paste the command provided into a terminal window to add the server.
When you refresh the page, your server will appear in the list.
**To remove a server node:**
Click **Actions** at the far right of the node you want to remove and select **Delete…**.
 **To log on to a server:**
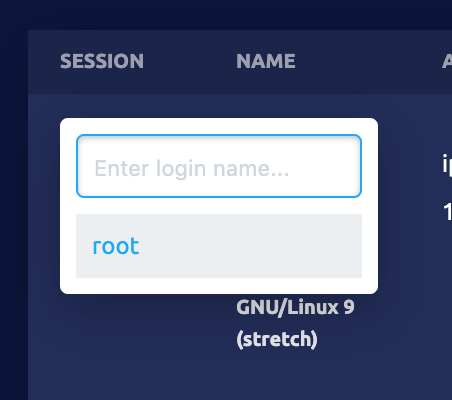
Click the terminal of the server you want to work with, and select **root** to open a terminal window. It will open a new tab in your browser.
**To log on to a server:**
Click the terminal of the server you want to work with, and select **root** to open a terminal window. It will open a new tab in your browser.
 When you are finished, simply close the console window by clicking **Close**.
***
## Using the command line to add nodes
1. Download the gravity binary that corresponds to your version of Workbench
from the S3 location provided to you by Anaconda onto the server
you’re adding to the cluster.
2. Rename the file to something simpler, then make it executable. For example:
```sh theme={null}
mv gravity-binary-6.1.9 gravity
chmod +x gravity
```
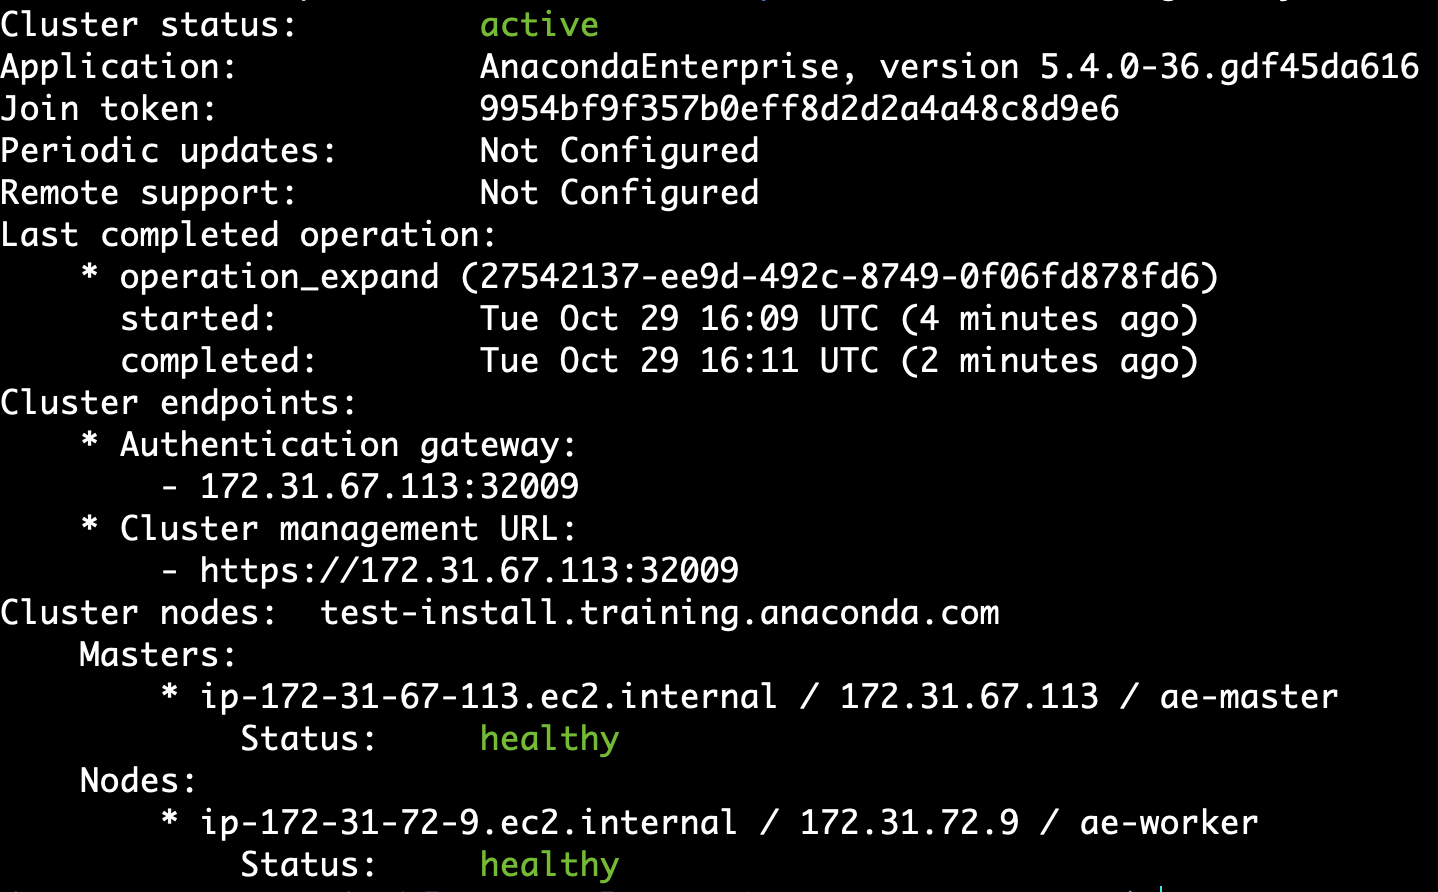
3. *On the Workbench master*, run the following command to obtain the join token and
IP address for the Workbench master node:
```sh theme={null}
gravity status
```
The results should look similar to the following:
When you are finished, simply close the console window by clicking **Close**.
***
## Using the command line to add nodes
1. Download the gravity binary that corresponds to your version of Workbench
from the S3 location provided to you by Anaconda onto the server
you’re adding to the cluster.
2. Rename the file to something simpler, then make it executable. For example:
```sh theme={null}
mv gravity-binary-6.1.9 gravity
chmod +x gravity
```
3. *On the Workbench master*, run the following command to obtain the join token and
IP address for the Workbench master node:
```sh theme={null}
gravity status
```
The results should look similar to the following:
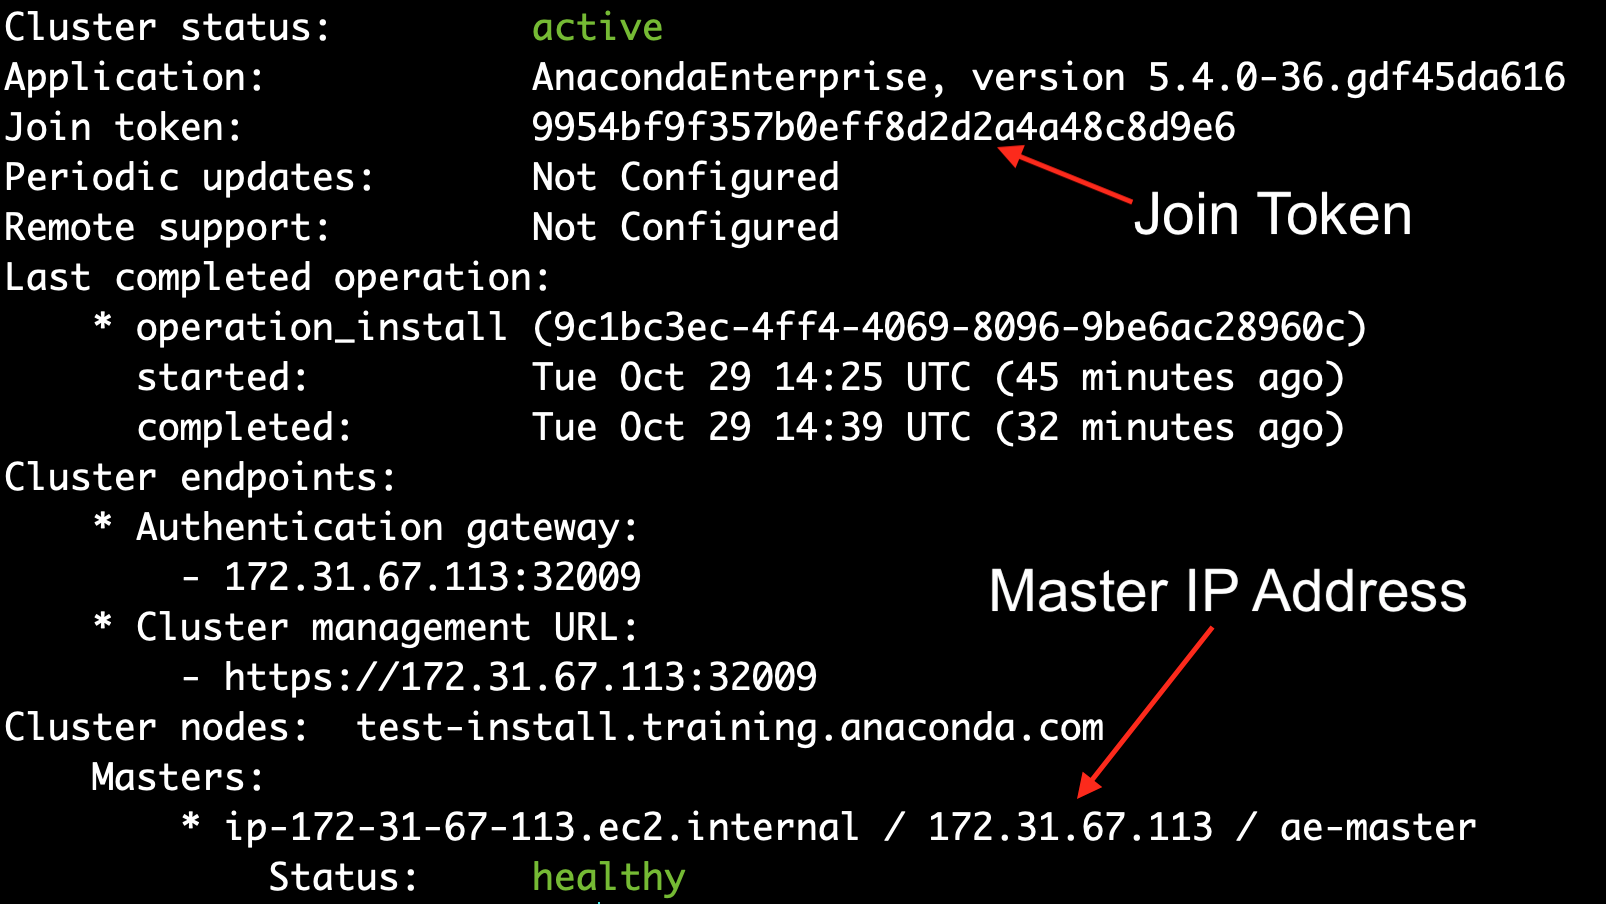 4. Copy and paste the join token for the cluster and the IP address for the Workbench
master somewhere accessible. You’ll need to provide this information when you
add a new worker node. You’ll also need the IP address of the server node
you’re adding.
5. *On the worker node*, run the following command to add the node to the cluster:
```sh theme={null}
./gravity join --token JOIN-TOKEN --advertise-addr=NODE-IP --role=NODE-ROLE --cloud-provider=CLOUD-PROVIDER MASTER-IP-ADDR
```
Where:
`JOIN-TOKEN` = The join token that you obtained in Step 3.
`NODE-IP` = The IP address of the worker node. This can be a private IP address, as long as the network it’s on can access the Workbench master.
`NODE-ROLE` = The type of node you’re adding: `ae-worker`, `gpu-worker`, or `k8s-master`.
`CLOUD-PROVIDER` = This is auto-detected, and can therefore be excluded unless you don’t have Internet access. In this case, use `generic`.
`MASTER-IP-ADDR` = The IP address of the Workbench master that you obtained in Step 3.
The `--role` flag must be provided and assigned to either `ae-worker`, `gpu-worker`, or `k8s-master`. Without it, the node will be added with the role `ae-master` and may cause your cluster to crash.
The progress of the join operation is displayed:
4. Copy and paste the join token for the cluster and the IP address for the Workbench
master somewhere accessible. You’ll need to provide this information when you
add a new worker node. You’ll also need the IP address of the server node
you’re adding.
5. *On the worker node*, run the following command to add the node to the cluster:
```sh theme={null}
./gravity join --token JOIN-TOKEN --advertise-addr=NODE-IP --role=NODE-ROLE --cloud-provider=CLOUD-PROVIDER MASTER-IP-ADDR
```
Where:
`JOIN-TOKEN` = The join token that you obtained in Step 3.
`NODE-IP` = The IP address of the worker node. This can be a private IP address, as long as the network it’s on can access the Workbench master.
`NODE-ROLE` = The type of node you’re adding: `ae-worker`, `gpu-worker`, or `k8s-master`.
`CLOUD-PROVIDER` = This is auto-detected, and can therefore be excluded unless you don’t have Internet access. In this case, use `generic`.
`MASTER-IP-ADDR` = The IP address of the Workbench master that you obtained in Step 3.
The `--role` flag must be provided and assigned to either `ae-worker`, `gpu-worker`, or `k8s-master`. Without it, the node will be added with the role `ae-master` and may cause your cluster to crash.
The progress of the join operation is displayed:
 6. To monitor the impact of the join operation on the cluster, run the `gravity status` command *on the Workbench master*.
The output will look similar to the following:
6. To monitor the impact of the join operation on the cluster, run the `gravity status` command *on the Workbench master*.
The output will look similar to the following:
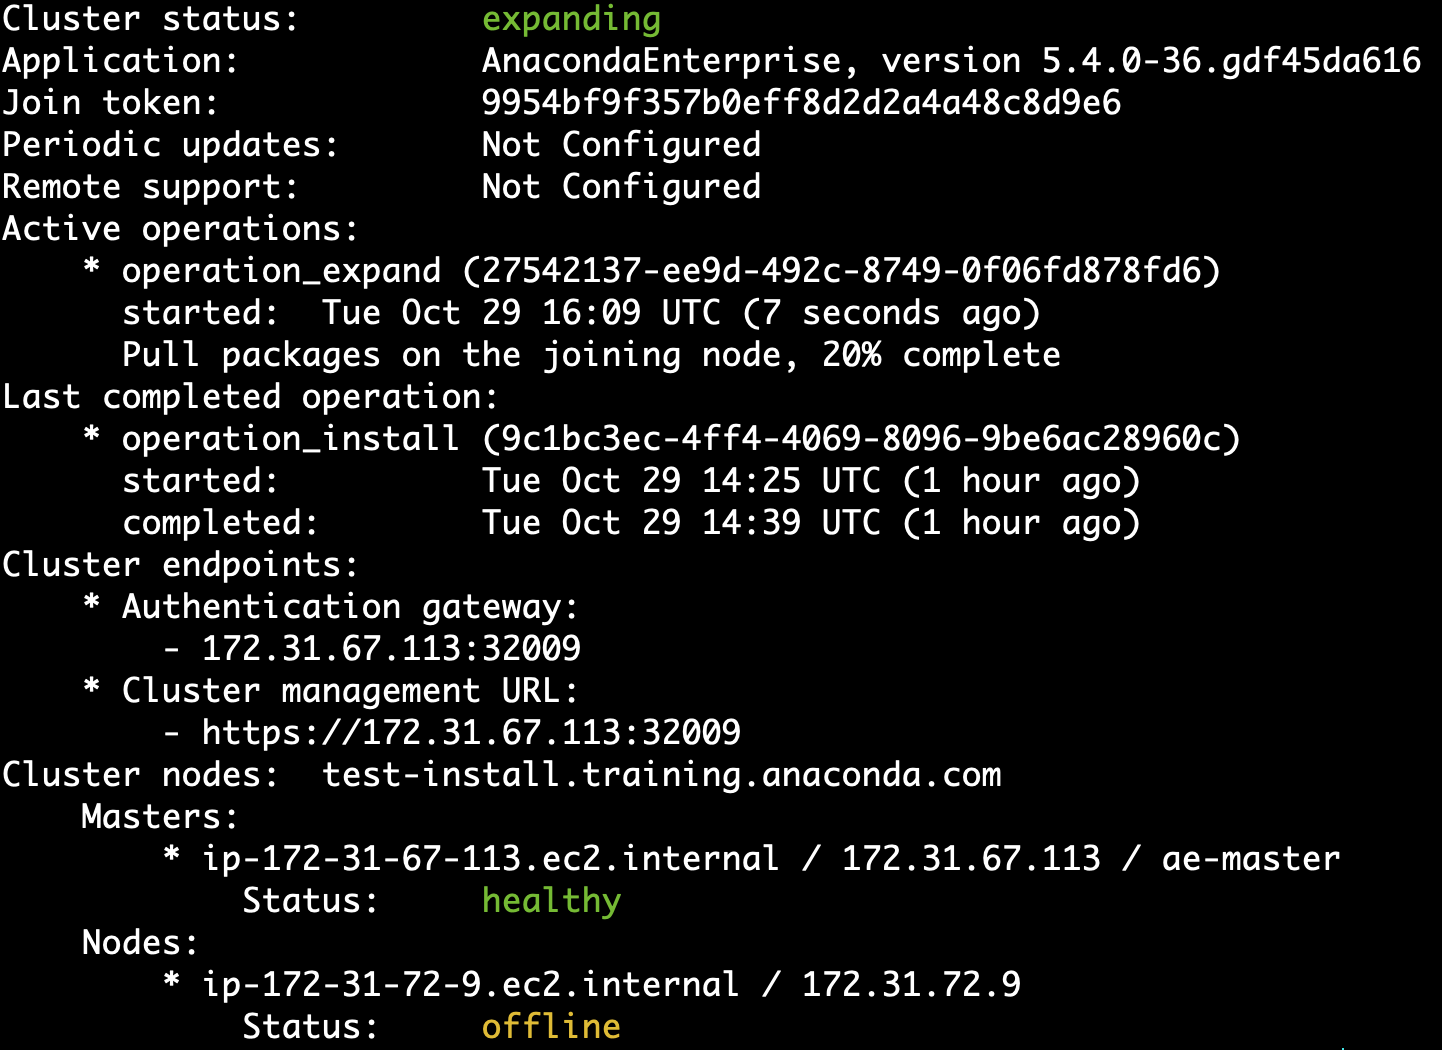 Note that the size of the cluster is `expanding` and the status of the new node being added is `offline`. When the node has successfully joined, the cluster returns to an `active` state, and the status of the new node changes to `healthy`: